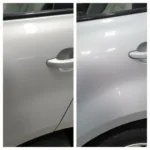
Repairing car scratches with touch up paint is a cost-effective way to maintain your vehicle’s appearance and protect it from further damage. Whether you’re dealing with minor clear coat scratches or deeper paint chips, this guide will provide you with the knowledge and techniques needed to achieve professional-looking results. Learn how to choose the right touch up paint, prepare the surface, apply the paint, and finish the job for a seamless repair. We’ll cover everything from assessing the damage to achieving a flawless finish, empowering you to tackle those pesky scratches with confidence.
Assessing the Damage: How Deep is the Scratch?
Before you begin the repair car scratches touch up paint process, it’s crucial to assess the extent of the damage. Scratches are generally categorized into three levels: clear coat scratches, base coat scratches, and primer/metal scratches. Clear coat scratches only affect the topmost layer and appear as light, superficial marks. Base coat scratches penetrate deeper, revealing the underlying color. Primer/metal scratches are the most severe, exposing the bare metal and requiring more extensive repair. how to repair scratches on car with touch up paint offers detailed instructions for each type of scratch.
Identifying the Scratch Type
Identifying the type of scratch is essential for choosing the appropriate repair method. A simple way to determine the depth is to run your fingernail across the scratch. If your nail catches, it indicates a deeper scratch that requires more than just a simple touch-up.
What are clear coat scratches? These are superficial and can often be buffed out.
What are base coat scratches? These expose the underlying paint color and require touch up paint.
What are primer/metal scratches? These are the deepest and might require professional repair.
Choosing the Right Touch Up Paint
Selecting the correct touch up paint is critical for achieving a seamless repair. Your car’s manufacturer provides a paint code, usually located on a sticker inside the driver’s side door jamb, glove compartment, or under the hood. Using this code ensures a perfect color match. Avoid generic touch up paint options, as they rarely match perfectly and can result in a noticeable blemish. car scratches touch up paint repair offers further guidance on choosing the right touch-up paint for your specific car model.
Where to find your car’s paint code?
The paint code is often located on a sticker inside the driver’s side doorjamb, glove compartment, or under the hood.
Preparing the Surface for Touch Up Paint
Before applying the touch up paint, thorough surface preparation is key. Wash the area with car wash soap and water, then dry it completely. Use rubbing alcohol or a wax and grease remover to clean the scratch and surrounding area, ensuring proper paint adhesion. For deeper scratches, lightly sand the area with fine-grit sandpaper to smooth out any rough edges and create a level surface. car color match paint repair can help you find the exact paint match for a seamless repair.
Why is surface preparation important?
Proper surface preparation ensures clean, smooth surface for better paint adhesion and a seamless repair.
Applying the Touch Up Paint
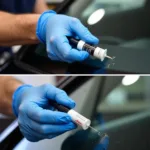
Apply the touch up paint in thin, even coats, allowing each coat to dry completely before applying the next. For deeper scratches, multiple coats may be necessary. Use a fine-tipped brush or a touch-up pen for precise application. Avoid applying too much paint, as it can lead to drips and unevenness. If you’re repairing a scratch on the door jam, check out door jam on car paint repair for specific tips and techniques.
How many coats of touch up paint are needed?
The number of coats depends on the scratch depth. Apply thin coats and let each dry completely before the next.
Finishing Touches: Leveling and Polishing
Once the touch up paint has dried completely, you can level and polish the area for a professional finish. Wet sanding with ultra-fine grit sandpaper can smooth out any imperfections. Follow this with polishing compound and a microfiber cloth to restore the shine and blend the repair seamlessly with the surrounding paint.
Conclusion
Repairing car scratches with touch up paint is a manageable DIY project that can save you money and maintain your car’s appearance. By following these steps and choosing the right touch up paint, you can achieve professional-looking results and protect your car from further damage.
FAQ
- Can I use any touch up paint on my car? No, it’s essential to use the correct paint code for a perfect match.
- How long does touch up paint take to dry? Drying time varies, but it’s best to allow each coat to dry completely before applying the next.
- Do I need to sand the scratch before applying touch up paint? Sanding is necessary for deeper scratches to create a smooth surface.
- Can I wash my car after applying touch up paint? Wait at least 24 hours after the final coat before washing your car.
- What if the scratch is too deep for touch up paint? Very deep scratches may require professional repair.
Need further assistance? Contact us via WhatsApp: +1(641)206-8880, or Email: [email protected]. We have a 24/7 customer support team ready to help.


