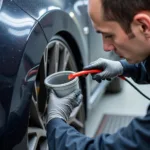
A primer in can offers a convenient way to repair a car’s paint job, providing a crucial foundation for a smooth, professional finish. Whether you’re dealing with minor scratches, chips, or larger areas of damage, understanding the proper use of primer is essential for achieving optimal results. This guide will delve into the world of primer, exploring its types, application techniques, and best practices for a seamless car paint repair.
Repairing your car’s paint job doesn’t have to be a daunting task. With readily available resources, like those found in our guide on how to repair flaking paint on car, you can achieve professional-looking results. This comprehensive guide provides detailed information on preparing the surface, applying primer, and ensuring a smooth, durable finish.
Understanding the Importance of Primer
Primer serves as a bonding agent between the bare metal or existing paint and the new coat of paint. It promotes adhesion, ensuring the paint adheres properly and doesn’t peel or flake over time. Additionally, primer helps to create a uniform surface, filling in minor imperfections and providing a smooth base for the paint to adhere to. This is especially important when working with surfaces that have been sanded or repaired, as it creates a consistent texture. Furthermore, primer helps to enhance the color and vibrancy of the topcoat, preventing the underlying color from showing through.
Choosing the Right Primer for Your Car
There are various types of primers available, each designed for specific purposes. Choosing the correct primer is crucial for achieving the desired results. Some common types include:
- Self-Etching Primer: Ideal for bare metal, as it etches into the surface, creating a strong bond for the paint.
- Epoxy Primer: Provides excellent adhesion and corrosion resistance, making it suitable for areas prone to rust.
- Filler Primer: Designed to fill in minor imperfections and create a smooth surface.
- Sealer Primer: Used to seal porous surfaces and prevent the underlying color from bleeding through.
For locations like car paint repair richmond, where finding a reputable service might be challenging, understanding these primer types can empower you to take on DIY repairs confidently.
Preparing the Surface for Primer Application
Before applying primer, it’s crucial to prepare the surface properly. This involves cleaning the area thoroughly to remove any dirt, grease, or wax. If there is any rust present, it should be removed with a wire brush or sandpaper. Any imperfections, such as dents or scratches, should be repaired and sanded smooth. After these steps, our guide on how to repair blistered car paint may prove helpful in addressing specific paint issues.
Applying Primer: A Step-by-Step Guide
- Mask off the surrounding areas: Protect areas that you don’t want to be primed.
- Shake the can vigorously: Ensure the primer is thoroughly mixed.
- Apply thin, even coats: Avoid applying thick coats, as this can lead to runs and drips.
- Allow each coat to dry completely: Follow the manufacturer’s instructions for drying times.
- Sand lightly between coats: This creates a smooth surface for the subsequent coats.
For professional car paint repair in specific areas, you might consider services like car paint repair quezon city or car paint repair oakville, which offer specialized expertise and equipment.
Troubleshooting Common Primer Problems
- Runs and drips: Apply thinner coats and allow sufficient drying time between coats.
- Orange peel: This textured finish can be caused by improper spraying technique. Ensure the can is held at the correct distance and moved in a steady, sweeping motion.
- Poor adhesion: Ensure the surface is properly cleaned and prepared before applying primer.
Conclusion
Using a primer in can to repair your car’s paint job is a cost-effective and efficient solution for minor to moderate damage. By following the proper preparation and application techniques, you can achieve a professional-looking finish that will last for years to come. Remember to choose the right primer for your specific needs and always follow the manufacturer’s instructions for optimal results. This primer in can method will give you a great base for your new paint job.
FAQ
- Can I use any type of primer on my car? No, different primers are designed for different surfaces and purposes.
- How many coats of primer do I need to apply? Typically, 2-3 thin coats are sufficient.
- Can I apply primer over rust? It’s best to remove any rust before applying primer.
- How long does primer take to dry? Drying times vary depending on the type of primer and environmental conditions.
- Do I need to sand the primer before painting? Lightly sanding between coats and after the final coat creates a smooth surface for the paint.
- Can I use spray paint over primer? Yes, once the primer is dry and sanded, you can apply spray paint.
- What if the primer doesn’t adhere properly? The surface might not have been properly cleaned or prepared.
Common Scenarios
- Scenario 1: Scratches reaching the metal: Clean the area, apply a self-etching primer, then follow up with your car’s paint color.
- Scenario 2: Minor chips in the paint: Clean the area, apply a filler primer to smooth the surface, then apply touch-up paint.
Further Exploration
For more information on car paint repair, check out our articles on how to repair blistered car paint and how to repair flaking paint on car.
Need assistance? Contact us via WhatsApp: +1(641)206-8880 or email [email protected]. Our 24/7 customer service team is ready to help.

