
In today’s world, understanding your car’s health is becoming increasingly accessible, even for those who aren’t professional mechanics. A car diagnostic tool, often referred to as an OBD2 scanner, is an indispensable piece of equipment for any vehicle owner wanting to take a proactive approach to car maintenance and repair. These handy devices plug into your car’s OBD2 port, acting as a direct line to your vehicle’s computer system, allowing you to read trouble codes, understand what’s going on under the hood, and potentially save significant money on repairs. Learning how to use a car diagnostic tool is simpler than you might think, and this guide will walk you through the process step-by-step.
Understanding Your Car Diagnostic Tool (OBD2 Scanner)
Before diving into the “how-to,” it’s important to understand what a car diagnostic tool actually is. Modern vehicles are equipped with an On-Board Diagnostics system, generation two (OBD2). This system monitors various aspects of your car’s performance, from engine emissions to transmission efficiency. When something goes wrong, the system generates a Diagnostic Trouble Code (DTC) and often illuminates the dreaded “Check Engine Light” on your dashboard.
An OBD2 scanner is a tool that communicates with your car’s OBD2 system via a standardized port typically located inside the cabin. It allows you to retrieve these DTCs, providing you with valuable information about potential issues. Beyond just reading codes, many advanced scanners offer features like live data streaming, freeze frame data, and the ability to clear codes after repairs are made. Using a car diagnostic tool empowers you to understand your car’s health, troubleshoot problems, and make informed decisions about maintenance and repairs.
Step-by-Step Guide: Connecting and Using Your OBD2 Scanner
Using a car diagnostic tool is generally straightforward. Here’s a step-by-step guide to get you started:
Locating the OBD2 Port
The first step is to find your car’s OBD2 port. In most passenger vehicles, you’ll find it located under the dashboard on the driver’s side. Look for a 16-pin, trapezoid-shaped connector. It’s usually easily accessible, but in some models, it might be tucked away in the center console or even under the passenger side dashboard. Refer to your vehicle’s owner’s manual if you’re having trouble locating it.
Connecting the OBD2 Scanner
Once you’ve located the OBD2 port, connecting the scanner is a breeze.
- Turn off the ignition: Ensure your car’s ignition is completely off before you begin.
- Plug in the scanner: Take your OBD2 scanner and align the male connector with the female OBD2 port in your car. The trapezoidal shape ensures it only fits in one orientation. Gently but firmly push the connectors together until they are securely seated. You might feel a slight click or resistance, but avoid forcing it.
- Turn the ignition to the “ON” position (Key On, Engine Off): Turn your car key to the “ON” position, which powers up the car’s electrical systems and dashboard, but do not start the engine.
- Wait for the scanner to power up: In most cases, the OBD2 port provides power to the scan tool. The scanner will typically boot up automatically once connected and the ignition is in the “ON” position. Wait for it to complete its boot sequence, which might involve displaying a logo or initial menu screen.
Navigating the Scanner Menu
After your OBD2 scanner is powered on, you’ll be greeted with a menu. The options available will depend on the specific scanner you’re using, ranging from basic code readers to more advanced professional-grade tools. Common menu options you might encounter include:
- Read Codes: This is the primary function for most users. Selecting this option will instruct the scanner to retrieve and display any stored or pending Diagnostic Trouble Codes (DTCs). The scanner may also provide a brief description of the fault associated with each code.
- Erase Codes: This option allows you to clear stored DTCs from your vehicle’s computer memory. Use this function with caution and only after you have properly diagnosed and repaired the underlying issue. Clearing codes without fixing the problem will only cause the Check Engine Light to reappear.
- Live Data (or Data Stream): Advanced scanners often offer live data monitoring. This feature displays real-time readings from various sensors throughout your vehicle, such as engine temperature, RPM, oxygen sensor values, and more. Live data is invaluable for diagnosing intermittent problems or monitoring sensor performance.
- Freeze Frame: Freeze frame data captures a snapshot of sensor readings at the precise moment a DTC was set. This information can provide valuable context and clues when diagnosing a problem, showing the conditions under which the fault occurred.
- Vehicle Info (or Vehicle Identification): This section usually displays information about your vehicle, such as the Vehicle Identification Number (VIN) and other build-related data.
- I/M Readiness (Inspection/Maintenance Readiness): This feature checks the status of emission-related systems and indicates whether your vehicle is ready for a smog check or emissions test. It helps identify potential issues that might prevent you from passing an emissions test.
Navigating the menu is usually done using buttons on the scanner. Arrow keys help you scroll through options, and an “Enter” or “OK” button selects your choice. A “Back” or “Escape” button is typically included to return to the previous menu.
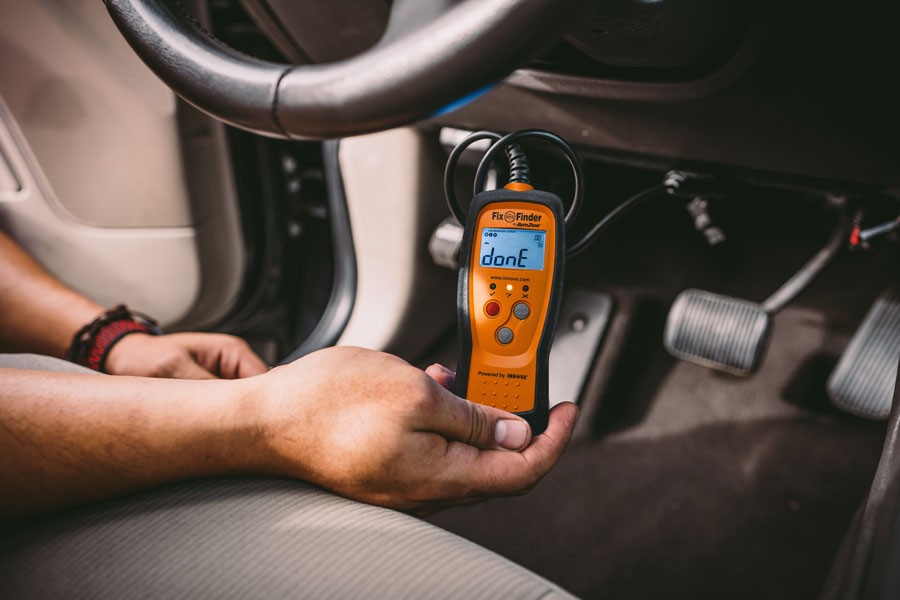 Car diagnostic tool displaying trouble codes
An OBD-II scanner displaying diagnostic trouble codes after a scan, showing the results of the vehicle’s self-diagnostic check.
Decoding Diagnostic Trouble Codes (DTCs) – Understanding Car Error Codes
Once you select “Read Codes,” your scanner will display a series of codes if any faults are detected. DTCs are standardized codes, making them universally understandable across different vehicle makes and models. A DTC always follows a specific format: one letter followed by four numbers, such as P0301.
The letter at the beginning indicates the system where the fault is located:
- P (Powertrain): Relates to the engine, transmission, fuel system, and emissions.
- B (Body): Concerns body control systems, including airbags, power windows, interior electronics, etc.
- C (Chassis): Deals with chassis systems like brakes, suspension, steering, and ABS.
- U (Network/Communication): Indicates communication issues within the vehicle’s computer network.
The first number following the letter is either a “0” or a “1”:
- 0: Indicates a generic code, meaning it’s a standard code defined by SAE (Society of Automotive Engineers) and is common across most manufacturers.
- 1: Signifies a manufacturer-specific code, meaning it’s a code defined by a specific car manufacturer and may have a more specific meaning for that brand.
The subsequent numbers provide further details about the specific system and fault. For Powertrain codes (P-codes), the third digit often specifies the subsystem:
- 0: Emission Management System
- 1: Fuel and Air Metering
- 2: Fuel and Air Metering (Injector Circuit)
- 3: Ignition System or Misfire
- 4: Auxiliary Emission Controls
- 5: Vehicle Speed Control & Idle Control System
- 6: Computer Output Circuit
- 7, 8, 9: Transmission
The last two digits further pinpoint the specific component or circuit that is experiencing the problem. While the generic code structure provides a good starting point, consulting a reliable DTC database or repair manual is crucial for accurate diagnosis and repair.
For example, the code P0301 tells us:
- P: Powertrain system
- 0: Generic code
- 3: Ignition system or misfire
- 01: Cylinder #1
Therefore, P0301 indicates a Cylinder 1 Misfire Detected.
Unlocking the Benefits: How a Car Diagnostic Tool Saves You Money and Time
Investing in and learning how to use a car diagnostic tool can offer significant benefits and savings for vehicle owners:
DIY Car Diagnostics and Cost Savings
One of the most significant advantages is the ability to perform your own preliminary diagnostics. When the Check Engine Light illuminates, instead of immediately rushing to a mechanic and paying for a diagnostic scan, you can use your OBD2 scanner to read the codes yourself. This gives you an initial understanding of the potential problem, allowing you to research the issue, consider DIY repairs, or have a more informed conversation with your mechanic, potentially saving on unnecessary diagnostic fees.
Ensuring Smog Check Readiness
Before heading to an emissions testing station, use the I/M Readiness function on your scanner. This can reveal if there are any emission-related issues that might cause your vehicle to fail the test. Addressing these problems beforehand can save you time and the inconvenience of a failed smog check.
Empowering DIY Car Repairs
For those comfortable with DIY car maintenance, an OBD2 scanner is an invaluable tool. After performing a repair, such as replacing an oxygen sensor (as indicated by a code like P0138 – O2 Sensor Circuit High Voltage Bank 1 Sensor 2), you can use your scanner to clear the DTC and confirm that the issue is resolved, eliminating unnecessary trips to a mechanic for simple fixes.
By understanding how to use a car diagnostic tool, you take a significant step towards becoming a more informed and empowered car owner, capable of proactively managing your vehicle’s health and saving money on car repairs.