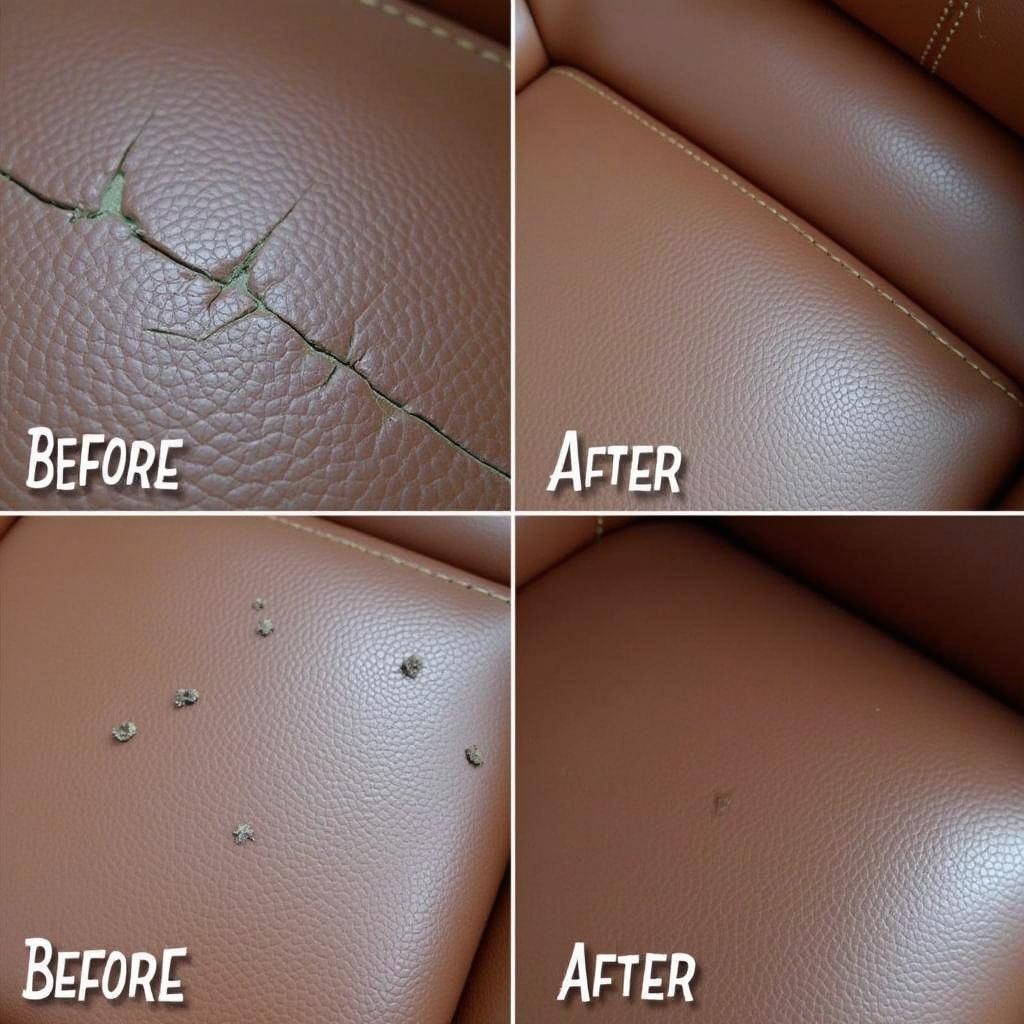
Leather car seats are a luxurious addition to any vehicle, but over time, even the highest quality leather can show signs of wear and tear. The good news is that you can often revitalize your leather seats and restore their former glory with a bit of effort. This comprehensive guide will walk you through the steps to repair worn leather car seats, from assessing the damage to applying the right treatments.
Understanding the Damage on Your Leather Car Seats
Before you begin any repairs, it’s crucial to assess the type and extent of the damage.
- Cracks: These are breaks in the leather’s surface, often caused by dryness, sun exposure, or extreme temperatures.
- Scratches: Light surface abrasions that haven’t penetrated the leather’s top layer.
- Fading: Loss of color due to sun damage or improper cleaning.
- Stains: Discolorations caused by spills or dirt.
Gathering Your Leather Car Seat Repair Supplies
To effectively repair your worn leather seats, you will need the following:
- Leather Cleaner: Choose a pH-neutral cleaner specifically designed for automotive leather.
- Leather Conditioner: A good conditioner will help moisturize and protect the leather.
- Leather Filler: This is used to fill in cracks and deep scratches. Opt for a filler that matches your leather’s color.
- Colorant/Dye: For faded or discolored areas, a leather dye can restore the original color.
- Applicator Sponges/Pads: These are essential for even product application.
- Microfiber Cloths: Used for cleaning and buffing.
- Masking Tape: To protect surrounding areas when working with dyes or fillers.
- Gloves: Protect your hands from chemicals.
A Step-by-Step Guide to Repairing Worn Leather Car Seats
Step 1: Thoroughly Clean the Leather
Begin by cleaning the leather seats thoroughly to remove dirt, grime, and any previous cleaning product residue. Apply the leather cleaner to a damp sponge and gently work it into the leather using circular motions. Wipe away any excess cleaner with a clean microfiber cloth.
Step 2: Repair Cracks and Scratches
If your leather seats have cracks or deep scratches, use a leather filler to repair them. Apply a small amount of filler to the damaged area using a putty knife or your finger, pressing it gently into the crack or scratch. Allow the filler to dry completely according to the manufacturer’s instructions. You may need to apply multiple layers for deeper damage.
Step 3: Sand and Smooth the Repaired Areas
Once the filler is dry, use fine-grit sandpaper (around 400-grit) to smooth out the repaired areas. Sand lightly and evenly until the filler blends seamlessly with the surrounding leather. Wipe away any dust with a damp cloth.
Step 4: Restore Color with Leather Dye
For faded or discolored leather, use a leather dye that matches the original color of your seats. Using a clean applicator sponge or pad, apply the dye evenly to the affected areas. Work in thin coats, allowing each coat to dry thoroughly before applying the next.
Step 5: Condition and Protect the Leather
After the dye (if used) has dried completely, apply a high-quality leather conditioner to the entire seat. This will help to moisturize the leather, prevent future cracking, and restore its natural sheen. Apply the conditioner with a clean microfiber cloth, working it into the leather in circular motions.
Expert Insights from Johnathan Miller, Automotive Upholstery Specialist
“One of the biggest mistakes people make is using household cleaners on their leather car seats,” says Johnathan Miller, a veteran automotive upholstery specialist. “These cleaners are often too harsh and can strip away the leather’s natural oils, leading to premature drying and cracking. Always choose cleaners and conditioners specifically formulated for automotive leather.”
Maintaining Your Repaired Leather Car Seats
Once you’ve repaired and restored your leather car seats, proper maintenance is key to keeping them looking their best.
- Regular Cleaning: Clean your leather seats every few weeks using a pH-neutral leather cleaner and a soft microfiber cloth.
- Conditioning: Condition your leather seats every three months, or more frequently if you live in a hot or dry climate.
- Sun Protection: Park your car in the shade or use a windshield sunshade to protect your leather seats from damaging UV rays.
FAQs About Repairing Worn Leather Car Seats
Can I repair leather car seats myself, or should I hire a professional?
Minor repairs like scratches and light fading can often be tackled with a DIY approach. However, for severe damage or if you’re uncomfortable working with dyes and fillers, it’s best to consult a professional automotive upholstery specialist.
What is the best way to prevent my leather car seats from cracking?
Regular cleaning and conditioning are essential for preventing leather car seats from drying out and cracking. Additionally, protect your seats from direct sunlight and extreme temperatures whenever possible.
How often should I condition my leather car seats?
It’s generally recommended to condition your leather car seats every three months. However, if you live in a hot or dry climate, you may need to condition them more frequently.
Need Expert Help with Your Car’s Leather Seats?
Revitalizing your car’s interior can make a world of difference in your driving experience. While this guide provides a comprehensive overview of repairing worn leather car seats, we understand that some repairs may require professional expertise. If you’re unsure about tackling the repairs yourself or if you’re dealing with extensive damage, our team of certified technicians is here to help. Contact us today via WhatsApp at +1(641)206-8880 or email us at [email protected] for expert assistance. We offer 24/7 customer support to address your car repair needs promptly and efficiently.


