Vinyl trim is a common feature in leather car seats, adding a touch of style and durability. However, over time, this vinyl trim can start to peel, crack, or fade, affecting the overall aesthetics of your car’s interior. Fortunately, repairing vinyl trim on leather car seats is a manageable DIY project that can restore your car’s interior without breaking the bank.
This comprehensive guide will walk you through the process of repairing vinyl trim to leather car seats, offering practical tips and professional insights to help you achieve professional-looking results.
Understanding the Importance of Timely Repairs
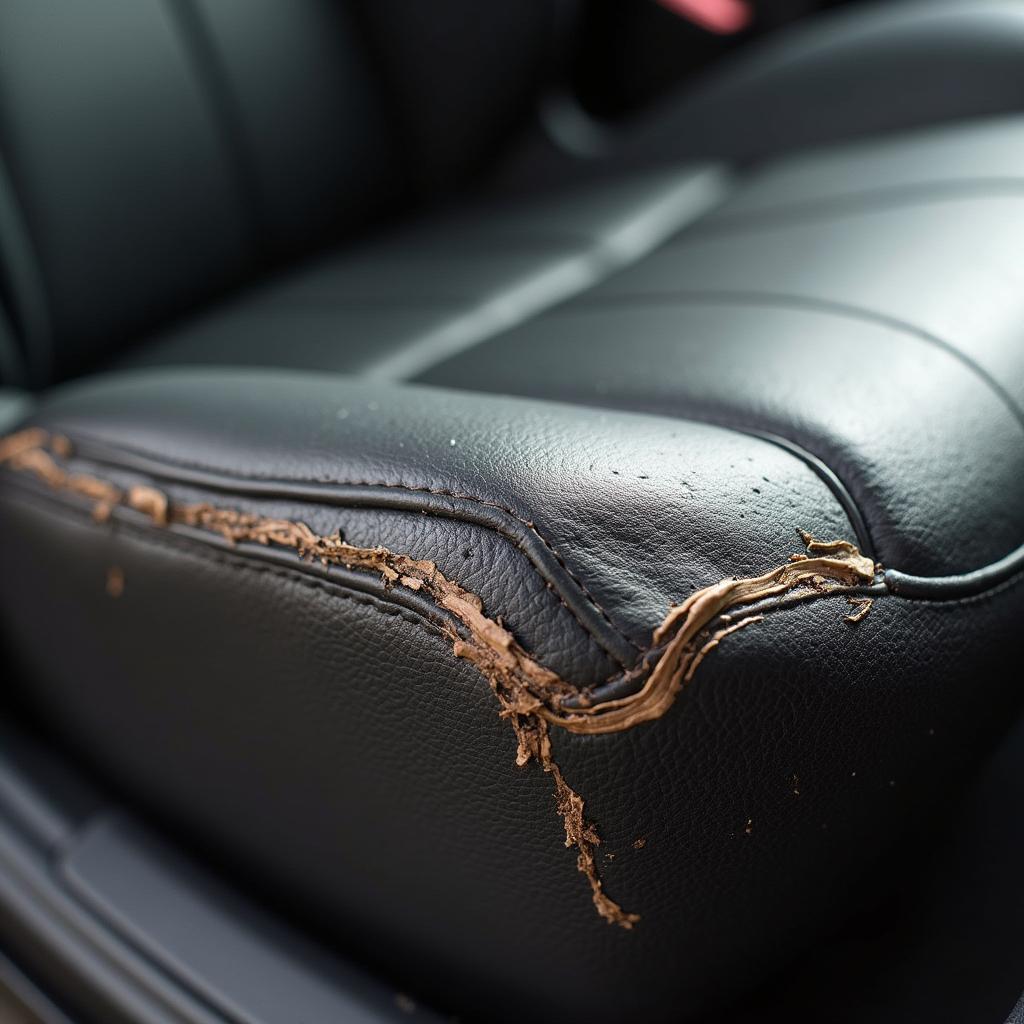
Before delving into the repair process, it’s crucial to understand why addressing vinyl trim issues promptly is essential. Ignoring peeling or cracked vinyl can lead to further damage, potentially exposing the underlying foam and compromising the structural integrity of the seat.
 Damaged Vinyl Trim on a Leather Car Seat
Moreover, timely repairs help maintain the resale value of your car. A well-maintained interior significantly contributes to a positive impression on potential buyers.
Gathering the Necessary Tools and Materials
Having the right tools and materials is crucial for a successful vinyl trim repair. Here’s a list of what you’ll need:
- Cleaning Supplies: Mild soap, water, microfiber cloths, rubbing alcohol
- Vinyl Repair Kit: Choose a high-quality kit that matches the color and texture of your car’s vinyl trim.
- Adhesive Promoter: This improves the bond between the existing vinyl and the repair material.
- Heat Gun or Hairdryer: Used to soften the vinyl and activate the adhesive.
- Plastic Spatula or Putty Knife: For applying and spreading the repair compound.
- Vinyl Texture Mat (optional): To replicate the original texture of the vinyl trim.
- Vinyl Protectant: For protecting the repaired area and preventing future damage.
A Step-by-Step Guide to Repairing Vinyl Trim
Now that you have your tools and materials ready, let’s dive into the repair process:
-
Clean the Area: Thoroughly clean the damaged area with mild soap and water to remove dirt, grime, and debris. Use rubbing alcohol to remove any remaining residue and ensure a clean surface for the repair compound to adhere properly.
-
Prepare the Vinyl Trim: Gently sand down any loose or peeling edges of the vinyl trim using fine-grit sandpaper. Be careful not to damage the surrounding leather.
-
Apply the Repair Compound: Following the instructions provided with your vinyl repair kit, carefully apply the repair compound to the damaged area. Use a plastic spatula or putty knife to spread it evenly and smoothly, ensuring it fills any cracks or gaps.
-
Apply Heat (If Necessary): Some vinyl repair kits require heat activation. If this is the case, use a heat gun or hairdryer on a low setting to soften the vinyl and help the compound bond effectively.
-
Create Texture (Optional): If your vinyl trim has a specific texture, you can use a vinyl texture mat to replicate it. Press the mat onto the repaired area while the compound is still wet to create the desired pattern.
-
Trim and Blend: Once the repair compound is dry, use a sharp blade or razor to carefully trim away any excess and create a seamless blend with the surrounding vinyl.
-
Apply Vinyl Protectant: To protect your newly repaired vinyl trim and prevent future damage, apply a high-quality vinyl protectant. This will help prevent fading, cracking, and UV damage.
Tips for a Professional Finish
“When repairing vinyl trim, patience is your best friend,” says experienced automotive upholsterer, John Miller. “Take your time with each step, ensuring the repair compound is applied evenly and blended seamlessly for a professional-looking result.”
Here are some additional tips:
- Work in a well-ventilated area to avoid inhaling fumes from the repair compound or adhesive.
- Use masking tape to protect the surrounding leather while sanding or trimming.
- If the damage is extensive or you’re not comfortable with a DIY repair, consider seeking professional upholstery services.
Conclusion
Repairing vinyl trim to leather car seats is a manageable DIY project that can significantly enhance the look and feel of your car’s interior. By following these steps and seeking professional help when needed, you can restore your car’s interior to its former glory and maintain its value for years to come.
Frequently Asked Questions (FAQs)
Can I use super glue to repair vinyl trim?
While super glue might seem like a quick fix, it’s not recommended for vinyl trim repairs. Super glue can damage the vinyl and create a messy, noticeable repair.
How long does the repair compound take to dry?
Drying time varies depending on the specific product used. Always refer to the manufacturer’s instructions for drying times.
Can I repair faded vinyl trim?
While this guide focuses on repairing cracks and peeling, you can use vinyl dye to refresh faded vinyl trim and restore its original color.
Related Car Upholstery Repair Guides
For more helpful tips and guides on car upholstery repair, check out our other resources:
- How to Repair a Car Seat Upholstery
- How to Repair Torn Car Seat Fabric
- How to Repair Car Seat
- How to Repair Small Burn Hole in Car Seat
- Repair Ripped Leather Car Seat
Need further assistance with your car upholstery repair? Contact our expert team via WhatsApp at +1(641)206-8880 or email us at [email protected]. We offer 24/7 support to help you get back on the road with a car interior that looks as good as new!


