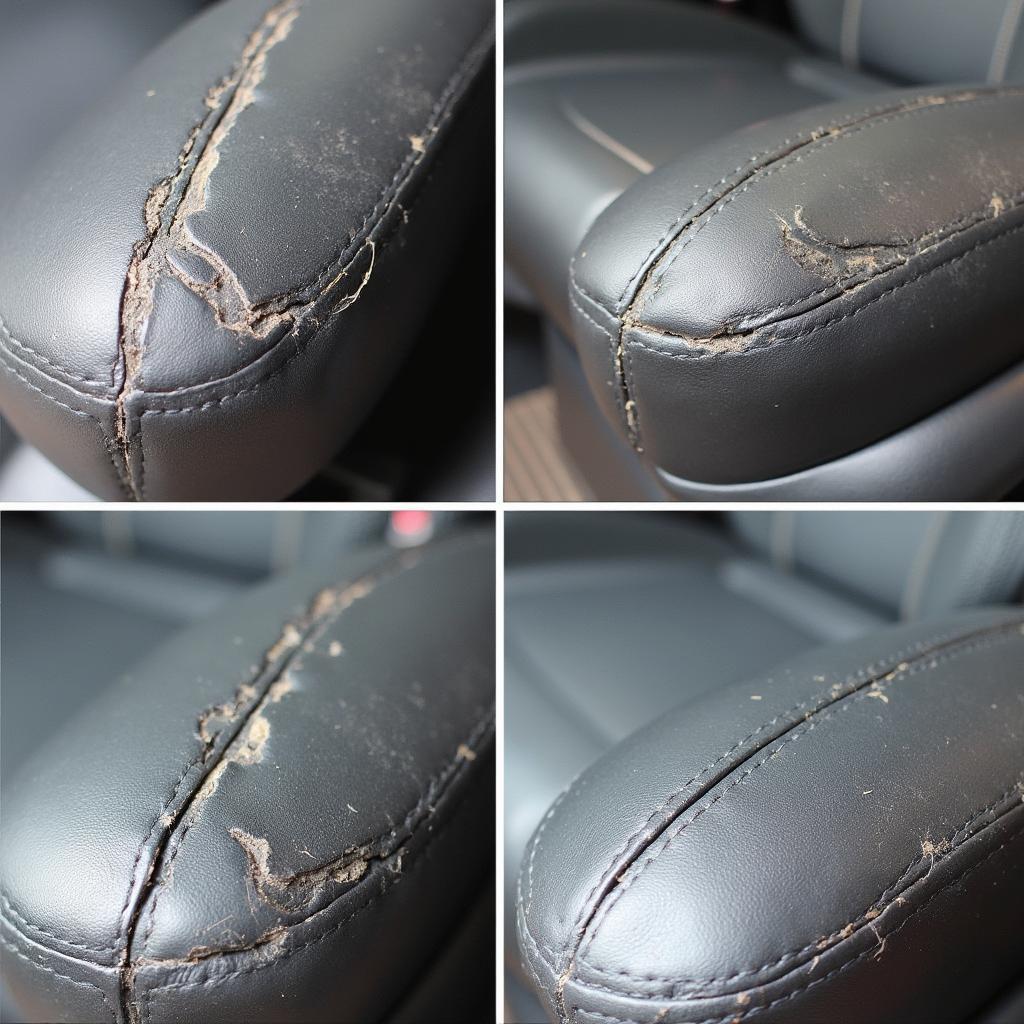
Vinyl car seats are a popular choice for their durability and easy cleaning. However, over time, they can suffer from cracks, tears, and fading. The good news is that repairing minor to moderate damage on your vinyl car seats is achievable and cost-effective. This comprehensive guide will take you through the steps on how to repair vinyl car seats, giving them a new lease on life.
Assessing the Damage: What Needs Fixing?
Before diving into the repair process, it’s crucial to assess the extent of the damage to your vinyl car seats.
- Cracks: These are thin, linear breaks in the vinyl, often caused by wear and tear or extreme temperatures.
- Tears: Larger and more irregular than cracks, tears can occur from sharp objects or rough use.
- Holes: These are punctures that go through the vinyl completely.
- Fading and Discoloration: Prolonged exposure to sunlight can cause the color of your vinyl seats to fade or become discolored.
Gathering Your Vinyl Repair Arsenal: Tools and Materials
Having the right tools and materials is essential for a successful vinyl car seat repair. Here’s a list of what you’ll need:
- Vinyl Repair Kit: These kits are readily available online or at auto parts stores and usually contain a vinyl filler, color matching guide, adhesive, and various grain papers.
- Cleaning Supplies: Isopropyl alcohol, microfiber cloths, and a soft-bristled brush are necessary for cleaning the damaged area thoroughly.
- Heat Gun or Hairdryer: Applying heat helps the vinyl become more pliable, making it easier to work with and ensuring a smoother repair.
- Scissors or Utility Knife: These are useful for trimming any excess vinyl filler or repair patches.
- Masking Tape: Protects the surrounding areas of the seat during the repair process.
- Gloves: Protect your hands from the chemicals in the vinyl repair products.
How to Repair Vinyl Car Seats: Step-by-Step Guide
Now, let’s get down to the actual repair process. Follow these steps to restore your vinyl car seats:
1. Preparation is Key: Begin by thoroughly cleaning the damaged area with isopropyl alcohol and a microfiber cloth. This removes dirt, grime, and any residues that might hinder the adhesion of the repair material. Allow the area to dry completely before proceeding.
2. Addressing Cracks and Tears: For minor cracks, a liquid vinyl filler is often sufficient. Apply the filler according to the manufacturer’s instructions, ensuring it fills the entire crack. For larger tears or holes, you might need a vinyl patch from the repair kit. Cut the patch to a size slightly larger than the damaged area and apply it using the adhesive provided in the kit.
3. Heat for a Seamless Finish: After applying the filler or patch, use a heat gun or hairdryer on a low setting to heat the area gently. Heating makes the vinyl more pliable, allowing the repair material to blend seamlessly. Be cautious not to overheat, as this can damage the vinyl.
4. Matching the Texture: Most vinyl repair kits come with grain papers that help you replicate the texture of your car seat. Choose a grain paper that closely resembles the original texture and, once the filler or patch is dry, gently press it onto the repaired area using the heat gun or hairdryer for a few seconds.
5. Color Matching for a Flawless Look: Use the color-matching guide in your vinyl repair kit to find the closest match to your car seat’s original color. Apply thin layers of the colorant, allowing each layer to dry completely before applying the next.
6. Finishing Touches: Once you’re satisfied with the color match, allow the area to dry thoroughly. You can then apply a vinyl protectant to shield your newly repaired seats from UV rays and future damage.
Can You Repair Torn Vinyl Car Seats?
Yes, in many cases, you can repair torn vinyl car seats, depending on the severity. Small tears can often be fixed using a vinyl repair kit, following a similar process to repairing cracks. For larger tears, you might need a professional upholsterer to replace the damaged section of vinyl.
Best Vinyl Repair Kit for Car Seats
Choosing the right vinyl repair kit can significantly impact the outcome of your repair project. Look for a kit that includes:
- High-Quality Vinyl Filler: Ensure the filler is flexible, durable, and dries to a smooth, paintable finish.
- Variety of Colors and Grain Papers: A wide range of colors and grain papers allows you to achieve a closer match to your car’s interior.
- Strong Adhesive: A strong adhesive is crucial for securing patches and ensuring a long-lasting repair.
- Complete Instructions: Clear and detailed instructions make the repair process easier, especially for beginners.
How to Repair Town Vinyl Car Seats
“Town vinyl” is a specific type of vinyl upholstery often found in older vehicles. While the repair process for town vinyl is similar to standard vinyl, you might need to pay extra attention to color matching and finding a repair kit specifically designed for this type of material.
Learn more about the intricacies of repairing town vinyl car seats in our dedicated guide.
Prolonging the Life of Your Repaired Seats: Prevention Tips
Once you’ve successfully repaired your vinyl car seats, follow these tips to prevent future damage and keep them looking their best:
- Regular Cleaning: Wipe down your seats regularly with a damp cloth and mild soap to prevent dirt and grime from building up and potentially causing cracks or tears.
- UV Protection: Park your car in the shade or use a sunshade to protect your seats from harmful UV rays that can cause fading and cracking.
- Avoid Sharp Objects: Be mindful of sharp objects like keys, pens, or tools that can scratch or puncture the vinyl.
- Conditioning: Use a vinyl conditioner every few months to keep the material supple and prevent cracking.
Conclusion
Repairing your own vinyl car seats is a satisfying and budget-friendly way to breathe new life into your car’s interior. By following this guide and using the right techniques, you can achieve professional-looking results and enjoy damage-free seats for years to come. Remember, for extensive damage or if you’re not comfortable tackling the repair yourself, consult a professional upholsterer.
Have you tried repairing your vinyl car seats before? Share your experiences and any additional tips in the comments below!


