
Radiator leaks can be a common headache for car owners, often stemming from damaged threads or weakened spots in the radiator core. Addressing these issues promptly is crucial to prevent overheating and further engine damage. While professional repairs are an option, tackling it yourself can save you money and provide a satisfying sense of accomplishment. This guide will walk you through a practical approach to repairing leaks, drawing on real-world experience to help you achieve a durable fix.
Understanding the Challenge: Radiator Threads and Leaks
When we talk about repairing “threads” in a car radiator in the context of leaks, we’re often referring to damage in the thin aluminum or plastic material that makes up the radiator core. Over time, corrosion, impacts, or stress can weaken these areas, leading to cracks and leaks. Repairing these “threads” means sealing these breaches effectively to restore the radiator’s function.
Trial and Error: Lessons Learned in Radiator Repair
One car enthusiast documented their journey of repairing a radiator leak on a 92 K75S BMW, providing valuable insights into what works and what doesn’t. Their initial approach involved aluminum brazing, a method that seemed promising for its strength. However, early attempts were marred by overheating the aluminum, resulting in a weak and leaky patch.
Practicing aluminum brazing on a test aluminum can to simulate radiator repair conditions.
Practice on an aluminum can proved essential. By switching to a propane torch with a gentler flame compared to a hotter MAAP gas torch, and carefully controlling the heat, they gradually improved their brazing technique.
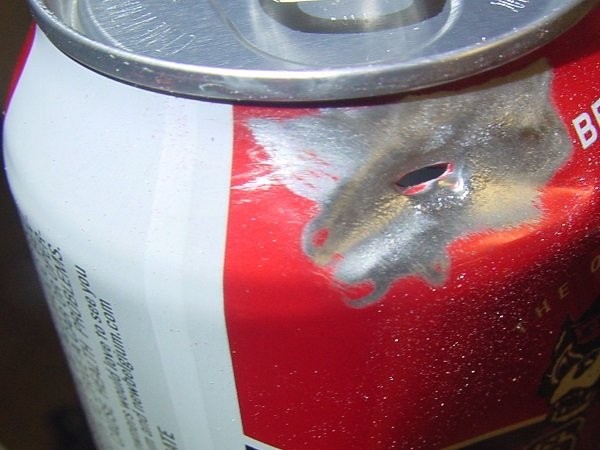
Melting the aluminum can during an early brazing attempt, highlighting the risk of overheating.
Achieving a gloppy patch on the aluminum can after some practice, showing improvement in technique.
Through persistent practice, they managed to create more effective patches on the test can, strong enough to withstand water pressure without leaking.
A better-looking and leak-proof patch achieved after further brazing practice on the aluminum can.
Brazing Challenges and Epoxy Solutions
Despite progress on the test can, applying brazing directly to the radiator proved less successful. The patches were weak and easily detached, likely due to insufficient heating of the radiator material itself, out of concern for causing further damage by melting the aluminum.
An aluminum brazing patch on the radiator that proved to be weak and easily flicked off.
Seeking a more user-friendly solution, the focus shifted to epoxy-based repairs. Stik-Tite epoxy, recommended by a manufacturer representative for its use in radiator repair shops and even race cars, emerged as a promising alternative. Applying Stik-Tite with localized heat from a butane pencil torch was found to be much easier to handle.
Applying Stik-Tite epoxy to the radiator leak area with the aid of a butane pencil torch for localized heating.
Creating a Hybrid Patch for Enhanced Strength
While the Stik-Tite patch effectively sealed the leak initially, concerns about long-term durability led to the development of a hybrid patch. This technique combined the sealing properties of Stik-Tite with the structural reinforcement of JB Weld epoxy and an aluminum strip.
The process involved:
- Softening Stik-Tite: Heating the existing Stik-Tite patch with a hot air gun until it softened, allowing it to further penetrate the leak points.
- Surface Preparation: Removing radiator fins around the damaged area to create a larger bonding surface. Cleaning the area with a Dremel and wire brush.
- JB Weld Application: Applying a layer of JB Weld epoxy to the cleaned area.
- Aluminum Reinforcement: Forming a small V-shaped tent from an aluminum can strip and embedding it into the wet JB Weld over the leak.
- Final Epoxy Layer: Covering the aluminum tent and surrounding area with more JB Weld.
The hybrid patch using Stik-Tite, JB Weld, and an aluminum strip for added strength and durability.
This “epoxy sandwich” approach, proven in other bike repairs, aimed to create a robust and lasting repair.
Curing, Testing, and Final Steps
After allowing the hybrid patch to cure for 24 hours, the repaired radiator underwent testing. Hot air was blown onto the patch to re-melt the Stik-Tite within the holes, further ensuring a complete seal. Once cooled, the radiator was reinstalled, and the system pressure tested to 20 psi. The repair successfully held pressure for an hour, confirming no leaks.
Finally, the system was refilled with coolant, and the bike was run to full operating temperature, with no leaks observed even after a test ride. The radiator repair was declared a success.
Replacing the radiator overflow hose as a preventative measure during the radiator repair process.
Additional Tips for Radiator Maintenance
Beyond leak repair, radiator removal provides an opportunity to inspect and maintain related components. A valuable tip from this repair experience is to examine and clean electrical connections near the radiator. Using WD-40 to clean connectors and applying dielectric grease before reassembly can prevent future electrical issues.
Conclusion: DIY Radiator Thread (Leak) Repair is Achievable
Repairing radiator threads, or more accurately, leaks stemming from damaged radiator material, is a DIY task within reach for car owners. While methods like brazing can be challenging without experience, epoxy-based solutions, especially hybrid approaches combining different epoxies and reinforcement, offer a more accessible and effective path to a lasting repair. By learning from practical examples and following a step-by-step approach, you can confidently tackle radiator leak repairs and keep your vehicle running smoothly.