
If you’ve ever admired your car’s reflection only to be met with a spiderweb of faint, circular scratches, you’re likely dealing with swirl marks. Almost every car owner encounters these imperfections at some point. In fact, “how to repair swirl marks on a car” is a frequently searched topic in auto detailing, highlighting just how common this paint issue is.
Swirl marks are essentially clusters of micro-scratches that, while individually tiny, collectively dull your car’s paint and diminish its shine. Often confined to the clear coat, the top protective layer of your car’s paint, they’re primarily caused by improper car washing and drying methods.
Beyond aesthetics, swirl marks can trap contaminants, causing your car’s paint to become dirty faster and require more frequent cleaning. This increased maintenance can lead to unnecessary expenses. Therefore, addressing swirl marks promptly is crucial to maintaining your car’s appearance and protecting your investment.
Let’s delve deeper into the causes of swirl marks and, more importantly, how to effectively remove them and restore your car’s paint to its former glory.
Understanding the Root Causes of Swirl Marks
As mentioned, improper car care techniques are the main culprits behind those unsightly swirl marks. Here are the most common mistakes that lead to their formation:
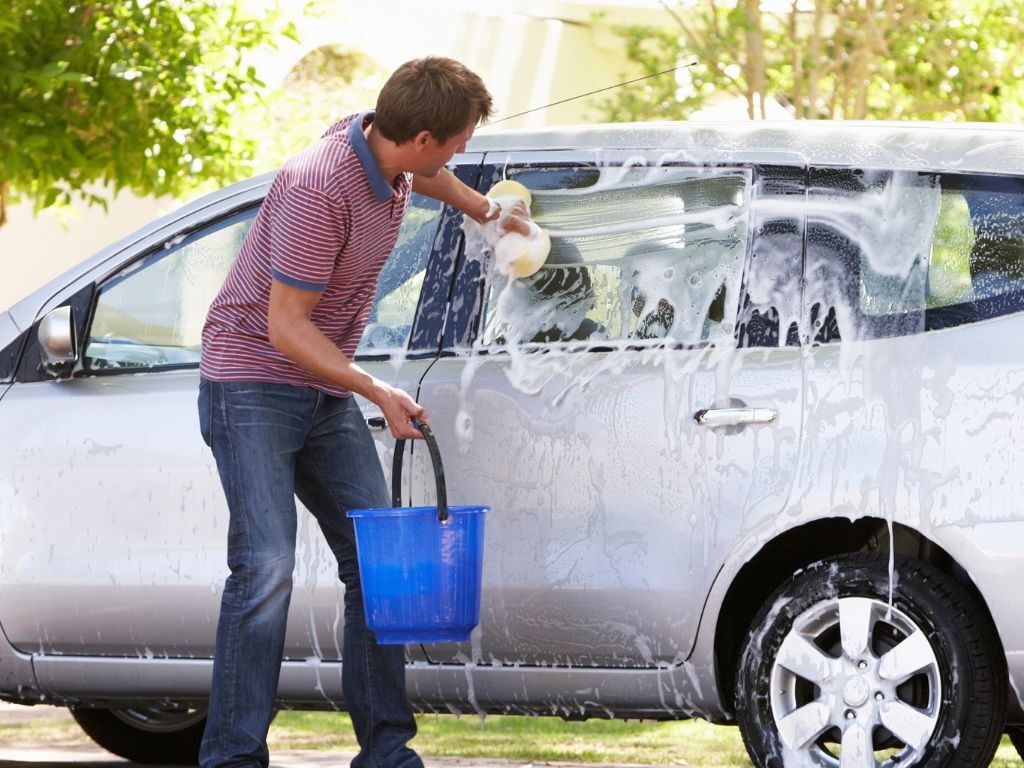
The Single Bucket Wash Mistake
Using just one bucket for washing your car is a recipe for swirl marks. Imagine washing your car with a soapy solution, then dipping the same dirty wash mitt back into the same bucket. You’re essentially redepositing the dirt and grime you just removed back onto your car’s paint.
The solution? Adopt the two-bucket wash method. Use one bucket filled with soapy water for washing and a second bucket with clean water for rinsing your wash mitt or sponge after each section. This simple change significantly reduces the amount of dirt reintroduced to your paint during washing.
Skipping the Essential Pre-Wash Rinse
Many car owners jump straight into washing with a mitt or sponge without properly rinsing the car first. This is a critical error. Dry dirt and debris on your car’s surface act like sandpaper when rubbed with a wash mitt, directly causing swirl marks.
A pre-wash rinse, ideally with a pressure washer, is crucial. It blasts away loose dirt and contaminants before you even touch the paint with a wash mitt, minimizing the risk of scratching.
Using Abrasive Cleaning Tools and Products
The tools and products you use can also contribute to swirl marks. Harsh cleaning agents or abrasive materials like cheap towels or applicators containing polyester can inflict micro-scratches. Similarly, overly aggressive polishing compounds can damage the clear coat if used improperly.
Opt for gentle, pH-balanced car wash soaps and high-quality microfiber wash mitts and drying towels. Avoid abrasive sponges or brushes, and always choose polishing products designed for car paint.
Improper Drying Techniques
Even after a careful wash, improper drying can introduce swirl marks. Dragging a dirty towel across your car’s surface will scratch the paint.
Always use clean, soft microfiber drying towels. Patting the car dry rather than wiping is even gentler. Consider using a leaf blower or forced air dryer to remove the majority of water before using a towel for the final touch.
The Inconvenience of Automated Car Washes
Automated car washes, while convenient, are notorious for causing swirl marks. The large, rotating brushes often trap dirt and grit from previous vehicles. As these brushes scrub your car, they act like abrasive tools, scratching the paint.
While touchless car washes are a slightly better alternative, hand washing remains the safest method to prevent swirl marks, especially for newer vehicles or cars with delicate paint.
Common Locations for Swirl Marks on Your Vehicle
Swirl marks can technically appear anywhere on your car’s painted surfaces. However, they are most commonly found on horizontal panels that receive direct sunlight and are more prone to collecting dirt and debris.
These areas include:
- Hood: The hood is a large, flat surface that directly faces the elements.
- Roof: Similar to the hood, the roof is exposed to sun, rain, and airborne contaminants.
- Trunk Lid: Another horizontal panel that often accumulates dirt.
Swirl marks are also more noticeable on darker colored cars, especially black vehicles. Dark paint reflects light less effectively, making imperfections like swirl marks stand out more. While lighter cars are not immune to swirl marks, they are less visually prominent due to the paint’s higher reflectivity. Swirl marks are often easier to spot in shaded areas or when the car is wet, as these conditions reduce glare and highlight surface imperfections.
Identifying Swirl Marks: Distinguishing Them from Scratches
Before you can repair swirl marks, it’s essential to accurately identify them and differentiate them from deeper scratches. While both are paint defects, their characteristics and repair methods differ. A trained auto detailer can easily distinguish between the two, but here’s what you should look for:
Swirl Marks Characteristics:
- Appearance: Often resemble spiderwebs or cobwebs, with circular patterns and a relatively consistent diameter.
- Prevalence: The most common type of paint defect.
- Depth: Typically superficial, residing only in the clear coat layer.
- Impact: Dull the paint’s shine but don’t penetrate the color layer.
Scratch Characteristics:
- Appearance: Random shapes and patterns, not consistently circular.
- Cause: Result from deeper abrasions caused by sharp objects like keys, rocks, or branches.
- Depth: Penetrate deeper than swirl marks, often reaching the color coat or even the primer.
- Impact: Can damage the color layer, potentially exposing the bare metal beneath the paint.
Swirl marks are generally shallow, usually only 2-4 microns deep, staying within the clear coat. There are also different types of swirl marks, categorized by their appearance and cause:
-
Wash Marring: These are the most common type, appearing as swirls or straight lines with varying depth and coverage, directly caused by improper washing.
-
Dual Action Haze (Micro-Marring): These are extremely fine, uniform swirl marks, often appearing as a haze. They are most visible under direct light sources like sunlight or fluorescent lights.
-
Buffer Swirls: These are thicker and more defined swirl marks with a consistent circular pattern, typically caused by improper use of a rotary buffer. They are more noticeable under bright or white fluorescent light.
Step-by-Step Guide: How to Remove Swirl Marks Effectively
While preventing swirl marks is ideal, they are often unavoidable. Fortunately, repairing them is a manageable DIY task. For minor swirl marks, a dedicated scratch and swirl remover product can be a quick fix. However, for more significant swirl marks, a more comprehensive approach is needed. Here’s a step-by-step process to effectively remove swirl marks and restore your car’s paint:
Step One: Thoroughly Wash Your Car
The first and most crucial step is a proper car wash. Any dirt or contaminants left on the surface will be ground into the paint during the swirl removal process, worsening the problem.
Begin with a pre-wash using a pressure washer to rinse away loose dirt and debris.
Then, employ the two-bucket wash method with a mild car wash soap. Remember these key points during washing:
- Use a pH-balanced, automotive-specific car wash soap.
- Wash from the top down, as the lower areas are usually dirtier.
- Pay extra attention to areas prone to swirl marks like the hood, roof, and trunk.
- Rinse thoroughly to remove all soap residue.
- Dry the car with a clean microfiber towel or forced air.
Step Two: Decontaminate with a Clay Bar
Even after a thorough wash, bonded contaminants like industrial fallout, brake dust, and tree sap can remain embedded in the clear coat. These contaminants prevent polish from properly correcting the paint and can contribute to future swirl marks. A clay bar treatment effectively removes these bonded contaminants.
When using a clay bar:
- Work in small sections, approximately 1ft X 1ft.
- Generously spray the section with clay lubricant to prevent scratching.
- Glide the clay bar gently back and forth in straight lines, without excessive pressure.
- You’ll feel the clay bar smooth out as contaminants are removed.
- Rinse the area after claying and dry with a clean microfiber towel.
If you’re new to clay bars, proceed cautiously. Improper technique can mar the paint. If unsure, consider seeking professional detailing assistance for this step.
Step Three: Polish to Remove Swirl Marks
With the car washed and decontaminated, it’s time to polish. Polishing uses mild abrasives to level the clear coat, removing the micro-scratches that constitute swirl marks and restoring paint clarity and gloss.
If using a machine polisher, start with a low speed and gradually increase as needed.
- Apply a few pea-sized drops of polishing compound to a clean polishing pad.
- Work in small sections, overlapping each pass.
- Use consistent, moderate pressure.
- Move the polisher in slow, overlapping passes.
- Wipe away polish residue with a clean microfiber towel after each section.
Step Four: Buff to Enhance Shine
Buffing is an extension of polishing, refining the paint surface to maximize gloss and remove any remaining haze from polishing. You can buff by hand or with a machine buffer.
Hand Buffing Technique
Immediately after polishing, before the polish fully dries, wipe away excess polish with a clean microfiber towel. Then, using a fresh, clean microfiber towel or buffing pad, buff the area with light to medium pressure in circular or back-and-forth motions until a high-gloss finish appears.
- Use clean, dedicated buffing microfiber towels or pads.
- Keep multiple clean towels/pads on hand.
- Inspect your work with a flashlight to check for remaining swirl marks. If found, repeat polishing and buffing in that area.
- Continue buffing until a deep, reflective shine is achieved.
Machine Buffing with a Buffer/Polisher
For faster and more effective buffing, a machine buffer/polisher is recommended. A random orbital buffer is safer for beginners than a rotary buffer, which can easily damage paint if used incorrectly.
- Apply a small amount of finishing polish or buffing compound to a clean buffing pad.
- Work in 1ft X 1ft sections.
- Move the buffer slowly and steadily, overlapping passes.
- Use light to moderate pressure.
- Make several passes over each section before moving on.
Exercise caution when machine buffing. Excessive pressure can damage the paint. If you’re uncomfortable with machine buffing, hand buffing or professional detailing are safer alternatives.
Step Five: Protect Your Work with Wax or Sealant
The final and vital step is to protect your freshly polished paint with a coat of wax or paint sealant. Polishing removes a minimal layer of clear coat, leaving the paint slightly more vulnerable. Waxing or sealing strengthens the clear coat and provides a protective barrier against environmental contaminants, helping to prevent future swirl marks.
When waxing your car:
- Use a high-quality automotive wax or sealant.
- Apply a small amount of wax to an applicator pad.
- Work in small sections.
- Apply wax in thin, even coats using circular motions.
- Allow the wax to haze slightly according to product instructions.
- Remove excess wax with a clean microfiber towel.
For optimal results, wax your car in a shaded or enclosed space like a garage to prevent the wax from drying too quickly and to avoid dust contamination.
Conclusion
Swirl marks are a common car paint issue, but they don’t have to be a permanent problem. By understanding their causes and following this detailed DIY guide, you can effectively repair swirl marks and restore your car’s paint to a showroom shine. While the process requires some time and effort, the results are well worth it.
If you prefer a professional touch, detailing experts like Car Repair Online are here to help. Our skilled team offers comprehensive car detailing services, including expert swirl mark removal. Contact us today to learn more and schedule an appointment to bring back the brilliance of your car’s paint!