It’s a familiar frustration for car owners: a pristine car interior marred by an unsightly hole in the upholstery. Whether it’s from a stray ember, a pet’s claw, or just wear and tear, a small hole can quickly detract from your car’s overall appeal. Before you consider expensive professional repairs or ill-fitting seat covers, you should know that fixing minor damage yourself is entirely achievable and budget-friendly.
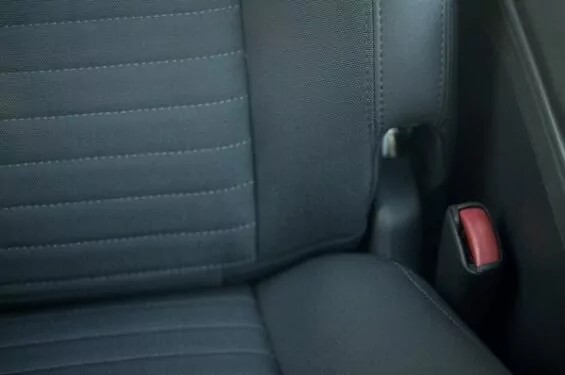
 Close-up showing the process of repairing a small hole in car upholstery with a fabric patch and adhesive
This guide will walk you through simple, step-by-step methods to effectively repair small holes in your car upholstery, focusing primarily on fabric seats. Let’s restore your car’s interior and keep it looking its best.
Assessing the Damage and Safety
Before you begin any repair, it’s crucial to properly assess the damage. For minor holes and tears in fabric upholstery, DIY repair is often a viable solution. However, if the damage is extensive, involves leather upholstery, or affects critical safety components like seat belts, it’s always best to consult a professional. Attempting to repair damage to safety equipment yourself could compromise the vehicle’s safety features.
Keep in mind that while these DIY methods can significantly improve the appearance of your upholstery, they might not result in an invisible repair. For damage in highly conspicuous areas or for those seeking a flawless finish, professional upholstery repair services might be a more suitable option.
Simple Steps to Repair Small Holes in Cloth Car Upholstery
For small holes, particularly in cloth seats, a patching technique is usually the most effective DIY approach. Here’s how you can tackle it:
1. Gather Your Repair Supplies
To effectively repair a small hole in your car’s cloth upholstery, you’ll need to gather a few essential supplies:
- Fabric Patch: The key to a seamless repair is using a patch fabric that closely matches the color and texture of your car’s existing upholstery. You might be able to source matching fabric from under the seat (if there’s excess material) or purchase a similar fabric from a craft or fabric store.
- Fabric Adhesive or Upholstery Interfacing: Fabric adhesive is a glue specifically designed for fabrics. Upholstery interfacing is a heat-activated adhesive web that bonds fabric together when ironed. Both are effective for patching holes.
- Scissors or Utility Knife: For precisely cutting the patch and adhesive.
- Iron (if using interfacing): To activate heat-sensitive interfacing.
- Optional: Upholstery Needle and Thread: For reinforcing the patch edges, especially for larger small holes, adding extra durability.
2. Prepare the Damaged Area
Clean the area around the hole thoroughly. Use a vacuum cleaner to remove any loose dirt, debris, or frayed fabric pieces. This will ensure a clean surface for the adhesive to bond properly. Trim any loose threads around the hole’s edges for a neater repair.
3. Cut and Apply the Fabric Patch
- Measure and Cut: Carefully measure the hole, adding about half an inch of overlap on all sides. Cut your chosen fabric patch to this size, ensuring clean, straight edges for a neat finish.
- Apply Adhesive: If using fabric adhesive, apply it evenly to the back of your fabric patch, ensuring you cover the entire surface. If using interfacing, cut a piece of interfacing slightly larger than the hole and position it underneath the damaged upholstery, inside the hole.
- Position and Secure the Patch: Carefully position the fabric patch over the hole, ensuring it’s centered and covers the damaged area completely. Gently press the patch down to ensure good contact with the adhesive or interfacing.
- Heat Seal (for Interfacing): If using heat-activated interfacing, follow the manufacturer’s instructions to apply heat with an iron. Usually, this involves placing a pressing cloth over the patch and applying a medium heat iron for a specified time to activate the adhesive and bond the patch to the upholstery.
4. Finishing Touches
Once the adhesive has dried or the interfacing has cooled, check the repair. If you opted to reinforce with needle and thread, carefully stitch around the edges of the patch to further secure it and blend it with the surrounding upholstery. Avoid pulling the stitches too tight, which could distort the fabric.
Repairing Leather Upholstery Scratches (For Holes, Seek Professional Help)
While this guide focuses on fabric upholstery hole repair, it’s worth noting that leather upholstery requires different techniques. Small scratches on leather can sometimes be improved with leather conditioning creams or specialized leather scratch repair kits. However, repairing holes in leather upholstery is significantly more complex and generally requires professional expertise. Leather repair often involves fillers, dyes, and specialized techniques to restore the material’s look and feel, making it a task best left to professionals.
Conclusion: DIY Repair for a Fresher Car Interior
Repairing small holes in your car’s cloth upholstery is a rewarding DIY project that can save you money and refresh your vehicle’s interior. By following these simple steps and taking your time, you can effectively address minor damage and maintain the overall appearance and value of your car. Remember to assess the damage properly and consider professional help when dealing with safety-related issues or extensive damage, especially to leather upholstery. With a little effort, you can keep your car’s interior looking its best for years to come.

