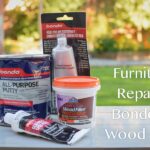
Repairing minor damage to your car’s body, such as small holes, is a manageable task you can undertake at home. This guide provides a step-by-step approach to effectively repair small holes, ensuring a smooth and professional finish.
Step-by-Step Guide to Repairing a Small Hole in Your Car Body
Step 1: Thoroughly Clean the Area
Begin by meticulously cleaning the area around the hole. This is crucial for ensuring proper adhesion of repair materials. Remove all traces of dirt, wax, rust, and any other contaminants. Use soap and water, followed by a wax and grease remover for best results. A clean surface is paramount for a successful and lasting repair.
Step 2: Sand the Damaged Area
Sanding is essential to prepare the surface for body filler. Use #180 or #220 grit aluminum oxide sandpaper, or the specific type recommended for your vehicle’s body material (plastic or aluminum). Consult with professionals at an auto supply store for the correct sandpaper.
Alt text: Preparing car body for repair by sanding the area around a small hole to ensure proper adhesion of body filler.
It’s important to feather-edge the paint surrounding the hole. This involves gently sanding outwards from the damage, blending the edges of the existing paint. Feathering prevents the old paint from lifting or chipping under the new repair and creates a seamless transition. Work carefully inwards to avoid enlarging the damaged area.
Step 3: Mix Body Filler
Prepare your body filler according to the manufacturer’s instructions. Crucially, only mix a small amount of filler and hardener that you can use within its working time. Body filler hardens relatively quickly, so mixing in small batches prevents waste and ensures you’re working with fresh material.
Step 4: Prepare the Hole for Filler Application
Depending on whether the hole is in a metal, fiberglass, or plastic part of your car body, the preparation will slightly differ.
- For metal body panels: To provide a backing for the filler, use fiberglass screening or fine aluminum chicken wire. Place this material beneath the hole, on the underside of the car body. This creates a stable base for the filler to adhere to.
Alt text: Securing fiberglass screen underneath a hole in a car body panel to provide support for body filler application during car body repair.
- For fiberglass or plastic components: Utilize an appropriate patch kit specifically designed for these materials. These kits, available at auto supply stores, typically include reinforcing mesh and specialized resins suitable for plastic or fiberglass repair.
Regardless of the material, ensure the area under the edges of the hole is thoroughly cleaned to remove any dirt or loose paint. To secure the backing patch (fiberglass screen or patch kit components), mix a very small amount of body filler and hardener. Apply this mixture to the edges of the screen or patch and the surrounding area of the hole. This will hold the backing in place. Allow this initial patch to dry for several hours before proceeding to the next step.
Step 5: Apply the Body Filler
Apply the mixed body filler to the prepared hole. Work deliberately and carefully to confine the filler to the damaged area, avoiding unnecessary spreading onto the surrounding paint. Use a plastic spreader or putty knife to apply the filler smoothly. The filled area should be slightly raised above the surrounding car body surface. This excess material will be sanded down to a smooth, even level later.
Step 6: Initial Shaping and Leveling
As the body filler begins to harden, reaching a consistency similar to firm cheese, use a perforated body file or a cheese grater-like tool to reduce the filler down to almost the level of the surrounding paint. This step is easier while the filler is still slightly pliable and removes the bulk of the excess material efficiently.
Step 7: Sanding to a Smooth Finish
Allow the body filler to fully cure and become completely dry and hard. This usually takes at least 20 to 30 minutes, but refer to the product instructions for specific drying times. Once fully cured, use medium-grit sandpaper to sand the filled area. The goal is to shape the filler to perfectly match the contours of the surrounding car body surface. Gradually refine the sanding using finer grits of sandpaper until the repair is smooth and indistinguishable from the original panel.
Step 8: Priming and Painting
Once the repaired area is smooth and even with the surrounding surface, it’s time for priming and painting. Apply several thin coats of automotive primer to the repaired section. Primer helps to fill any minor imperfections and provides a uniform surface for paint adhesion. After each coat of primer is dry, lightly sand it with a fine sanding block to achieve a perfectly smooth surface. To check for smoothness, wet the primed area and observe the light reflection; any imperfections will be more apparent when wet. Finally, apply touch-up paint that matches your car’s color code, following the paint manufacturer’s instructions for best results.
Conclusion
By following these steps, you can effectively repair small holes in your car body at home, saving on professional repair costs and maintaining the appearance of your vehicle. Remember to always prioritize safety and use appropriate protective gear when working with automotive repair materials. With patience and attention to detail, you can achieve a professional-looking repair.

