Leather car seats add a touch of luxury and comfort to any vehicle. However, over time, they can be susceptible to cracks, especially with regular wear and tear. While a small crack may seem like a minor issue, it can quickly worsen if left unattended. The good news is that repairing a small crack in your leather car seat is a manageable DIY project that can save you time and money compared to reupholstering or visiting a professional.
This comprehensive guide will walk you through the steps on how to repair a small crack in your leather car seat, restoring its pristine look and extending its lifespan.
Assessing the Damage: Know Your Enemy
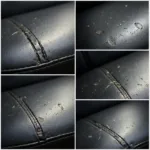
Before you begin the repair process, it’s crucial to assess the severity of the crack in your leather car seat.
- Size Matters: Is the crack small and superficial, or does it penetrate deep into the leather?
- Location, Location, Location: The location of the crack can also determine the complexity of the repair. Cracks on the seating surface may experience more stress and friction compared to cracks on the sides or back of the seat.
Gather Your Repair Arsenal
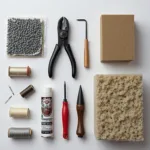
Having the right tools and materials on hand will make the repair process smoother and more effective. Here’s a list of what you’ll need:
- Leather Cleaner: Use a dedicated leather cleaner to remove dirt, oils, and debris from the cracked area.
- Leather Filler: This is your secret weapon against cracks. Choose a high-quality leather filler that matches the color of your car seat.
- Applicator Tools: Small spatulas, palette knives, or even toothpicks can be used to apply the leather filler precisely.
- Sandpaper: Fine-grit sandpaper (400-600 grit) is essential for smoothing out the filler and blending it with the surrounding leather.
- Leather Conditioner: Once the repair is complete, a good leather conditioner will help moisturize the leather and prevent future cracks.
- Clean Cloths: Microfiber cloths are perfect for wiping away excess cleaner, conditioner, and dust.
Step-by-Step Guide to Repairing a Small Crack
Follow these steps to effectively repair a small crack in your leather car seat:
1. Prep is Key: Thoroughly clean the area around the crack with a leather cleaner and a clean cloth. This ensures the filler adheres properly.
2. Fill the Void: Using your applicator tool, carefully fill the crack with the leather filler. Apply thin layers, pushing the filler into the crack and ensuring it’s level with the surrounding leather surface.
3. Smooth Operator: Once the filler is dry (refer to the manufacturer’s instructions), use fine-grit sandpaper to gently sand down any excess filler and create a seamless blend with the leather.
4. Buff It Up: With a clean, dry cloth, buff the repaired area to remove any residue and restore the leather’s natural sheen.
5. Condition for Protection: Apply a leather conditioner to the entire seat, including the repaired area. This will help keep the leather supple, prevent drying and cracking, and maintain the repair’s integrity.
Pro Tips for a Flawless Finish
- For deeper cracks, you may need to apply multiple thin layers of leather filler, allowing each layer to dry completely before applying the next.
- If the crack is near a seam, consider using a flexible leather adhesive along with the filler to reinforce the repair.
- Practice your filling and sanding techniques on a hidden area of the leather seat first to get a feel for the materials and avoid any mishaps.
“Many car owners underestimate the importance of regular leather conditioning,” says John Davis, a seasoned automotive upholsterer with over 20 years of experience. “Regular conditioning not only keeps the leather looking its best but also helps prevent cracks from forming in the first place.”
Beyond the Quick Fix: Preventing Future Cracks
Prevention is always better than cure. Here are some tips to keep your leather car seats crack-free:
- Regular Cleaning: Clean your leather seats with a dedicated cleaner at least every three months, or more frequently if needed.
- Condition, Condition, Condition: Apply a leather conditioner every 1-2 months to keep the leather moisturized and prevent drying and cracking.
- Park Smart: Parking your car in the shade or using a sunshade can help protect your leather seats from harmful UV rays that can cause fading and drying.
- Avoid Sharp Objects: Be mindful of what you bring into your car. Sharp objects like keys, pens, and tools can easily scratch and puncture leather seats.
By following these tips and the repair guide above, you can maintain the beauty and longevity of your leather car seats for years to come.
FAQs about Repairing Small Cracks in Leather Car Seats
Q: Can I use super glue to repair a crack in my leather car seat?
A: While super glue might seem like a quick fix, it’s not recommended for repairing leather car seats. Super glue can create a rigid bond that may crack again with the leather’s natural movement. Also, it doesn’t blend well with leather and can leave a noticeable mark.
Q: How much does it cost to have a professional repair a crack in a leather car seat?
A: The cost of professional repair can vary depending on the severity of the damage and the location of the repair shop. However, you can expect to pay anywhere from $100 to $300 or more for a professional repair.
Q: Can I repair a large crack in my leather car seat myself?
A: While this guide focuses on repairing small cracks, larger cracks or tears may require more advanced techniques and materials best handled by professional upholstery shops.
Need More Help with Your Car Seats?
For more comprehensive car repair guides and expert advice, visit CarRepairOnline. We’re your trusted source for all things automotive!
Need personalized assistance? Reach out to our 24/7 support team via WhatsApp: +1(641)206-8880, or Email: [email protected]. We’re always here to help you get back on the road!


