
Even minor blemishes like scratches on your car’s body or wheels can detract from its overall appearance, making you feel less proud of your vehicle. While wheel scratches might seem like a small issue, especially given their location, addressing them can significantly enhance your car’s aesthetics.
This guide will walk you through the process of repairing scratched car wheels using readily available tools and straightforward steps, allowing you to restore your wheels to their former glory.
Understanding the Common Causes of Scratched Car Wheels
Wheel rims are particularly susceptible to scratches due to their position and exposure. Often, these scratches occur because the rims are in a driver’s blind spot when maneuvering, making it challenging to avoid obstacles. Here are the primary culprits behind scratched rims:
Curb Damage
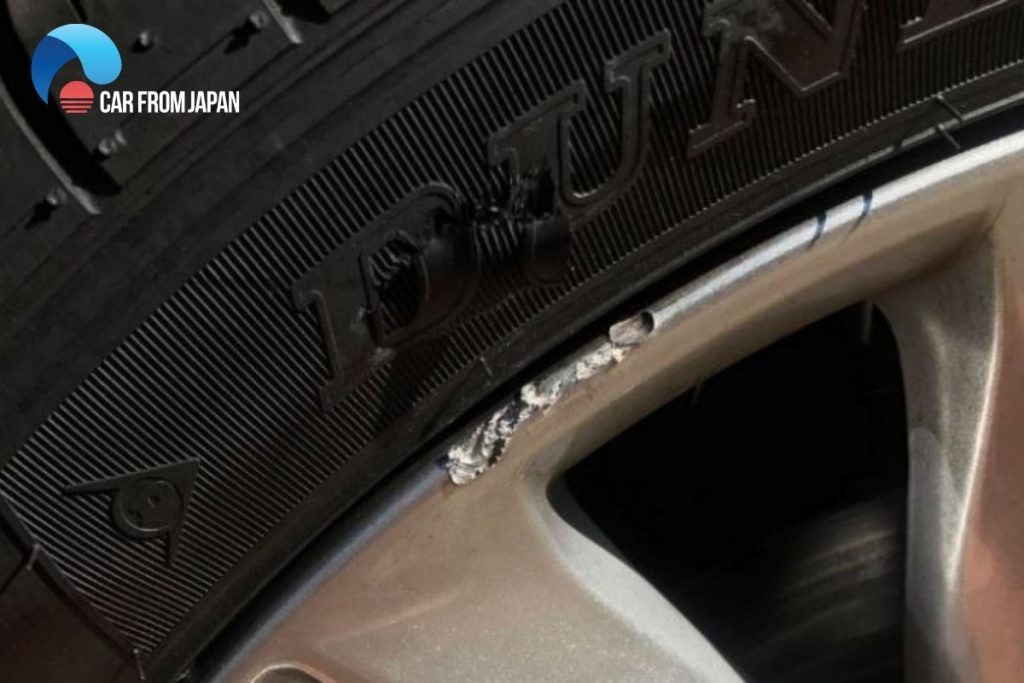
Alt text: Close-up of curb rash scratches on a car wheel rim, showing typical damage from scraping against a curb during parking.
One of the most frequent causes of rim damage is curb rash. This happens when you accidentally scrape your wheels against curbs while parking or making tight turns. Misjudging the distance to the curb or turning too sharply can easily lead to contact, resulting in unsightly scratches, scrapes, and even dents on your rims.
Beyond curbs, everyday driving conditions also contribute to wheel scratches. Potholes, road debris, and minor collisions can all leave their mark on your rims, ranging from superficial scratches to more significant damage. While minor surface scratches can often be concealed with touch-up paint, deeper scratches may necessitate more extensive repairs or even wheel replacement.
Improper Tire Changing
Changing tires, while a routine maintenance task, can also inadvertently cause rim scratches if not done carefully. Using tools like tire irons or jacks without proper caution and protection can lead to accidental scrapes and scratches on the rim surface. It’s crucial to handle tire changing equipment with care and ensure proper padding to prevent damage to your wheels.
Harsh Cleaning Methods
Believe it or not, even cleaning your wheels can sometimes cause scratches if you’re not careful. Using abrasive cleaning agents or stiff brushes that are too harsh for the wheel’s finish can result in scratches. It’s essential to use cleaning products and tools specifically designed for car wheels to avoid damaging their delicate surfaces. Opt for gentle, pH-balanced cleaners and soft brushes or sponges to maintain the pristine condition of your rims.
Understanding these common causes allows you to be more mindful and take preventative measures to minimize the risk of scratching your wheel rims. Now, let’s delve into how to repair those scratches when they do occur.
How to Fix Scratched Rims – A Step-by-Step Guide
Scratched rims are not only an eyesore but can also diminish your vehicle’s overall value. Fortunately, depending on the extent of the damage, you can often repair these scratches yourself, saving time and money compared to professional repair services. Below is a detailed guide to help you through the rim scratch repair process:
Tools You’ll Need for DIY Rim Repair
Before you begin, gather the following tools and materials to ensure a smooth and efficient repair process:
- Mild Soap or Wheel Cleaner: A pH-balanced car wash soap or specialized wheel cleaner is essential for cleaning your rims before and after the repair. This removes dirt, grime, and brake dust, allowing for proper assessment and adhesion of repair materials.
- Soft Brush or Sponge: Use a non-abrasive soft brush or sponge to gently scrub the rim surface and remove contaminants without causing further scratches.
- Clean Microfiber Cloths: Microfiber cloths are ideal for drying the rims and applying polishing compounds. They are lint-free and soft, preventing scratches during wiping and buffing.
- Fine-Grit Sandpaper (800-1200 grit): Fine-grit sandpaper is crucial for smoothing out scratches. Start with 800 grit for more noticeable scratches and move to 1000 or 1200 grit for finer scratches and blending.
- Touch-Up Paint or Rim Repair Kit (Optional): For scratches that are still visible after sanding, touch-up paint matching your wheel color or a specialized rim repair kit can be used to fill and conceal the damage. Rim repair kits often include fillers, applicators, and sometimes color-matched paints.
- Polishing Compound: A polishing compound designed for automotive finishes is used to buff and polish the repaired area, restoring shine and blending the repair seamlessly with the surrounding rim surface.
- Protective Gloves and Safety Glasses: Safety is paramount. Wear protective gloves to shield your hands from cleaning chemicals and repair materials, and safety glasses to protect your eyes from debris and splashes.
Alt text: Demonstrating the application of a wheel repair compound from a kit onto a scratched car wheel rim using a small applicator tool.
With your tools ready, let’s proceed with the step-by-step repair process:
Step 1: Thoroughly Clean the Wheel Rim
Begin by meticulously cleaning the scratched wheel rim to remove all traces of dirt, grime, brake dust, and road debris. Use your mild soap or wheel cleaner, applying it with a soft brush or sponge. Pay close attention to the scratched area and any crevices where dirt might accumulate. Once cleaned, thoroughly rinse the rim with clean water and allow it to dry completely. This clean surface is crucial for proper scratch assessment and ensuring the repair materials adhere correctly.
During this cleaning phase, carefully examine the scratches to determine their depth and severity. Superficial scratches that haven’t penetrated the metal are ideal for DIY repair. However, if you encounter deep scratches, significant gouges, or structural damage, professional rim repair or replacement might be necessary.
Step 2: Gently Sand the Scratched Area
Using your fine-grit sandpaper (starting with 800 grit), lightly sand the scratched area. Employ a circular motion and focus specifically on the scratched portion of the rim. The goal here is to smooth out the edges of the scratch and create a level surface. Apply gentle pressure and avoid sanding excessively in one spot, which could create unevenness. If the scratch is located near the tire, use painter’s tape to carefully mask off the tire sidewall, protecting it from accidental sanding. After sanding with 800 grit, you can refine the area further with 1000 or 1200 grit sandpaper for an even smoother finish.
Step 3: Fill Deeper Scratches (Optional)
If, after sanding, the scratches are still noticeable or have some depth, you can use touch-up paint or a specialized rim repair kit to fill them. If using touch-up paint, apply thin, even coats, allowing each coat to dry completely according to the manufacturer’s instructions. For rim repair kits, follow the specific instructions provided with the product. These kits often include a filler material that you apply to the scratch to level it with the surrounding rim surface. Apply the filler carefully, ensuring it covers the scratch evenly and smoothly. Allow the filler to dry completely as instructed.
Step 4: Buff and Polish for a Seamless Finish
Once the touch-up paint or repair material is fully dry, it’s time to buff and polish the repaired area to blend it seamlessly with the rest of the rim. Apply a small amount of polishing compound to a clean microfiber cloth. Gently rub the compound onto the repaired area using circular motions. Continue buffing until the repaired area matches the shine and texture of the surrounding rim surface and the scratch is no longer visible. You may need to apply more polishing compound and buff repeatedly to achieve a flawless finish.
Step 5: Final Cleaning and Protection
After buffing and polishing, give the entire rim a final cleaning to remove any polishing compound residue and dust from the repair process. Use a clean microfiber cloth and a mild soap or wheel cleaner if needed. Rinse the rim thoroughly and dry it completely. For added protection and shine, you can apply a wheel sealant or wax to the entire rim. This will help protect your repair and keep your wheels looking their best for longer.
When to Consider Professional Rim Repair
While many rim scratches can be successfully repaired at home using these DIY methods, there are situations where professional rim repair is recommended. If your wheels have:
- Deep or Extensive Damage: Deep gouges, dents, or significant areas of scratching may require specialized tools and techniques that are beyond the scope of DIY repair.
- Structural Damage: If you suspect any structural damage to the rim, such as bending or cracking, it’s crucial to seek professional repair or replacement immediately, as driving on structurally compromised wheels can be dangerous.
- Complex Finishes: Wheels with specialized finishes like chrome plating, machine finishes, or painted accents might be challenging to repair to a factory-quality finish at home. Professional rim repair technicians have the expertise and equipment to handle these complex finishes.
In these cases, consulting with a professional wheel repair service will ensure the damage is repaired correctly and safely, maintaining the integrity and appearance of your wheels.
Conclusion
Repairing scratches on your car wheels is a rewarding DIY project that can significantly improve your vehicle’s appearance and your pride in ownership. By following these steps and using the right tools, you can effectively address minor scratches and curb rash, restoring your wheels to their former glory. Remember to take your time, be patient, and prioritize safety throughout the process. For more severe damage, don’t hesitate to seek professional help to ensure your wheels are repaired correctly and safely. With a little effort, you can keep your wheels looking their best and enhance the overall aesthetics of your car.