Scratched leather car seats can make your car’s interior look worn and detract from its overall value. Luckily, you don’t always need a professional to restore your leather seats to their former glory. This comprehensive guide will walk you through the steps on how to repair scratched leather car seats yourself, saving you money and keeping your car looking its best.
Assessing the Damage: What Kind of Scratch is It?
Before you start gathering your materials, it’s essential to identify the type of scratch you’re dealing with. Leather scratches are categorized into two main types:
- Surface Scratches: These are minor abrasions that haven’t penetrated the leather’s top layer. They appear lighter in color than the surrounding leather and can often be buffed out.
- Deep Scratches: These scratches have penetrated the leather’s top layer, exposing the fibers beneath. They appear darker and require more than just buffing to repair.
Gathering Your Supplies: The Right Tools for the Job
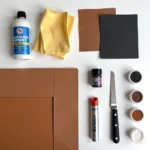
Having the right tools is crucial for a successful leather seat repair. Here’s what you’ll need:
- Cleaning Supplies: Leather cleaner, microfiber cloths, rubbing alcohol
- Repair Materials: Leather filler (for deep scratches), leather dye (if needed), leather adhesive (if needed)
- Tools: Soft-bristled brush, hairdryer or heat gun, palette knife (for leather filler), sandpaper (fine-grit), masking tape.
How to Repair Light Scratches on Leather Car Seats
For light, surface-level scratches, follow these steps:
- Clean the Area: Start by cleaning the scratched area with a dedicated leather cleaner and a microfiber cloth. This removes dirt and grime that could worsen the scratch during the repair process.
- Apply Rubbing Alcohol: Lightly dampen a clean microfiber cloth with rubbing alcohol and gently rub the scratch. This helps to remove any remaining debris and prepares the leather for treatment.
- Buff the Scratch: Using a clean, dry microfiber cloth, buff the scratched area in circular motions. This will help to blend the scratch with the surrounding leather.
- Apply Leather Conditioner: Once finished, apply a high-quality leather conditioner to the entire seat to nourish the leather and restore its natural oils.
How to Repair Deep Scratches on Leather Car Seats: A Step-by-Step Guide
Repairing deep scratches requires a more involved approach. Here’s how to tackle them:
- Clean and Prepare: Clean the scratched area thoroughly with leather cleaner and let it dry.
- Apply Leather Filler: If the scratch is deep, use a leather filler to fill in the gap. Apply the filler with a palette knife, ensuring it’s level with the leather surface. Let it dry completely.
- Sand the Filler: Once the filler is dry, gently sand it down using fine-grit sandpaper. The goal is to create a smooth, even surface.
- Apply Leather Dye (If Needed): If the scratch is significantly lighter than the surrounding leather, apply a matching leather dye to the repaired area. Use a cotton swab or a small brush for precise application.
- Apply Heat: Using a hairdryer on a low setting or a heat gun from a distance, gently heat the repaired area. This helps the leather dye to set and prevents it from transferring.
- Apply Leather Conditioner: Once cooled, apply a leather conditioner to the entire seat to keep it moisturized and prevent future cracking.
Expert Insights on Leather Car Seat Repair
“Many car owners underestimate the importance of regular leather conditioning,” says John Smith, a senior automotive technician with over 20 years of experience. “Regular conditioning not only keeps the leather supple and looking new, but it also helps to prevent future scratches and damage.”
 Applying Leather Conditioner to Car Seat
Preventing Future Scratches: Proactive Measures for Long-Lasting Leather
- Regular Cleaning: Dirt and grime can act like sandpaper on leather, causing micro-scratches. Clean your leather seats regularly with a dedicated leather cleaner.
- Conditioning is Key: Leather conditioners replenish the natural oils that keep leather soft and supple. Aim to condition your leather seats at least every three months, or more frequently if you live in a harsh climate.
- Avoid Sharp Objects: Be mindful of sharp objects like keys, pens, and even belt buckles that could scratch your leather seats. Consider using seat covers for added protection.
- Mindful Entry and Exit: Be careful when getting in and out of your car, especially if you’re wearing tight clothing or carrying heavy bags, as these can easily rub against the leather and cause scratches.
Conclusion
Repairing scratched leather car seats is achievable with the right tools, techniques, and a bit of patience. By following the steps outlined in this guide, you can restore your leather seats to their former glory and keep your car’s interior looking its best for years to come. Remember that regular cleaning and conditioning are essential for preventing future scratches and maintaining the beauty of your leather car seats.
For more in-depth guides on car upholstery repair, check out our articles on how to repair rip leather car seat, how to repair car seat upholstery, and how to repair a worn leather car seat.
Need help with a large rip in your leather car seat? Our article on how to repair large rip in leather car seat provides step-by-step instructions and expert advice.
Wondering about the cost of professional leather car seat repair? Visit our page on how much to repair leather car seat for detailed information and price estimates.

