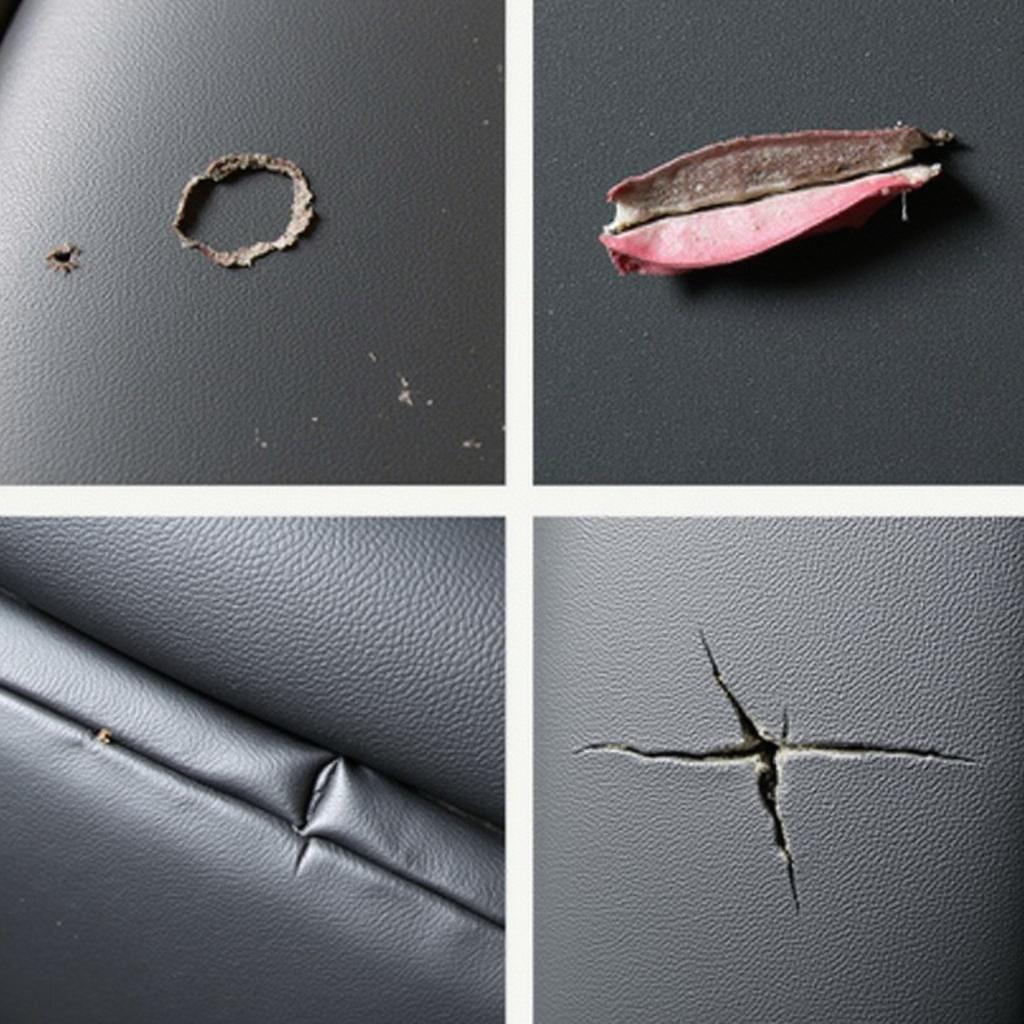
A ripped vinyl car seat can be an eyesore and significantly detract from the overall look of your vehicle’s interior. Luckily, with a few simple tools and a little bit of patience, you can often repair these rips and tears yourself, saving money and restoring your car’s interior to its former glory. Let’s dive into the steps on how to repair ripped vinyl car seats.
Assessing the Damage: Knowing Your Enemy
Before you begin the repair process, it’s essential to assess the extent of the damage to your vinyl car seat.
- Size Matters: A small tear is a much easier fix than a large gash.
- Location, Location, Location: Tears on the seating surface will experience more wear and tear than those on the sides or back of the seat.
- Underlying Issues: Check for any underlying damage, such as broken springs or worn-out foam, that may need to be addressed before repairing the vinyl.
“Knowing the extent of the damage is crucial,” says renowned automotive upholstery expert, Sarah Chen. “It helps determine the appropriate repair method and ensures a long-lasting fix.”
Gathering Your Repair Arsenal: The Right Tools for the Job
Having the right tools is crucial for a successful vinyl car seat repair. Here’s what you’ll need:
- Cleaning Supplies: Isopropyl alcohol, a clean microfiber cloth, and mild soap are essential for prepping the area.
- Vinyl Repair Kit: These kits are readily available online or at auto parts stores and usually contain a vinyl patch, adhesive, a color-matching guide, and application tools.
- Scissors: For trimming the vinyl patch to the desired size and shape.
- Heat Gun or Hairdryer: Heat helps activate the adhesive and make the vinyl more pliable for a seamless repair.
- Roller or Credit Card: Use this to smooth out the patch and remove any air bubbles.
The Repair Process: A Step-by-Step Guide
Now that you have your tools ready, let’s walk through the repair process:
-
Clean the Area: Thoroughly clean the ripped area with isopropyl alcohol to remove dirt, grease, and any debris. Allow it to dry completely.
-
Prepare the Vinyl Patch: If your repair kit doesn’t come with a pre-cut patch, use the provided vinyl material to cut a patch slightly larger than the rip or tear.
-
Apply the Adhesive: Carefully apply the adhesive to the back of the vinyl patch, ensuring even coverage.
-
Position and Adhere: Carefully position the vinyl patch over the rip, ensuring it aligns properly and completely covers the damaged area. Press down firmly on the patch, starting from the center and working your way outwards to eliminate air bubbles.
-
Apply Heat (Optional): If your repair kit recommends using heat, carefully apply heat to the patch using a heat gun or hairdryer. The heat will activate the adhesive and make the vinyl more pliable, resulting in a smoother and more durable repair.
-
Smooth it Out: Use a roller or a credit card to smooth out the patch, ensuring it adheres properly to the seat.
-
Trim any Excess: Carefully trim any excess vinyl around the edges of the patch using sharp scissors.
-
Let it Cure: Allow the adhesive to cure completely as per the manufacturer’s instructions before using the seat.
Preventing Future Rips: Prolonging the Life of Your Vinyl Seats
Prevention is always better than cure! Here are some tips to prevent future rips and tears:
- Regular Cleaning: Regularly cleaning your vinyl car seats with a mild cleaner and a soft cloth will help prevent dirt and grime from building up and potentially causing damage.
- Avoid Sharp Objects: Be mindful of sharp objects, such as keys, pens, and tools, that can easily puncture or tear vinyl.
- Condition Your Seats: Using a vinyl conditioner will help keep the material supple and less prone to cracking or tearing.
When to Call in the Professionals: Knowing Your Limits
While minor rips and tears can often be repaired at home, some situations may require professional intervention:
- Extensive Damage: If the rip is extremely large or complex, it’s best to leave it to the professionals.
- Airbag Concerns: Avoid attempting repairs near or on the side panels of seats with airbags, as improper repairs can interfere with their deployment.
- Lack of Confidence: If you’re unsure about any aspect of the repair process, it’s always wise to seek professional help.
“Don’t underestimate the value of professional expertise,” advises Ms. Chen. “For significant damage or concerns about airbags, always consult a reputable upholstery shop.”
Conclusion: A Stitch in Time Saves Nine
Repairing a ripped vinyl car seat doesn’t have to be a daunting task. By following these steps and using the right tools, you can restore your car’s interior and prevent further damage. Remember, regular maintenance and prompt repairs can go a long way in prolonging the life of your vinyl car seats and keeping your vehicle looking its best. For more specific advice on vinyl car seat repair, explore our other helpful articles: Can you repair a car seat with duct tape?, Leather car seat repairs near me.


