
Plastic trim is ubiquitous in modern vehicles, enhancing both the interior and exterior aesthetics. However, being made of plastic, these parts are susceptible to damage from sun exposure, impacts, and general wear and tear. Cracks, breaks, and fading are common issues that can detract from your car’s appearance. Replacing these trim pieces can be costly and sometimes impossible, especially for older or classic cars. Fortunately, repairing plastic trim is often a viable and cost-effective DIY solution. This guide will walk you through several methods to repair plastic trim, restoring its look and extending its lifespan.
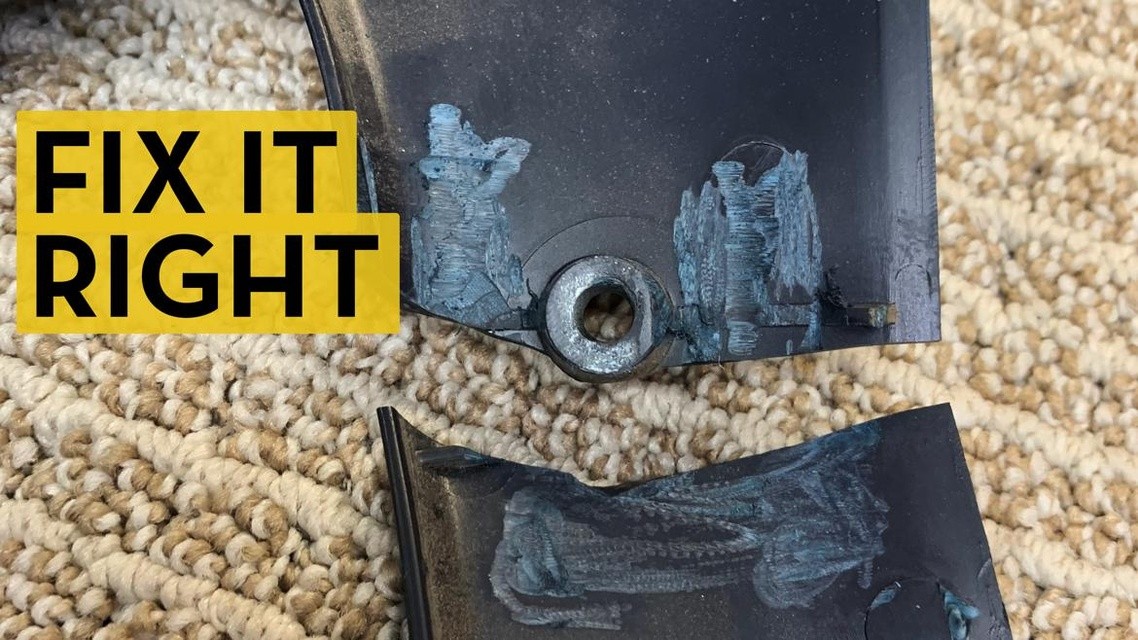 Cracked A-pillar trim piece of a Volkswagen Rabbit GTI before repair, highlighting common plastic trim damage in older vehicles.
Identifying the Type of Plastic
Before starting any repair, it’s helpful to identify the type of plastic you’re dealing with. Many automotive plastic trim pieces, especially interior parts from recent decades, are made from ABS (Acrylonitrile Butadiene Styrene). ABS plastic is known for its durability and impact resistance. Some plastics might be marked with recycling symbols and abbreviations like ABS, PP (Polypropylene), or PC (Polycarbonate). Knowing the type of plastic can guide your choice of repair method and adhesives. For instance, ABS cement works exceptionally well on ABS plastics, creating a strong and flexible bond.
Common Plastic Trim Repair Methods
Several methods can be employed to repair damaged plastic trim, depending on the severity and type of damage. Here are some of the most effective techniques:
Stitching and Adhesives
For simple cracks, sometimes a combination of stitching and adhesive is sufficient. This method involves drilling small holes on either side of the crack and using zip ties or wire to “stitch” the pieces together for alignment and stability. Then, a suitable plastic adhesive or epoxy can be applied to the crack line to create a strong bond. This is a straightforward approach for relatively clean breaks.
ABS Cement and Acetone Method
For ABS plastic, ABS cement offers a superior bonding solution. Alternatively, a technique involving acetone and ABS plastic can create a very effective filler and adhesive. This method involves dissolving small pieces of ABS plastic (like scraps from ABS pipes) in acetone to create a slurry. This ABS-acetone mixture can then be applied to cracks or gaps as a filler. As the acetone evaporates, it leaves behind a solid ABS weld, seamlessly integrating with the original plastic. This is particularly useful for filling gaps and rebuilding missing sections of ABS trim.
Hot Stapler Technique
For more significant cracks or breaks, especially in stress-bearing areas, a hot stapler can provide structural reinforcement. Hot staplers use heated staples to embed metal staples into the plastic, effectively “stitching” the broken pieces together from the inside. This creates a very strong mechanical bond and is ideal for splits or cracks that need robust reinforcement. Hot stapling is particularly useful for bumpers, dashboards, and other trim pieces subjected to stress and vibration.
Plastic Welding
Plastic welding is another advanced technique that uses heat to melt and fuse plastic pieces together. A plastic welder uses a hot air stream to melt the edges of the broken plastic, and then filler rods made of compatible plastic are used to add material and reinforce the joint. This method creates a very strong and seamless repair, essentially re-welding the plastic together. Plastic welding is suitable for various types of plastic and is excellent for repairing bumpers, body panels, and other exterior trim components.
Step-by-Step Guide for Basic Plastic Trim Repair (Adhesive Method)
While specific steps may vary depending on the chosen method, a general process for adhesive-based repair includes:
- Cleaning: Thoroughly clean the broken plastic trim pieces. Use soap and water to remove dirt and grime. For stubborn residues, isopropyl alcohol can be used to degrease the surfaces, ensuring proper adhesion.
- Alignment: Carefully align the broken pieces to ensure a proper fit. Use clamps or tape to hold the pieces in the correct position if necessary.
- Applying Adhesive: Apply a plastic-specific adhesive or epoxy along the crack or break line. Follow the manufacturer’s instructions for application and curing time. For the ABS-acetone method, apply the mixture to the damaged area using a brush or applicator.
- Reinforcement (Optional): For added strength, especially with adhesives, consider embedding fiberglass mesh tape into the adhesive along the backside of the repair. This adds structural integrity, similar to rebar in concrete.
- Curing and Finishing: Allow the adhesive or filler to cure completely as per the product instructions. Once cured, you can sand down any excess adhesive or filler to create a smooth surface. For cosmetic improvements, the repaired area can be painted to match the surrounding trim.
Conclusion
Repairing plastic trim is a rewarding DIY task that can save you money and extend the life of your vehicle’s components. By understanding the type of plastic and employing the appropriate repair techniques—whether it’s simple adhesives, ABS cement, hot stapling, or plastic welding—you can effectively restore damaged plastic trim. Tackling these repairs yourself not only preserves the original parts of your car but also contributes to maintaining its overall value and appearance. With the right tools and methods, you can confidently repair plastic trim and keep your car looking its best.