Daily usage of your car, from family trips to grocery runs, inevitably leads to wear and tear, especially on interior plastic door panels. These panels are prone to scratches and scuff marks that can detract from your car’s overall appearance and even reduce its resale value. No car owner wants to see unsightly scratches marring their vehicle’s interior, but fortunately, you can take matters into your own hands. This guide will walk you through effective methods on how to repair plastic scratch door panels car, enhancing both the look and value of your vehicle.
Understanding Common Types of Door Panel Scratches
Before you grab your tools, it’s crucial to identify the type of scratch you’re dealing with on your car door panels. Different scratches require different approaches for effective repair.
Scuff Marks
Common Causes:
Scuff marks are usually the most superficial type of damage. They occur when something rubs against the plastic door panels, often leaving behind traces of dirt or color from shoes, clothing, or bags as people enter and exit the vehicle.
How to Address:
These marks are typically surface-level and don’t penetrate the plastic. Often, a simple cleaning solution is enough to remove them. Regular cleaning and being mindful of items rubbing against the door panels can prevent scuffs.
Deep Scratches
Common Causes:
Deeper scratches are more noticeable and are caused by sharper objects coming into contact with the door panels. Keys, tools, or even unsecured items in door pockets can easily create these more significant scratches.
How to Address:
Repairing deep scratches requires a more involved process. It might involve techniques like sanding and heating to smooth out the damage and restore the panel’s appearance. Prevention is key here – ensure sharp objects are stored safely and away from door panels.
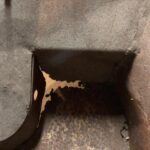
Chips
Common Causes:
Chips represent actual damage to the plastic material itself. They can be caused by impacts from objects or simply develop over time due to wear and tear, especially in older vehicles where plastic can become more brittle.
How to Address:
Chips are more challenging to repair than scratches. If possible, preserving any broken pieces is helpful. Repairing chips often involves filling the damaged area and blending it with the surrounding plastic, a more intricate process.
Cracks
Common Causes:
Cracks in door panels are often a result of prolonged exposure to sunlight, which can degrade and weaken the plastic over time. Stress on the panels, particularly around door edges or hinges, can also lead to cracking.
How to Address:
Cracks indicate structural weakness in the plastic. Prevention is important – using sunshades can reduce UV exposure. Repairing cracks might require more extensive methods, potentially involving reinforcing the plastic or even panel replacement in severe cases.
DIY Repair Methods for Plastic Door Panel Scratches
When it comes to repairing scratches on your car door panels, you have a couple of primary options: using a specialized scratch repair kit or undertaking a more hands-on DIY approach. While kits are convenient for minor scratches, tackling the repair manually often yields better results, especially for deeper damage. The following method details how to effectively repair plastic scratch door panels car using a DIY approach.
Essential Tools and Materials
For a professional-quality DIY repair of scratches on your plastic door panels, gather these tools and materials:
- Heat Gun: This tool is crucial for gently heating the plastic, making it pliable for reshaping and scratch reduction.
- Interior Grain Pad: Used to re-texture the plastic surface after heating, helping it match the original factory finish. Grain pads come in various textures, so choose one that closely resembles your door panel.
- Superfine Grit Sandpaper: Essential for smoothing out the repaired area and blending it seamlessly with the surrounding plastic.
- Plastic Scratch Polish Kit: While we’re focusing on DIY, a polish kit can be useful for finishing touches and addressing very light scratches.
- High-Quality Interior Car Cleaner: A good cleaner is vital for removing dirt, grime, and any contaminants from the scratch area, ensuring a clean surface for repair.
Step-by-Step DIY Scratch Repair Process
Step 1: Thoroughly Clean the Damaged Area
Begin by cleaning the scratched area and the surrounding door panel with your interior plastic cleaner. This step is critical. Removing all dirt and debris prevents them from becoming trapped in the plastic during the repair process, which could discolor or compromise the finish. Ensure the area is completely clean and dry before moving to the next step.
Step 2: Gently Apply Heat with a Heat Gun
Using a heat gun set to a medium or low setting, carefully apply heat to the scratched plastic. The goal is to soften the plastic, not melt it. Move the heat gun in a sweeping motion and avoid concentrating heat in one spot for too long. The plastic is ready for the next step when it becomes slightly glossy and loses some of its texture, indicating it’s pliable. Be cautious – overheating can warp or burn the plastic, causing irreversible damage.
Step 3: Re-texture with a Grain Pad
Immediately after heating, while the plastic is still warm and pliable, press the interior grain pad firmly onto the affected area. Apply light but consistent pressure. This step is key to smoothing out deeper scratches and restoring the texture of the plastic to match the original door panel. The grain pad helps to remold the surface, effectively reducing the visibility of the scratch. Choose a grain pad with a texture that closely matches your car’s interior for the best results.
Step 4: Cool and Sand to a Smooth Finish
Allow the heated area to cool and harden completely. Once cooled, the texture should be improved and scratches less visible. However, to achieve a truly seamless finish, you’ll need to lightly sand the area. Use superfine grit sandpaper to gently smooth out any remaining imperfections and ensure the repaired area blends perfectly with the surrounding door panel.
Step 5: Final Clean and Inspection
Clean the repaired area one last time using the interior plastic cleaner, just as you did in Step 1. This removes any sanding dust and reveals the final result. Inspect your work. The scratch should be significantly reduced or even completely gone, and the texture should match the rest of the door panel.
Repairing Light Scratches with a Polish Kit
For very minor scratches or scuff marks on your plastic door panels, a plastic scratch polish kit can be sufficient. These kits typically contain a plastic cleaner, polishing compound, microfiber cloths, and buffing pads.
The process is simpler: clean the area, and then apply the polishing compound using the buffing pads in back-and-forth motions over the scratch. This compound works to fill in and minimize light scratches. After polishing, buff away any excess compound and clean the area. For slightly more stubborn light scratches, you might lightly sand with superfine sandpaper before polishing.
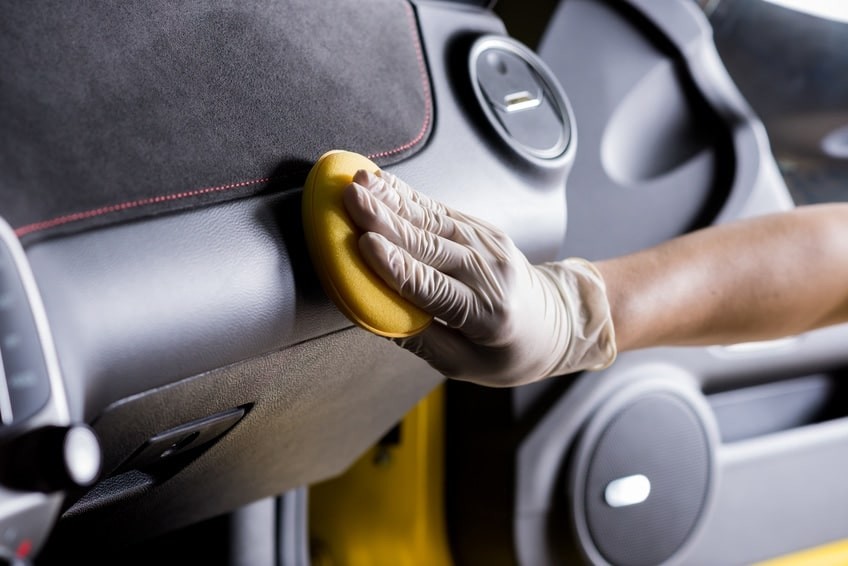
Maintaining and Restoring Door Panel Plastic Trim
After repairing scratches, or even as part of regular car care, consider restoring the overall appearance of your plastic door panels. Over time, plastic trim can fade or lose its luster. Using a plastic restorer pad or spray can revitalize the color and shine, making your door panels look fresh and new.
When applying a restorer, use gentle, circular motions. Avoid excessive scrubbing. Keeping a restorer pad in your glove compartment makes it easy to quickly touch up your interior whenever needed, maintaining that pristine look and protecting your investment.
By following these steps, you can effectively repair plastic scratch door panels car yourself, saving money and maintaining the value and appearance of your vehicle. Remember, regular cleaning and careful handling can prevent many scratches in the first place, keeping your car interior looking its best for longer.