Since the late 1960s, the automotive industry has increasingly incorporated plastics into vehicle design, starting with the Pontiac Endura’s innovative plastic-coated bumper. Today, plastics are integral to both structural and non-structural components of cars. Reinforced plastics offer strength and stability for crucial parts, while unreinforced plastics are utilized in elements like door trims and body moldings.
Whether it’s a minor scratch or more significant damage, knowing how to repair plastic on your car is a valuable skill for any vehicle owner. This guide provides a comprehensive overview of auto body plastic repair, from identifying plastic types to understanding repair techniques.
Understanding Car Plastics and Repair Products
The world of automotive plastics is diverse, and understanding the type of plastic you’re dealing with is the first step in effective repair. Collision repair technicians rely on identifiers, often abbreviations, to determine the polymer composition. These identifiers, standardized by the International Standards Organization (ISO), are also crucial for recycling efforts. Common plastic types include:
- PP: Polypropylene – Known for its chemical resistance and toughness.
- PO: Polyolefin – A broad category encompassing various thermoplastics.
- ABS: Acrylonitrile Butadiene Styrene – Offers a good balance of impact strength and rigidity.
- PC: Polycarbonate – Characterized by its high impact resistance and clarity.
- PE: Polyethylene – Lightweight and flexible, often used in non-structural parts.
- PVC: Polyvinylchloride – Durable and weather-resistant.
Sometimes, manufacturers use polymer blends to achieve specific properties. In such cases, the identifier will reflect all plastics used in the part.
When it comes to car plastic repair products, specialized solutions have been developed to effectively bond and restore these materials. These products are designed to save time and money in collision repair shops by allowing technicians to fix parts instead of replacing them. For customers, this translates to more cost-effective repairs.
Step-by-Step Guide to Repairing Car Plastic
Before you begin any repair, identifying the plastic type and whether it’s fiber-reinforced is crucial for choosing the correct repair method. Most plastic repairs fall into two categories: cosmetic and two-sided.
Assessing the Damage: Cosmetic vs. Two-Sided
The severity of the damage dictates the repair approach.
- Cosmetic damage refers to surface-level issues like scratches, scuffs, or minor dents that don’t penetrate the plastic.
- Two-sided damage is more extensive, involving tears, holes, or punctures that go through the plastic part.
Both cosmetic and two-sided repairs can often be addressed using repair adhesives. Plastic welding is another popular and effective technique employed by professionals. Plastic welding involves pressing plastic surfaces together and then applying heat and pressure to create a strong molecular bond.
Tools and Materials You’ll Need for Plastic Repair
For successful DIY car plastic repair, gather these essential tools and materials:
- Plastic cleaner: Specialized cleaners to remove waxes, dirt, and oils.
- Compressed air: For drying and cleaning surfaces.
- Sandpaper: Various grits for surface preparation and smoothing.
- Body filler (for plastics): To fill dents and imperfections.
- Plastic repair adhesive: Two-part epoxy adhesives are common for plastic repair.
- Plastic welder (optional but recommended for two-sided repairs): For melting and fusing plastic parts.
- Heat gun (alternative to plastic welder for some repairs): To soften plastic.
- Putty knives and spreaders: For applying filler and adhesives.
- Safety gear: Gloves, eye protection, and respirator.
- Refinishing supplies (primer, paint, clear coat): To restore the finish after repair.
The Repair Process: Step-by-Step
Whether you’re tackling cosmetic or two-sided damage, cleanliness is paramount. Always begin by thoroughly cleaning the plastic part with a plastic cleaner and compressed air.
For Cosmetic Damage (Scratches and Minor Dents):
- Clean the area: Thoroughly clean the damaged area and surrounding surface.
- Sand the scratch: Use fine-grit sandpaper to lightly sand the scratch and feather the edges.
- Apply body filler (if needed for dents): For minor dents, apply a thin layer of plastic body filler, following manufacturer instructions. Let it dry completely.
- Sand the filler: Once dry, sand the filler smooth, blending it with the surrounding surface. Start with medium-grit sandpaper and finish with fine-grit.
- Prime the area: Apply plastic primer to the repaired area.
- Paint and clear coat: Apply automotive paint to match the car’s color, followed by a clear coat for protection and shine.
For Two-Sided Damage (Tears and Holes):
- Clean and prepare the area: Clean the plastic thoroughly. Bevel the edges of the damage at a 45-degree angle to create a groove for the adhesive or welding.
- Apply backing (optional but recommended for large holes): For larger holes, you may need to create a backing using fiberglass cloth or metal tape on the backside of the panel to support the repair.
- Apply plastic repair adhesive or weld:
- Adhesive: Apply plastic repair adhesive to the beveled edges and the backing (if used), following manufacturer instructions. Clamp or tape the pieces together and allow the adhesive to cure completely.
- Welding: If using a plastic welder, carefully weld along the crack or hole, fusing the plastic together. Work slowly and avoid overheating the plastic.
- Grind down excess weld or adhesive: Once cured or welded, grind down any excess material using a rotary tool or sandpaper to create a smooth surface.
- Apply body filler (if needed): If there are imperfections, apply a thin layer of plastic body filler, let it dry, and sand smooth.
- Prime, paint, and clear coat: Prime the repaired area, then apply paint and clear coat to match the vehicle’s finish.
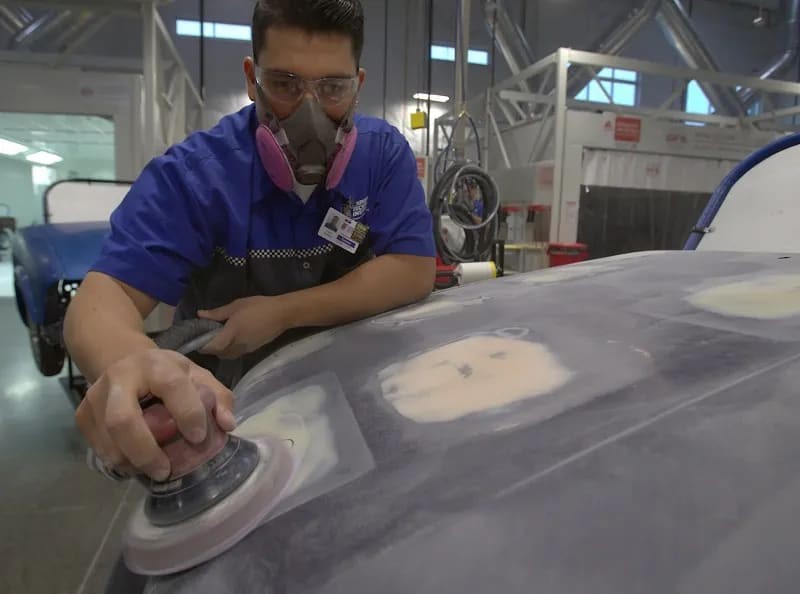
Refinishing the Repaired Plastic
After the structural repair is complete, refinishing is crucial to seamlessly blend the repaired area with the rest of the vehicle. This is often the domain of refinish technicians, specialists who work closely with collision repair technicians. Refinishing involves:
- Sanding: Careful sanding to create a smooth surface for painting.
- Priming: Applying primer to ensure proper paint adhesion.
- Color matching and mixing: Precisely matching the vehicle’s paint color and mixing it accurately.
- Painting: Applying the base coat and clear coat in even layers.
- Tinting and blending: Fine-tuning the color and blending it into the surrounding paint for an invisible repair.
- Sealing: Applying sealant for protection and a durable finish.
Common Challenges and DIY vs. Professional Repair
While DIY plastic repair can be effective for minor damage, there are challenges and situations where professional expertise is recommended.
Automotive Plastic Repair Challenges
- Texture and Color Matching: Replicating the original texture and achieving a perfect color match, especially with faded or aged plastics, can be difficult.
- Durability and Longevity: Ensuring the repair is not only cosmetically appealing but also durable and long-lasting requires the right techniques and materials.
- ADAS Sensor Interference: Modern vehicles equipped with Advanced Driver Assistance Systems (ADAS) have sensors often integrated into plastic bumpers and trim. Improper repairs can interfere with these sensors, compromising safety systems.
DIY vs. Professional Car Plastic Repair
- DIY Repair: Cost-effective for minor cosmetic damage. Car plastic repair kits are readily available and suitable for scratches and small dents. However, durability and finish quality may be limited, and color matching can be challenging.
- Professional Repair: Recommended for two-sided damage, structural repairs, damage affecting ADAS sensors, and high-value vehicles. Professionals have access to advanced tools, specialized materials, and training to ensure durable, seamless, and safe repairs that meet ISO guidelines.
Learn Professional Automotive Plastic Repair Techniques
If you’re fascinated by automotive repair and enjoy hands-on work with meticulous attention to detail, a career in collision repair could be a rewarding path. Programs like the Collision Repair & Refinish Technology (CRRT) program at Universal Technical Institute (UTI) offer comprehensive training in various automotive repair techniques, including plastic repair.
UTI’s CRRT program provides hands-on training covering everything from plastic identification to advanced repair technologies. Courses like “Exterior Panel Repair I” specifically teach students to identify different automotive plastics and master adhesive and welding repair methods. This program can equip you with the skills needed to pursue a fulfilling career in the collision repair industry.
Ready to explore a career in collision repair? Contact UTI to request more information and take the first step towards your automotive career!
Related Articles
[
What Is a Vehicle Damage Report?](/blog/collision/vehicle-damage-report)A vehicle damage report is an important resource to have when a car is involved in an accident. Find out more about them here.
[
Auto Damage Appraiser Job Description & Career Information](/blog/collision/auto-damage-appraiser)Do you have a passion for cars and love investigating and analyzing? A career as an auto damage appraiser may be for you. Learn more in this blog.
[
How To Fix Faded Car Paint: Guide to Auto Paint Restoring](/blog/collision/restore-car-paint)Faded car paint doesn’t look great. Learn how to prevent this from happening, including how to fix faded car paint if it has started by reading here.
1 ) UTI is an educational institution and cannot guarantee employment or salary.
2 ) For program outcome information and other disclosures, visit www.uti.edu/disclosures.
Universal Technical Institute of Illinois, Inc. is approved by the Division of Private Business and Vocational Schools of the Illinois Board of Higher Education.