
Since their introduction in the late 1960s with the Pontiac Endura’s innovative plastic bumper, plastics have become increasingly vital in automotive design. From nonstructural elements like door trims to structural components requiring reinforced plastics, modern vehicles are heavily reliant on these versatile materials. Understanding how to repair plastic in car bodies is therefore an essential skill for both car enthusiasts and those in the automotive repair industry. Whether it’s a minor scratch or a more significant crack, knowing the techniques and products for plastic repair can save time and money, and ensure your vehicle maintains its appearance and integrity.
Understanding the Plastics in Your Car
Before you start any repair, it’s crucial to recognize the type of plastic you’re dealing with. Just like metals, not all plastics are created equal, and their properties dictate the best repair methods. Automotive plastics are broadly categorized, and identifying them is the first step in effective repair.
Identifying Types of Automotive Plastics
Automakers use a variety of plastics, each chosen for specific properties like flexibility, strength, and weight. To help technicians and recyclers, plastic parts often have identifier codes, typically abbreviations molded directly into the part. These codes are standardized by the International Standards Organization (ISO) and are universally used. Common identifiers you might encounter include:
- PP (Polypropylene): Known for its chemical resistance and toughness, often used in bumpers and interior trims.
- PO (Polyolefin): A general term for polymers like polyethylene and polypropylene, offering good impact resistance.
- ABS (Acrylonitrile Butadiene Styrene): A rigid and strong plastic, frequently used for grilles and some interior panels.
- PC (Polycarbonate): Extremely durable and transparent, used in headlight lenses and some structural parts.
- PE (Polyethylene): Flexible and impact-resistant, used in liners and some flexible body parts.
- PVC (Polyvinylchloride): Rigid and weather-resistant, used in some interior and exterior trim components.
Sometimes, manufacturers use blends of polymers to achieve specific characteristics. In these cases, the identifier will reflect all the plastics used in the mixture. Identifying these plastics is not just for recycling; it’s vital for choosing the correct repair products and techniques to ensure a lasting fix.
Reinforced vs. Non-Reinforced Plastics
Another critical distinction is whether the plastic is reinforced or non-reinforced. Reinforced plastics have fibers, such as glass or carbon fibers, added to enhance their strength and rigidity. These are typically used in structural parts like hoods, fenders, and some bumper components. Non-reinforced plastics, on the other hand, are used for parts where flexibility and cosmetic appeal are more important, like door trims and interior moldings.
The presence of reinforcement fibers affects the repair approach. Reinforced plastics often require different adhesives and techniques, sometimes involving grinding down damaged areas to relieve stress before repair. Non-reinforced plastics might be more amenable to heat-based repairs, where heat is used to soften the plastic and reshape it back to its original form.
Essential Products for Plastic Car Repair
The automotive aftermarket offers a wide range of specialized products designed for plastic repair. Using the right products is crucial for achieving a durable and aesthetically pleasing repair. Here are some essential categories:
- Plastic Repair Adhesives: These are specially formulated to bond different types of plastics. They come in various forms, including two-part epoxies and acrylic adhesives, each suited for different types of damage and plastics. For structural repairs, choose adhesives designed for reinforced plastics, offering high strength and flexibility.
- Plastic Welding Systems: Plastic welding is a technique that fuses plastic parts together at a molecular level using heat. Welding systems range from hot air welders to specialized tools with different tips for various plastic types and repair scenarios. This method is particularly effective for two-sided repairs and structural damage.
- Fillers and Putties: For cosmetic repairs, fillers and putties are essential to smooth out dents, scratches, and imperfections. Choose products specifically designed for automotive plastics to ensure proper adhesion and flexibility. Lightweight fillers are preferred to avoid adding unnecessary weight to the repaired part.
- Cleaning and Preparation Products: Surface preparation is key to any successful repair. Plastic cleaners and degreasers remove waxes, oils, dirt, and contaminants that can interfere with adhesion. Using compressed air can also help in cleaning and drying the repair area.
- Refinishing Products: After the structural repair, refinishing products like plastic primers, paints, and clear coats are necessary to restore the part’s original appearance. Flex agents are often added to paint to accommodate the flexibility of plastic parts and prevent cracking.
Step-by-Step Guide: How to Repair Plastic Car Parts
Now, let’s delve into the practical steps of repairing plastic car parts. The approach varies depending on whether you are tackling a cosmetic issue or a more serious structural damage.
Preparation: Cleaning and Identification
Before any repair work begins, thorough preparation is essential.
- Clean the Area: Use a plastic cleaner or degreaser to remove all dirt, wax, grease, and road oils from the damaged area and the surrounding surface. Ensure the area is completely dry before proceeding.
- Identify the Plastic Type: Locate the identifier code on the back of the plastic part. This will guide you in selecting the appropriate repair products and methods. If you are unsure, consulting a repair manual or a professional can be beneficial.
Cosmetic Repair: Fixing Scratches and Minor Dents
Cosmetic repairs address surface-level imperfections like scratches and minor dents that haven’t penetrated the plastic.
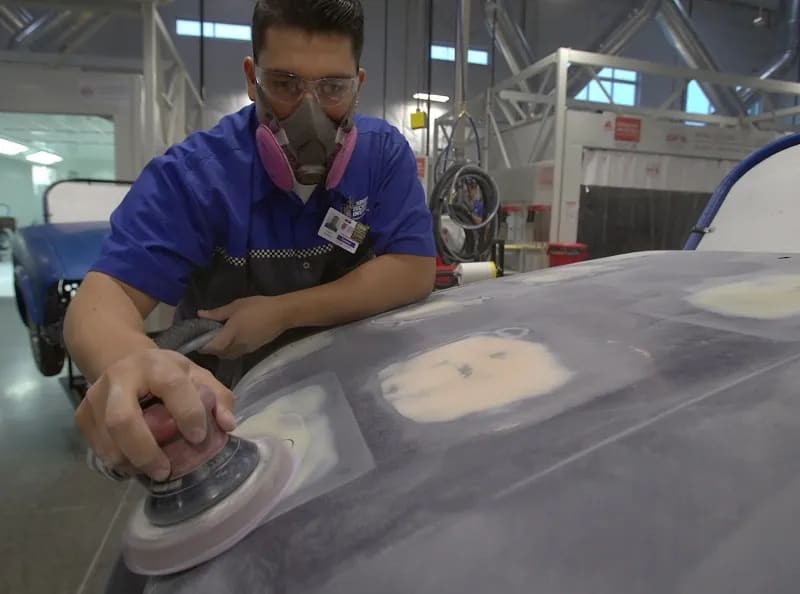
- Sanding: For scratches, start by lightly sanding the damaged area with fine-grit sandpaper to smooth out the edges. Work your way up to finer grits for a smooth finish.
- Applying Filler (if necessary): For minor dents or deeper scratches, apply a thin layer of plastic filler to level the surface. Follow the manufacturer’s instructions for mixing and application.
- Sanding the Filler: Once the filler is dry, carefully sand it down to match the contour of the surrounding area. Start with medium-grit sandpaper and progress to fine-grit for a seamless blend.
- Priming: Apply a plastic primer to the repaired area. Primer helps to create a uniform surface for paint adhesion and improves the final finish.
- Painting and Clear Coating: Apply automotive paint that matches your car’s color code in thin, even coats. Allow each coat to dry before applying the next. Finish with a clear coat to protect the paint and add gloss.
Two-Sided Repair: Fixing Tears and Holes
Two-sided repairs are necessary when the damage goes through the plastic, creating tears or holes. Plastic welding is often the most effective method for these types of repairs.
-
Cleaning and Beveling: Clean the area around the damage thoroughly. Bevel the edges of the tear or hole at a 45-degree angle using a grinder or rotary tool. This creates a V-groove that will be filled with weld material, increasing the repair’s strength.
-
Plastic Welding: Using a plastic welder and appropriate welding rods (matching the plastic type if possible), carefully weld along the beveled edges. Apply heat and pressure to melt the welding rod and fuse it with the existing plastic. Work in small sections, allowing the plastic to cool slightly between passes to prevent overheating and warping.
 Close-up of a technician repairing a plastic car bumper using plastic welding tools.
 -
Grinding and Shaping the Weld: After welding, the repaired area may have excess weld material. Use a grinder or rotary tool to carefully grind down the weld to be flush with the surrounding surface. Shape the repaired area to match the original contour of the part.
-
Filler and Refinishing: Apply a thin layer of plastic filler to smooth out any imperfections and ensure a seamless finish. Sand the filler, prime, paint, and clear coat as described in the cosmetic repair section.
Refinishing After Plastic Repair
Refinishing is the final, crucial step in the plastic repair process. It’s not just about aesthetics; proper refinishing ensures the repaired area is protected and blends seamlessly with the rest of the vehicle. Refinish technicians are specialists in this area, possessing the skills to match colors precisely and apply finishes that withstand environmental conditions. They work closely with collision repair technicians to ensure the entire repair process results in a high-quality, invisible fix.
DIY vs. Professional Plastic Car Repair
While minor cosmetic repairs can often be successfully tackled as DIY projects, more complex or structural repairs, especially those involving reinforced plastics or critical areas like bumpers with sensor integration, are best left to professionals.
DIY Repair:
- Pros: Cost-effective for minor damage, convenient for small scratches and dents, learning opportunity.
- Cons: May lack durability for structural repairs, finish quality may not match professional standards, potential risks with incorrect techniques or products.
Professional Repair:
- Pros: Durable and high-quality repairs, expertise in handling various plastic types and damage levels, access to professional-grade tools and materials, ensures safety and integrity of vehicle systems (including ADAS).
- Cons: More expensive than DIY, may require scheduling and vehicle drop-off.
For high-value vehicles or those equipped with advanced technologies like ADAS, professional repair is generally recommended to ensure safety and maintain vehicle value.
Common Challenges in Automotive Plastic Repair
Repairing plastic car parts comes with its own set of challenges:
- Matching Texture and Color: Achieving a perfect match with the original texture and color of the surrounding area can be difficult. Professional refinishers use specialized techniques and color-matching systems to overcome this challenge.
- Ensuring Durability and Longevity: Plastic repairs need to withstand the same stresses and environmental conditions as the original part. Choosing the right products and techniques is crucial for a long-lasting repair.
- ADAS Sensor Interference: Modern vehicles often have ADAS sensors embedded in or behind plastic bumpers and panels. Improper repairs can interfere with these sensors, compromising safety systems. Professionals are trained to handle these repairs without affecting sensor functionality.
FAQs About Car Plastic Repair
Q: Is automotive interior plastic repair for a deep scratch possible?
A: Yes, deep scratches on interior plastics can be repaired. Technicians use heat tools to make the plastic pliable, then level the surface with fillers, restore texture with specialized tools, and finish with color matching.
Q: What are the differences between professional car plastic repair and DIY methods?
A: Professionals adhere to ISO guidelines, use advanced tools and specialized materials for durable and seamless finishes. DIY methods are cheaper and suitable for minor damage, but may lack durability and finish quality, and are not recommended for complex repairs or vehicles with ADAS.
Learn Automotive Plastic Repair Techniques
If you’re fascinated by automotive repair and enjoy hands-on work, a career in collision repair could be a great path. The Collision Repair & Refinish Technology (CRRT) program at Universal Technical Institute (UTI) offers comprehensive training in various repair methods, including automotive plastic repair. This program provides the hands-on skills and knowledge needed to excel in the field.
Courses cover topics like “Exterior Panel Repair I,” where you’ll learn to identify automotive plastics and master adhesive and welding technologies. If you’re ready to start a career in automotive repair, request more information from UTI today!
UTI Campuses Offer Collision Repair Training
Start your exciting career as a technician now. With classes starting every 3-6 weeks, your new career is just around the corner. Get hands-on experience with industry-leading brands and explore your options with no pressure to commit.
Related Articles
[
What Is a Vehicle Damage Report?](/blog/collision/vehicle-damage-report) Learn about the importance of vehicle damage reports after car accidents.
[
Auto Damage Appraiser Job Description & Career Information](/blog/collision/auto-damage-appraiser) Explore a career as an auto damage appraiser and see if it’s right for you.
[