
Plastics have revolutionized car design since their introduction in the late 1960s. From the initial plastic-coated bumpers to the widespread use of both structural and non-structural reinforced plastics across various body parts, plastics offer a unique blend of durability, flexibility, and lightweight properties. You’ll find them in robust bumpers requiring strength and stability, achieved through reinforcement, and in more flexible components like door trims and body moldings, often made from unreinforced plastics.
Despite their resilience, plastic car parts are susceptible to damage from everyday wear and tear, minor collisions, or more significant accidents. Knowing how to repair plastic car parts is a valuable skill for car owners and essential knowledge for automotive technicians. Repairing, rather than replacing, damaged plastic components can be a cost-effective and environmentally friendly solution. This guide will walk you through the essentials of plastic car part repair, from identifying the type of plastic to mastering repair techniques and achieving a professional finish.
Understanding the Plastics in Your Car
Before you embark on any repair, understanding the type of plastic you’re dealing with is crucial. Automotive plastics aren’t all the same; they vary in composition and properties, affecting the best repair methods and products to use. Collision repair technicians rely on identifiers, often abbreviations stamped on the part itself, to determine the polymer type. These identifiers are standardized by the International Standards Organization (ISO), aiding in both repair and recycling. Common plastic types you might encounter include:
- PP (Polypropylene): Known for its chemical resistance and toughness, often used in bumpers and interior trim.
- PO (Polyolefin): A broad category including various polymers, frequently used in bumpers and exterior parts due to its impact resistance.
- ABS (Acrylonitrile Butadiene Styrene): Rigid and strong, often found in grilles and interior panels.
- PC (Polycarbonate): Transparent and impact-resistant, used in headlight lenses and some trim pieces.
- PE (Polyethylene): Flexible and chemical-resistant, used in fuel tanks and بعض liners.
- PVC (Polyvinylchloride): Durable and weather-resistant, sometimes used in door panels and dashboards.
Sometimes, manufacturers use polymer blends to achieve specific properties. In such cases, the identifier will reflect all the plastics used in the mixture. Identifying the plastic type is the first step in ensuring a successful and lasting repair.
Essential Products and Tools for Plastic Car Part Repair
Having the right tools and products is essential for effective plastic car part repair. The specific items you’ll need will depend on the type and extent of the damage, but some common essentials include:
- Plastic Cleaner: Specifically designed to remove waxes, grease, dirt, and road oils from plastic surfaces, ensuring proper adhesion of repair materials.
- Adhesives: A range of specialized adhesives formulated for plastic repair, including structural adhesives for strong bonds and flexible adhesives for bumpers and trim.
- Plastic Welding Tools: Heat guns or specialized plastic welders are used to melt and fuse plastic pieces together, creating a strong and seamless repair, particularly useful for tears and splits.
- Fillers: Plastic fillers are used to fill dents, scratches, and imperfections, creating a smooth surface for refinishing.
- Sanding Tools and Paper: Various grits of sandpaper, sanding blocks, and potentially power sanders, are needed to prepare the repair area, shape fillers, and create a smooth finish.
- Refinishing Materials: Primer, automotive paint (matched to your car’s color code), clear coat, and polishing compounds are necessary to restore the repaired area to its original appearance.
- Safety Gear: Always prioritize safety by using gloves, eye protection, and respirators, especially when sanding, using chemicals, or plastic welding.
Step-by-Step Guide: Repairing Plastic Car Parts
The approach to how to repair plastic car parts varies depending on the damage severity. Repairs are broadly categorized as cosmetic or two-sided.
Cosmetic Repair: Addressing Surface Damage
Cosmetic damage includes scratches, scuffs, minor dents, or small cracks that don’t penetrate the plastic part entirely. Here’s a step-by-step approach to cosmetic repair:
- Cleaning: Thoroughly clean the damaged area and surrounding surface with plastic cleaner to remove any contaminants.
- Sanding: Use progressively finer grits of sandpaper to smooth out scratches and scuffs. Start with a coarser grit to level the damage and move to finer grits for a smooth finish.
- Filler (Optional): For deeper scratches or minor dents, apply a thin layer of plastic filler to level the surface. Follow the manufacturer’s instructions for mixing and application.
- Sanding Filler: Once the filler is dry, carefully sand it smooth, blending it seamlessly with the surrounding plastic.
- Priming: Apply a plastic primer to the repaired area. Primer promotes paint adhesion and creates a uniform base for color.
- Painting: Apply several thin coats of automotive paint, matching your car’s color code, to the primed area. Allow each coat to dry properly before applying the next.
- Clear Coat (Optional but Recommended): Apply a clear coat to protect the paint and provide a glossy finish, matching the original factory finish.
- Polishing (Optional): Use polishing compound to refine the clear coat and achieve a seamless, blended finish.
Two-Sided Repair: Fixing Tears and Holes
Two-sided damage involves tears, holes, or cracks that go completely through the plastic part. These repairs require more robust techniques to restore structural integrity.
- Cleaning: Clean both sides of the damaged area thoroughly.
- Alignment and Clamping: Carefully align the broken pieces as accurately as possible. Use clamps or tape to hold the pieces firmly in place.
- Plastic Welding or Adhesive Bonding:
- Plastic Welding: For compatible plastics (check plastic type identifiers), plastic welding is a strong repair method. Use a plastic welder or heat gun to melt the edges of the broken pieces and fuse them together. Work in small sections and allow the plastic to cool and solidify.
- Adhesive Bonding: For plastics not suitable for welding or for simpler repairs, use a high-strength plastic adhesive. Apply adhesive to the edges of the break and clamp the pieces together until the adhesive cures completely, as per the manufacturer’s instructions.
- Reinforcement (For Larger Damage): For larger holes or tears, consider reinforcing the repair from the back side. You can use fiberglass cloth and resin or specialized plastic reinforcement mesh embedded in adhesive or filler for added strength.
- Shaping and Sanding: Once the weld or adhesive is cured, use a grinder or rotary tool to remove excess material and shape the repair area to match the original contour of the part. Then, sand the repaired area with progressively finer grits of sandpaper, as in cosmetic repair, to achieve a smooth surface.
- Filler, Priming, Painting, and Refinishing: Follow steps 4-8 from the cosmetic repair process to fill any remaining imperfections, prime, paint, clear coat, and polish the repaired area to blend seamlessly with the surrounding finish.
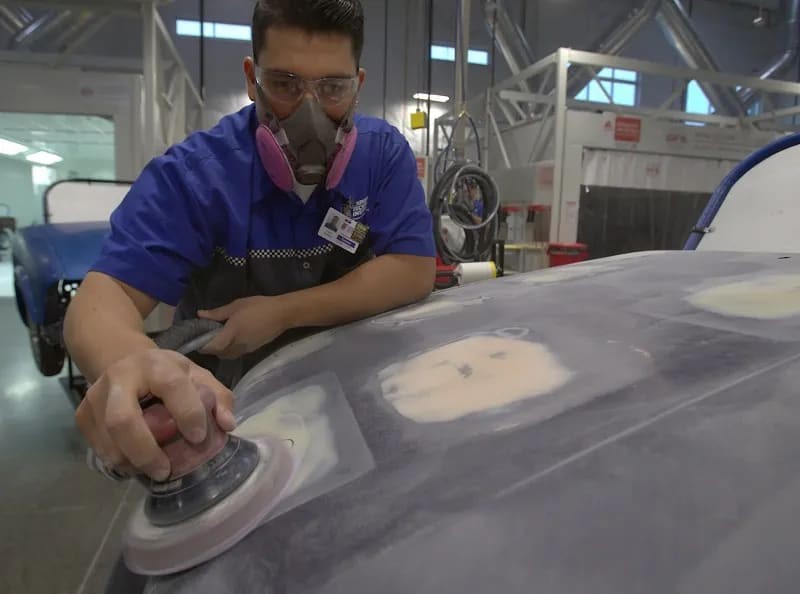
Close-up of a technician expertly repairing a plastic car part using specialized tools in a professional auto body shop.
Advanced Techniques and Important Considerations
Beyond the basic steps, mastering how to repair plastic car parts involves understanding advanced techniques and considerations:
- Textured Plastics: Many plastic car parts have textured surfaces. After repair, you may need to use texturing tools or specialized products to replicate the original texture for a seamless match.
- Painted Plastics: Repairing painted plastic requires careful color matching and blending techniques to ensure the repaired area is indistinguishable from the original paintwork. Professional color matching systems and blending techniques are often necessary for perfect results.
- Flexible Plastics: Bumpers and some trim pieces are made from flexible plastics. Use flexible fillers and adhesives designed to withstand flexing and movement without cracking.
- ADAS Sensors: Modern vehicles often have Advanced Driver Assistance Systems (ADAS) with sensors integrated into plastic bumpers and grilles. Be extremely cautious when repairing parts housing these sensors. Improper repairs can interfere with sensor function, compromising safety. Professional calibration of ADAS systems may be required after repairs in sensor-equipped areas.
DIY vs. Professional Plastic Car Part Repair
DIY plastic car part repair can be a cost-effective option for minor cosmetic damage and for car enthusiasts comfortable with auto repair tasks. DIY kits are readily available and can be effective for scratches, small dents, and minor cracks. However, DIY repairs may not always achieve the durability, finish quality, or structural integrity of professional repairs.
Professional plastic car part repair, performed by trained collision repair technicians, offers several advantages, especially for more complex or structural damage. Professionals possess:
- Expertise and Training: Technicians are trained in identifying plastic types, selecting appropriate repair methods, and using specialized tools and materials.
- Specialized Tools and Materials: Professional shops have access to advanced plastic welding equipment, high-quality adhesives, fillers, and refinishing systems.
- Durability and Quality: Professional repairs are typically more durable and offer a higher quality finish, often backed by warranties.
- ADAS System Expertise: Professionals are trained to handle repairs on vehicles with ADAS sensors, ensuring sensor functionality is maintained and recalibrated if necessary.
For high-value vehicles, vehicles with ADAS technology, or for significant structural damage, seeking professional repair is generally the best route. While DIY can save money on minor cosmetic fixes, professional repair ensures safety, durability, and maintains the value and technology of your vehicle.
Conclusion
Knowing how to repair plastic car parts is a valuable skill, whether you’re a car enthusiast tackling DIY projects or a professional aiming for a career in collision repair. From understanding plastic types and choosing the right products to mastering repair techniques and achieving a flawless finish, this guide provides a comprehensive overview of the process. While minor cosmetic repairs can be confidently handled at home with the right tools and approach, more complex damage, especially on modern vehicles with advanced technology, often necessitates the expertise of trained professionals.
If you’re passionate about automotive repair and interested in pursuing a career in this field, consider formal training programs like the Collision Repair & Refinish Technology program at Universal Technical Institute (UTI). Such programs provide comprehensive hands-on training, covering everything from plastic identification and repair technologies to refinishing techniques, preparing you for a rewarding career in the automotive repair industry.
FAQs About Plastic Car Part Repair
What are the biggest challenges in automotive plastic repair?
The most significant challenges include precisely matching the original texture and color of the vehicle’s finish while ensuring the repair is durable and long-lasting. Modern vehicles with ADAS sensors also present challenges, as improper repairs can interfere with sensor function and safety systems.
Can deep scratches on interior plastic car parts be repaired?
Yes, interior plastic scratches are often repairable. Technicians typically use heat tools to make the plastic more pliable, level the surface with appropriate fillers, and use texturing tools to restore the original pattern. Finishing and color matching complete the repair.
What are the key differences between professional and DIY car plastic repair methods?
Professionals adhere to ISO guidelines and utilize advanced tools and specialized materials for seamless, durable finishes. This is especially critical for high-value vehicles and those with ADAS technology. DIY methods are more affordable and accessible for minor damage, but may lack the durability and finish quality of professional repairs. DIY kits are suitable for superficial damage, but the finish may not perfectly match the vehicle’s original appearance.