Maintaining your car’s paint job is about more than just aesthetics; it’s about protecting your investment. Scratches, chips, and fading can significantly impact your car’s resale value and even lead to rust and corrosion. Luckily, with a little know-how, you can tackle many common paint issues yourself. This guide will walk you through the steps to repair paint work on a car, from minor blemishes to more significant damage, empowering you to restore your car’s finish to its former glory.
Assessing the Damage: Know Your Enemy
Before you grab your sandpaper and spray paint, it’s crucial to assess the extent of the damage. Different levels of paint damage require different repair approaches.
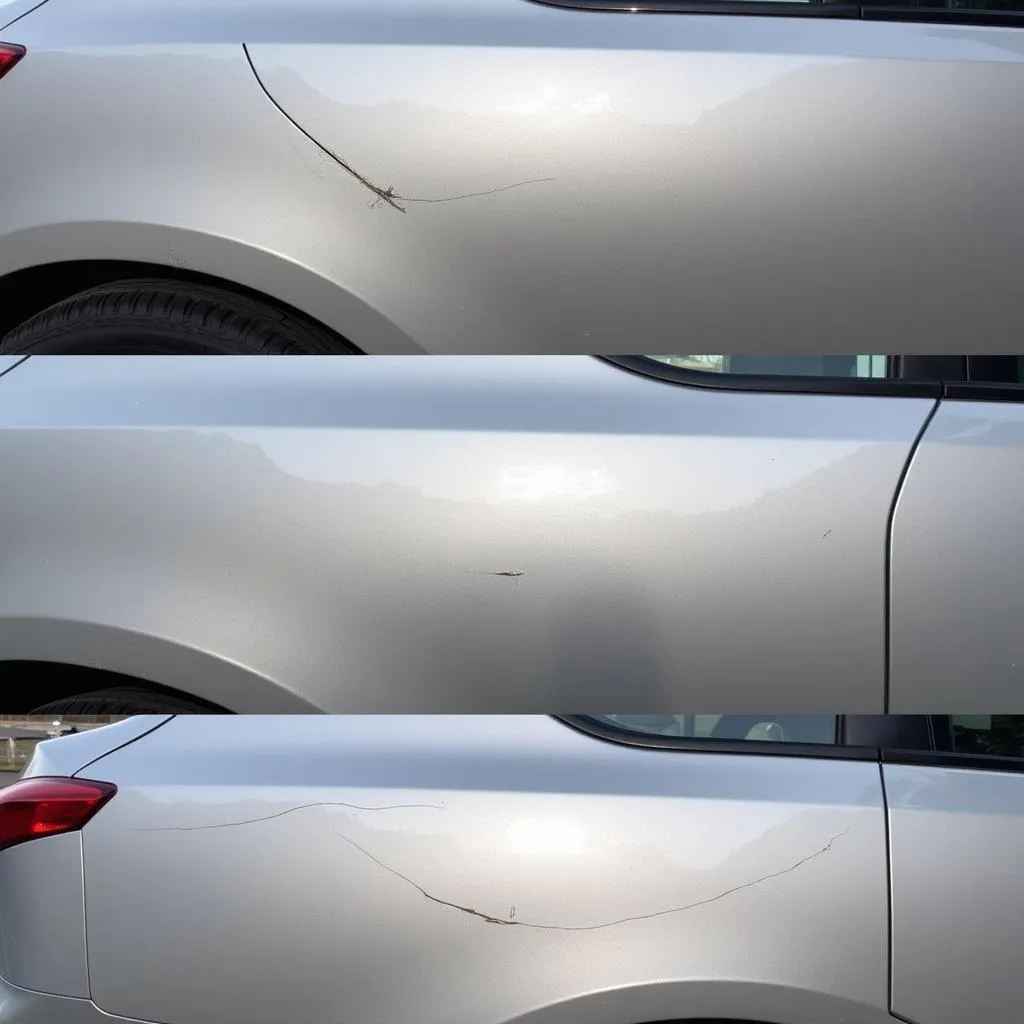
- Clearcoat Scratches: These are the most superficial scratches, affecting only the clear coat layer. They often appear white or lighter than your car’s paint.
- Paint Scratches: These scratches go deeper, penetrating the clear coat and reaching the color layer. You’ll see the actual color of the scratch differing from your car’s paint.
- Deep Scratches: These scratches cut through the color layer, exposing the primer or even bare metal underneath. They require more involved repairs to prevent rust.
Essential Tools and Materials: Arm Yourself for Success
Having the right tools and materials can make all the difference in achieving a professional-looking finish. Here’s a basic list of what you’ll need:
- Cleaning Supplies: Car wash soap, microfiber towels, wax and grease remover
- Sandpaper: Assorted grits (1500, 2000, 3000)
- Masking Tape and Paper: For protecting surrounding areas
- Primer: (If bare metal is exposed)
- Touch-Up Paint: Matching your car’s paint code
- Clear Coat: For a glossy finish and UV protection
- Polishing Compound: For removing scratches and restoring shine
- Applicators: Foam brushes, microfiber cloths
Step-by-Step Guide to Repairing Car Paint: A DIY Approach
Following these steps carefully will help you achieve the best possible results:
-
Clean the Area: Thoroughly wash and dry your car, focusing on the damaged area. Use a wax and grease remover to eliminate any contaminants.
-
Sanding (if necessary): For deeper scratches, start with 1500-grit sandpaper and gradually work your way up to 3000-grit. Sand lightly in a back-and-forth motion, feathering the edges to blend with the surrounding paint.
-
Masking: Use masking tape and paper to protect the areas around the damage. This prevents overspray and ensures a clean repair.
-
Priming (if necessary): If bare metal is exposed, apply a thin coat of primer to prevent rust. Allow it to dry completely according to the manufacturer’s instructions.
-
Applying Touch-Up Paint: Shake the touch-up paint thoroughly. Using a fine-tipped brush or the applicator provided, apply thin coats of paint to the damaged area. Allow each coat to dry completely before applying the next.
-
Applying Clear Coat: Once the touch-up paint has dried, apply a thin coat of clear coat, overlapping the surrounding paint slightly. Allow it to dry completely.
-
Wet Sanding and Polishing: After the clear coat has cured for at least 24 hours, wet sand the area with 3000-grit sandpaper for a smooth finish. Then, use a polishing compound and a microfiber cloth to buff the area to a high shine.
Common Car Paint Repair Mistakes to Avoid: Don’t Fall into These Traps
-
Rushing the Process: Car paint repair requires patience. Allow each layer to dry completely before proceeding to the next step.
-
Using the Wrong Products: Ensure your touch-up paint, clear coat, and other materials are compatible with your car’s paint type.
-
Ignoring Safety Precautions: Always wear gloves and safety glasses when sanding or using chemicals. Work in a well-ventilated area.
When to Call a Professional: Know Your Limits
While minor car paint repairs can be tackled DIY-style, some situations warrant professional intervention:
-
Extensive Damage: If the damage is widespread or affects multiple body panels, it’s best to consult a professional.
-
Deep Rust: Rust can spread quickly and compromise the structural integrity of your car. Professional rust removal and repair are crucial.
-
Color Matching Issues: Matching your car’s paint color can be tricky. Professionals have the tools and expertise to achieve a seamless blend.
Maintaining Your Car’s Paint: Protecting Your Handiwork
Once you’ve repaired your car’s paint, it’s essential to protect it from future damage:
-
Regular Washing: Wash your car regularly to remove dirt and grime that can scratch the paint.
-
Waxing: Applying a layer of wax every few months provides a protective barrier against UV rays and minor scratches.
-
Parking Strategically: Park in a garage or under cover whenever possible to shield your car from the elements.
FAQs: Addressing Your Concerns
Q: Can I use nail polish to repair car paint?
A: While tempting, nail polish is not designed for automotive paint and can react negatively, causing further damage.
Q: How long does it take for touch-up paint to dry?
A: Drying times vary, but generally, you should wait at least 24 hours before washing or waxing the area.
Q: Can I wet sand the clear coat by hand?
A: Yes, but using a sanding block provides more even pressure and helps achieve a smoother finish.
Conclusion: Your Car, Your Canvas
Repairing paint work on a car doesn’t have to be a daunting task. By following this guide, exercising patience, and paying attention to detail, you can restore your car’s paint and protect your investment for years to come. Remember, maintaining your car’s appearance is a reflection of your pride in ownership.
For more helpful car repair tips and expert advice, explore our other resources:
Need assistance with car paint repair or other car maintenance needs? Contact us via WhatsApp: +1(641)206-8880 or Email: [email protected]. Our dedicated customer support team is available 24/7 to assist you.


