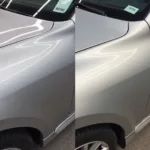
Repairing paint scratches on your car bumper can seem daunting, but with the right approach and a little patience, you can achieve professional-looking results without breaking the bank. Whether it’s a minor scuff or a deeper scratch, this comprehensive guide will walk you through the process of how to repair paint scratches on car bumper, from assessing the damage to achieving a flawless finish.
Knowing how to address these blemishes not only enhances your car’s appearance but also protects the underlying metal from rust and corrosion. Minor scratches can often be addressed with a simple car bumper scuff repair kit, saving you a trip to the body shop. Let’s dive into the details and get your bumper looking its best again! If you’re dealing with more extensive damage, you might want to check out our guide on how to repair plastic car bumper.
After washing and drying the affected area, carefully inspect the scratch to determine the extent of the damage. Is it a clear-coat scratch, a paint scratch, or has it gone down to the primer or bare metal? This assessment is crucial for choosing the right repair method.
Assessing the Damage: The First Step in Bumper Scratch Repair
Before you start any repair, it’s vital to understand the depth of the scratch. A light scratch that only affects the clear coat requires a different approach than a deep scratch that exposes the primer or metal. Use your fingernail to gently run across the scratch. If your nail catches, it indicates a deeper scratch that may require more than just a polishing compound. Remember, a proper assessment is key to achieving a successful repair.
Identifying the Type of Scratch
- Clear Coat Scratches: These are the most superficial scratches and often appear as light, hazy marks.
- Paint Scratches: These penetrate the color coat and are more visible, revealing a different color underneath.
- Primer/Metal Scratches: These are the deepest scratches and expose the primer or bare metal, requiring more extensive repair.
Repairing Minor Scratches: DIY Solutions
Minor scratches, especially those limited to the clear coat, can often be repaired using readily available products like rubbing compound and polishing compound.
Using Rubbing Compound and Polishing Compound
- Wash and dry the affected area thoroughly.
- Apply a small amount of rubbing compound to a clean microfiber cloth.
- Rub the compound onto the scratch using gentle, circular motions.
- Wipe away the excess compound with a clean microfiber cloth.
- Repeat steps 2-4 until the scratch disappears.
- Follow up with polishing compound to restore shine. You can find excellent resources on black plastic car bumper repair kits to tackle this issue effectively.
If you’re looking for a complete kit with everything you need, check out our recommended car bumper scuff repair kit. This kit provides all the necessary tools and materials for a professional-looking repair.
Repairing Deeper Scratches: A Step-by-Step Guide
Deeper scratches that penetrate the paint layer require a more involved approach, including sanding, priming, and painting.
Sanding, Priming, and Painting
- Clean the scratched area thoroughly.
- Sand the scratch and surrounding area with fine-grit sandpaper.
- Clean the area again to remove any dust or debris.
- Apply primer to the sanded area, allowing it to dry completely. If you’re working on a black bumper, our guide on how to repair black plastic car bumper can offer valuable insights.
- Apply touch-up paint that matches your car’s color.
- Apply clear coat to protect the paint and restore shine.
For those in the San Antonio area, finding a reputable repair shop can be simplified. Consider researching options for car bumper repair San Antonio for professional assistance.
Conclusion: Maintaining Your Bumper’s Pristine Appearance
Learning how to repair paint scratches on car bumper can save you time and money while maintaining your car’s appearance. By following the steps outlined in this guide, you can effectively address minor and more significant scratches, preventing further damage and preserving your vehicle’s value. Regular cleaning and waxing can also help protect your bumper from future scratches and maintain its shine.
FAQs
- Can I use toothpaste to remove scratches from my car bumper? Toothpaste might offer a temporary fix for very superficial scratches, but it’s not a long-term solution.
- What is the best way to prevent scratches on my car bumper? Careful parking and avoiding contact with abrasive materials are key to preventing scratches.
- How often should I wax my car bumper? Waxing your car bumper every three to six months can help protect it from scratches and maintain its shine.
- Do I need to sand the bumper before applying touch-up paint? Sanding is typically necessary for deeper scratches to ensure proper adhesion of the primer and paint.
- What should I do if the scratch is too deep to repair myself? For deep scratches that expose the metal, it’s best to consult a professional auto body repair shop.
- How do I match the touch-up paint to my car’s color? Refer to your car’s owner’s manual or check the sticker inside the driver’s side doorjamb for the paint code.
- Can I use a regular spray paint to repair bumper scratches? Using specialized automotive touch-up paint is recommended for the best results.
For further information on related topics, explore our articles on repair plastic car bumper. Also, check out our piece on how to repair black plastic car bumper for more specialized advice.
Need expert assistance? Contact us via WhatsApp: +1(641)206-8880 or email us at [email protected]. Our 24/7 customer support team is ready to help.

