Leather car seats, while luxurious and comfortable, are susceptible to wear and tear over time. Friction and daily use can lead to unsightly tears, diminishing your car’s interior appeal and potentially its value. This guide provides a detailed, step-by-step approach on how to repair leather tears in your car seats, restoring their pristine condition and preventing further damage. Learn how to effectively tackle this common car upholstery issue with professional techniques you can master at home.
PRODUCTS REQUIRED
To begin your leather repair journey, ensure you have the necessary products. A comprehensive Leather Car Seat Repair Kit is highly recommended as it contains all the essential items for a successful repair.
Leather Car Seat Repair Method
STEP 1. Prepare the Leather Car Seat
The foundation of any successful leather repair lies in proper preparation. Begin by thoroughly cleaning the area around the tear. Using a Leather Prep solution and an abrasive pad (typically included in a repair kit), gently rub the surface of the leather. This crucial step serves two main purposes: it effectively eliminates accumulated grease and oils from the leather surface, and it also removes the original manufactured finish.
Removing the finish is vital because it allows the leather colorant, which you’ll apply later, to properly adhere to the leather. Furthermore, the abrasive action helps to remove any loose fibers around the tear, creating a smoother surface for repair. After prepping, use an Alcohol Cleaner to wipe down the area. This will eliminate any remaining dirt, dust, or residue, ensuring a clean surface before proceeding to the next stage.
STEP 2. Tidy the Tear Area
Carefully examine the tear. You’ll likely notice that the leather edges around the tear protrude outwards, forming a lip. This lip, if left untreated, can compromise the smoothness and overall quality of your repair, making the damage noticeable even after fixing.
To achieve a seamless repair, this lip needs to be carefully removed. Using a scalpel or a pair of sharp scissors, gently trim away the lip at its base. Exercise caution during this step to avoid accidentally damaging the surrounding leather. The goal is to create a clean, even edge around the tear, ready for the backing and filling stages.
STEP 3. Apply the Backing Patch
To provide robust support and prevent the filler from sinking into the tear, a backing patch is essential. Locate the leather repair sub-patch supplied in your repair kit. Cut the patch to a size that adequately covers the tear with an extra centimeter of material extending beyond the tear’s edges on all sides. This overlap is crucial for secure adhesion.
Using tweezers, carefully insert one edge of the patch underneath the leather through the tear, ensuring the 1cm excess is positioned beneath the leather. Hold this edge in place and gently feed the rest of the patch under the remaining edges of the tear. The patch should lie flat underneath the repair, with the 1cm border tucked under the leather all around the tear.
Next, apply a small amount of Leather Glue onto the provided spatula. Carefully feed the spatula underneath the edges of the tear to coat the underside of the leather surrounding the patch. Be careful not to dislodge the canvas patch while applying glue. Once all edges are glued, apply pressure to bond the leather to the patch. Allow sufficient drying time for the glue to set firmly, providing a solid backing for the filler.
STEP 4. Fill the Hole with Heavy Filler – Initial Layers
With the backing patch securely in place, you can now begin filling the tear. Using the end of a palette knife, take a small amount of Heavy Filler from your repair kit. Apply a very thin layer of filler into the tear, ensuring it just covers the sub-patch. It’s crucial to apply thin layers because heavy filler tends to shrink as it dries. Thick layers may not cure properly and can lead to cracking or an uneven finish. Allow each thin layer to dry for approximately 20 minutes. You can expedite the drying process using a hairdryer on a low heat setting, but avoid overheating the filler.
Continue applying thin layers of heavy filler, building up the fill gradually. As a general guideline, aim for at least 5-6 thin layers to bring the filler level up to just below the surface of the leather surrounding the tear.
After applying each layer and before drying, use the sharper edge of the palette knife to smooth out the filler, removing any excess and ensuring a level surface. This step is important for minimizing sanding later and achieving a smooth, even repair.
STEP 5. Filler Build-Up – Approaching Surface Level
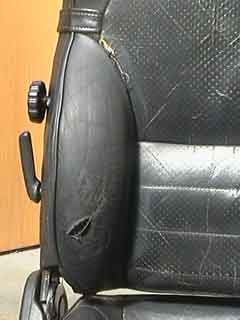
This image illustrates the appearance of the repair after 5 or 6 thin layers of filler have been applied. At this stage, the tear will be significantly filled, but it will likely not be perfectly smooth or completely level with the surrounding leather. You’re now approaching the final stages of filling, where precision and careful application become even more important.
STEP 6. Add the Final Layer of Filler – Achieving Level Surface
For the final layer, apply just enough filler to completely fill the remaining tear, aiming to make it perfectly level with the surrounding leather surface. Take extra care to ensure this final layer cures thoroughly. As filler can shrink slightly during curing, it’s better to slightly overfill and then sand back to level if necessary, rather than underfill.
If you accidentally get filler on the surrounding leather, immediately remove it with the palette knife before it dries. Your goal is to achieve a seamless fill that is flush with the original leather surface, without any ridges or depressions.
Once you are satisfied with the filler level and can no longer feel any ridge between the filler and the surrounding leather, clean the area again with the Alcohol Cleaner. This removes any unwanted filler dust or residue from the surrounding area, preparing it for the colorant application.
STEP 7. Apply the Initial Coat of Colorant – Base Layer
The colorant included in your repair kit should be specifically matched to your car’s leather interior color, unless you intend to completely recolor the seat.
Take one of the sponges provided in the kit and apply a small amount of colorant to it. Thoroughly rub this colorant into the repaired area. This initial application method is crucial as it forces the colorant to penetrate into the natural creases and grain of the leather. This ensures better color adhesion and a more consistent, natural-looking finish, especially in textured leather.
After applying the initial coat with a sponge, proceed to the next step for spray application, which will provide a more even and professional final color layer.
STEP 8. Finish the Job – Spraying Colorant and Finish
For the final color application, use an airbrush to spray thin coats of colorant over the repaired leather car seat. The key to a flawless repair is applying multiple thin coats rather than one or two thick coats. Ensure each coat is very thin and allowed sufficient drying time before applying the next. This technique allows for an even color build-up and prevents issues like runs or uncured colorant.
For optimal results, it’s common to apply between 10 to 15 thin coats of colorant, depending on the severity of the initial damage, the color being used, and the desired level of concealment.
Once you are satisfied that the repair is seamlessly concealed and the colorant is fully cured and well-blended with the surrounding leather, it’s time to apply the finish. Using the spray gun again, apply 4 or 5 thin coats of leather finish. Again, allow each coat to dry completely before applying the next. The finish acts as a sealant, protecting the colorant, enhancing the leather’s durability, and prolonging its lifespan.
After completing all steps, allow a full 24 hours before using the repaired car seat. This ensures that the filler, colorant, and finish have completely cured and hardened, resulting in a long-lasting and professional-quality leather tear repair.
For larger repair areas, consider using the Small Leather Colourant Kit in conjunction with the Leather Repair Kit, especially if spraying is required for a more extensive area.
After
Related Products