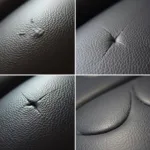
Leather car seats exude a luxurious feel, but over time, they can suffer from wear and tear, cracks, and fading. Knowing how to repair leather seats in car can save you from costly replacements and keep your vehicle’s interior looking its best. This comprehensive guide will walk you through the steps, tips, and tricks to restore your leather car seats to their former glory.
Assessing the Damage: What Needs Fixing?
Before diving into the repair process, it’s crucial to identify the type and extent of damage your leather seats have sustained. This assessment will determine the appropriate repair methods and materials you’ll need.
Common Leather Seat Damages:
- Cracks: These are thin, linear splits in the leather surface caused by drying, aging, or extreme temperatures.
- Scratches: Superficial abrasions that haven’t penetrated the leather’s full depth.
- Tears: Deeper cuts or rips in the leather, often resulting from sharp objects or accidents.
- Fading and Discoloration: Loss of color vibrancy due to prolonged exposure to sunlight or improper cleaning methods.
- Stains: Discolorations caused by spills, dirt, or dye transfer from clothing.
DIY Leather Seat Repair: Essential Tools and Materials
For most common leather seat repairs, you can achieve excellent results with readily available tools and materials. Here’s a list of essentials:
- Leather Cleaning Solution: Use a dedicated leather cleaner or a mild soap solution. Avoid harsh chemicals or household cleaners.
- Microfiber Cloths: Soft and lint-free cloths are ideal for cleaning and applying leather conditioners.
- Leather Repair Kit: Choose a kit that matches your leather color and includes a filler compound, colorant, and sealant.
- Applicator Sponges or Brushes: For applying cleaning solutions, repair compounds, and colorants.
- Heat Gun or Hair Dryer: To speed up the drying process of repair compounds and colorants.
- Masking Tape and Plastic Sheeting: To protect surrounding areas during the repair process.
- Fine-Grit Sandpaper (400-600 grit): For smoothing out repair compounds and blending repaired areas.
Step-by-Step Guide: How to Repair Leather Seats in Car
Now that you have your tools and materials ready, let’s dive into the step-by-step process of repairing your leather car seats:
-
Clean the Affected Area: Thoroughly clean the damaged area and its surroundings with a leather cleaning solution and a microfiber cloth. Allow the area to dry completely before proceeding.
-
Repair Cracks and Tears: If the damage involves cracks or tears, use a leather filler compound from your repair kit. Apply the filler with a putty knife or applicator tool, pressing it firmly into the cracks or tears. Allow the filler to dry completely, following the manufacturer’s instructions.
-
Sand and Smooth: Once the filler is dry, use fine-grit sandpaper (400-600 grit) to gently sand down any excess filler, creating a smooth and even surface. Be careful not to sand the surrounding leather.
-
Apply Colorant (if necessary): If the damage has resulted in color loss, use a leather colorant that matches your seat’s original color. Apply the colorant in thin, even coats, using a sponge or brush. Allow each coat to dry completely before applying the next.
-
Seal and Protect: After the colorant has dried, apply a leather sealant to the repaired area. This will protect the repair, prevent future cracking and fading, and restore the leather’s natural shine.
-
Condition the Leather: Once the sealant has cured, apply a high-quality leather conditioner to the entire seat surface. This will nourish the leather, keeping it supple and preventing future damage.
Professional Leather Seat Repair: When to Call the Experts
While DIY repairs can effectively address minor to moderate leather seat damage, certain situations warrant the expertise of professional car upholstery specialists. Consider seeking professional help if:
- The damage is extensive: Large tears, deep cuts, or widespread cracking might require specialized tools and techniques best handled by professionals.
- The leather is delicate or exotic: Luxury vehicles often feature delicate leather types that demand expert care during repairs.
- You’re unsure about the repair process: If you’re not confident in your ability to achieve a satisfactory result, it’s always wise to consult with professionals.
Preventing Future Leather Seat Damage
Prevention is key to maintaining the pristine condition of your leather car seats. By following these preventive measures, you can significantly extend the lifespan of your leather upholstery:
- Regular Cleaning: Clean your leather seats regularly with a dedicated leather cleaner or a mild soap solution. Avoid harsh chemicals or household cleaners that can strip the leather’s natural oils.
- UV Protection: Park your car in the shade or use a windshield sunshade to minimize prolonged exposure to direct sunlight, which can cause fading and drying.
- Leather Conditioning: Regularly condition your leather seats with a high-quality leather conditioner to keep the leather supple, moisturized, and protected.
- Careful Entry and Exit: Be mindful of sharp objects, such as keys or tools, that can scratch or tear the leather.
Conclusion: Keeping Your Leather Seats Looking Their Best
By following the steps outlined in this guide, you can effectively repair minor to moderate damage to your leather car seats, restoring their appearance and preserving their value. Remember, prevention is crucial, so regular cleaning, conditioning, and UV protection will go a long way in maintaining the pristine condition of your leather upholstery. If you’re ever unsure about a repair or dealing with extensive damage, don’t hesitate to seek professional help from experienced car upholstery specialists.
Need help with your leather car seat repairs? Contact our team of experts at CarRepairOnline via WhatsApp: +1(641)206-8880, or email us at: cardiagtechworkshop@gmail.com. We’re available 24/7 to assist you!


