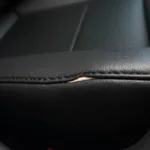
A rip or tear in your leather car seat can be an unsightly nuisance. But before you panic, know that repairing a leather rip in your car seat is often easier than you think. This comprehensive guide will walk you through the process, from assessing the damage to achieving a professional-looking repair.
Understanding the Damage: Is it a Rip or a Tear?
Before diving into the repair, it’s crucial to assess the damage. While often used interchangeably, rip and tear have subtle differences that influence the repair approach.
- Rip: A rip is a straight cut or separation in the leather, typically caused by a sharp object.
- Tear: A tear is an irregular opening caused by pulling or stretching the leather beyond its limits.
Knowing the difference will help you choose the right repair method and materials.
Repairing a Leather Rip in Car Seat: Step-by-Step Guide
Whether you have a small rip or a larger tear, the repair process follows a similar structure. Here’s a detailed guide:
1. Gather Your Materials:
- Leather Repair Kit: These kits usually contain everything you need, including a color-matching compound, a backing fabric, an applicator, and a heat tool.
- Clean Cloth: Use a microfiber cloth to avoid scratching the leather.
- Rubbing Alcohol: Cleans the area and removes any dirt or grease.
- Scissors: To trim any loose threads or backing fabric.
2. Prepare the Damaged Area:
- Clean Thoroughly: Use rubbing alcohol and a clean cloth to clean the damaged area and the surrounding leather. This ensures proper adhesion of the repair compound.
- Trim Loose Threads: Carefully trim any loose threads around the rip or tear using sharp scissors. Be careful not to enlarge the damaged area.
3. Apply the Repair Compound:
- Choose the Right Color: Most leather repair kits come with a color-matching guide. Select the color closest to your car seat’s leather.
- Apply Carefully: Using the applicator provided in the kit, apply the repair compound to the damaged area. Ensure you fill the rip or tear completely.
4. Apply the Backing Fabric (If Necessary):
- For Larger Tears: If the damage is significant, use the backing fabric provided in the kit. Cut a piece slightly larger than the damaged area and place it over the wet repair compound.
- Smooth Out: Gently press the backing fabric onto the compound, ensuring there are no wrinkles or air bubbles.
5. Heat and Dry the Repair:
- Follow Instructions: Different repair kits have varying drying times and methods. Some may require a heat tool for faster drying. Follow the instructions provided in your kit carefully.
Professional vs. DIY Repair: When to Seek Expert Help
While DIY repair kits are great for minor rips and tears, certain situations warrant professional help:
- Extensive Damage: If the rip or tear is substantial, or if there’s significant damage to the surrounding leather, it’s best to consult a professional upholsterer.
- Airbag Concerns: Rips or tears near airbags should be handled by a certified technician to avoid interfering with airbag deployment.
- Lack of Confidence: If you’re uncomfortable tackling the repair yourself, a professional can ensure a seamless and long-lasting fix.
“Remember, a stitch in time saves nine,” says Johnathan Miller, a veteran car upholsterer with over 20 years of experience. “Addressing a small rip early can prevent it from becoming a bigger problem down the line.”
Preventing Future Rips and Tears:
Prevention is always better than cure! Here are some tips to keep your leather car seats looking pristine:
- Regular Cleaning and Conditioning: Regularly cleaning and conditioning your leather seats will keep them supple and prevent drying and cracking, which can lead to tears.
- Use Seat Covers: Seat covers provide an extra layer of protection against spills, sharp objects, and UV damage.
- Avoid Sharp Objects: Be mindful of what you bring into your car. Sharp objects like pens, keys, and tools can easily cause rips and tears.
Conclusion:
Repairing a leather rip in your car seat doesn’t have to be a daunting task. With the right tools, a little patience, and the information provided in this guide, you can restore your car’s interior to its former glory. However, if you are dealing with extensive damage or are unsure about any aspect of the repair, it’s always best to seek professional help.


