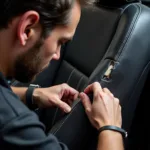
Leather car seats add a touch of luxury and sophistication to any vehicle. However, over time, the stitching on these seats can become worn, torn, or damaged. This can detract from the overall appearance of your car’s interior and even compromise the structural integrity of the seat itself. Thankfully, repairing leather car seat stitching is a manageable task that can be done at home with the right tools and techniques.
Understanding the Importance of Timely Repairs
Before diving into the repair process, it’s essential to understand why addressing damaged stitching promptly is crucial. Ignoring a small tear or loose thread can lead to more significant problems down the line. The damaged area can become larger, eventually requiring more complex and costly repairs. Additionally, compromised stitching can affect the seat’s support, potentially creating an unsafe driving environment.
“Many car owners underestimate the importance of addressing minor stitching issues early on,” says John Miller, a veteran automotive upholsterer with over 20 years of experience. “What may seem like a small aesthetic issue can quickly escalate into a costly repair if ignored.”
Gathering the Necessary Tools and Materials
To ensure a successful repair, you’ll need the right tools and materials:
- Leather Repair Kit: These kits are readily available online or at auto parts stores and typically include a selection of needles, threads, and other essential items.
- Leather Adhesive: Opt for a high-quality adhesive specifically designed for use on leather.
- Scissors: Sharp scissors are crucial for clean thread cuts.
- Leather Cleaner and Conditioner: These products will help prepare the area for repair and maintain the leather’s suppleness.
- Microfiber Cloth: Used for cleaning and applying conditioner.
Step-by-Step Guide to Repairing Leather Car Seat Stitching
Once you have your tools and materials ready, follow these steps to repair the stitching on your leather car seats:
- Clean the Area: Begin by thoroughly cleaning the damaged area with a suitable leather cleaner. This removes dirt, grime, and debris that can hinder the adhesion of the repair materials.
- Assess the Damage: Examine the stitching carefully to determine the extent of the damage. If it’s a small tear, a simple stitching repair might suffice. However, larger tears might require patching.
- Threading the Needle: Select a thread color that closely matches your leather’s color. Thread the needle, ensuring you have a comfortable length of thread to work with.
- Stitching the Tear: For minor tears, use a basic straight stitch to close the gap. Start a few stitches back from the beginning of the tear to secure the thread.
- Securing the Stitch: Once you reach the end of the tear, make a few backward stitches to lock the thread in place. Trim any excess thread.
Maintaining Your Repaired Leather Car Seats
After successfully repairing the stitching, it’s essential to protect your handiwork and keep your leather seats in top condition:
- Regular Cleaning: Regularly clean your leather seats with a pH-neutral leather cleaner. Avoid harsh chemicals or abrasive cleaners that can damage the leather.
- Conditioning: Leather conditioners help keep the material supple and prevent drying and cracking. Apply a high-quality leather conditioner after cleaning.
- UV Protection: Prolonged exposure to sunlight can fade and damage leather. Use a sunshade or park your car in the shade whenever possible.
Seeking Professional Help
While minor stitching repairs can often be handled at home, more extensive damage might require professional attention. If you’re unsure about tackling the repair yourself or if the damage is significant, consider seeking help from a qualified automotive upholsterer.
Remember, maintaining your leather car seats is an investment in your vehicle’s interior and its resale value. By addressing stitching issues promptly and following proper care techniques, you can enjoy beautiful, comfortable leather seats for years to come.
FAQ
Q: Can I use any type of thread for leather car seat repair?
A: It’s best to use a heavy-duty thread specifically designed for leather. These threads are more durable and less likely to break or fray.
Q: How often should I condition my leather car seats?
A: It’s generally recommended to condition your leather seats every three months or as needed, depending on the climate and usage.
Common Stitching Repair Scenarios:
Here are some common car seat stitching repair situations:
- Worn-out stitching on the driver’s seat bolster: This is a high-wear area due to frequent entry and exit from the vehicle.
- Ripped seam on the seatback pocket: Overloading the pocket can stress the stitching, leading to tears.
- Loose stitching on a headrest: Constant adjustments to the headrest can cause stitching to loosen over time.
For more information on repairing rips and tears in leather car seats, check out our comprehensive guide: how to repair ripped leather seat in car.
Need Help Finding a Qualified Technician?
If you’re not comfortable tackling leather car seat stitching repairs yourself, we can help! Visit our ” car leather seat stitching repair near me” page to find a reputable repair shop in your area.
Our team is dedicated to providing you with the information and resources you need to keep your car in excellent condition. For any further assistance or to schedule a consultation, feel free to reach out to us via WhatsApp: +1(641)206-8880 or email us at [email protected]. Our customer support team is available 24/7 to assist you.

