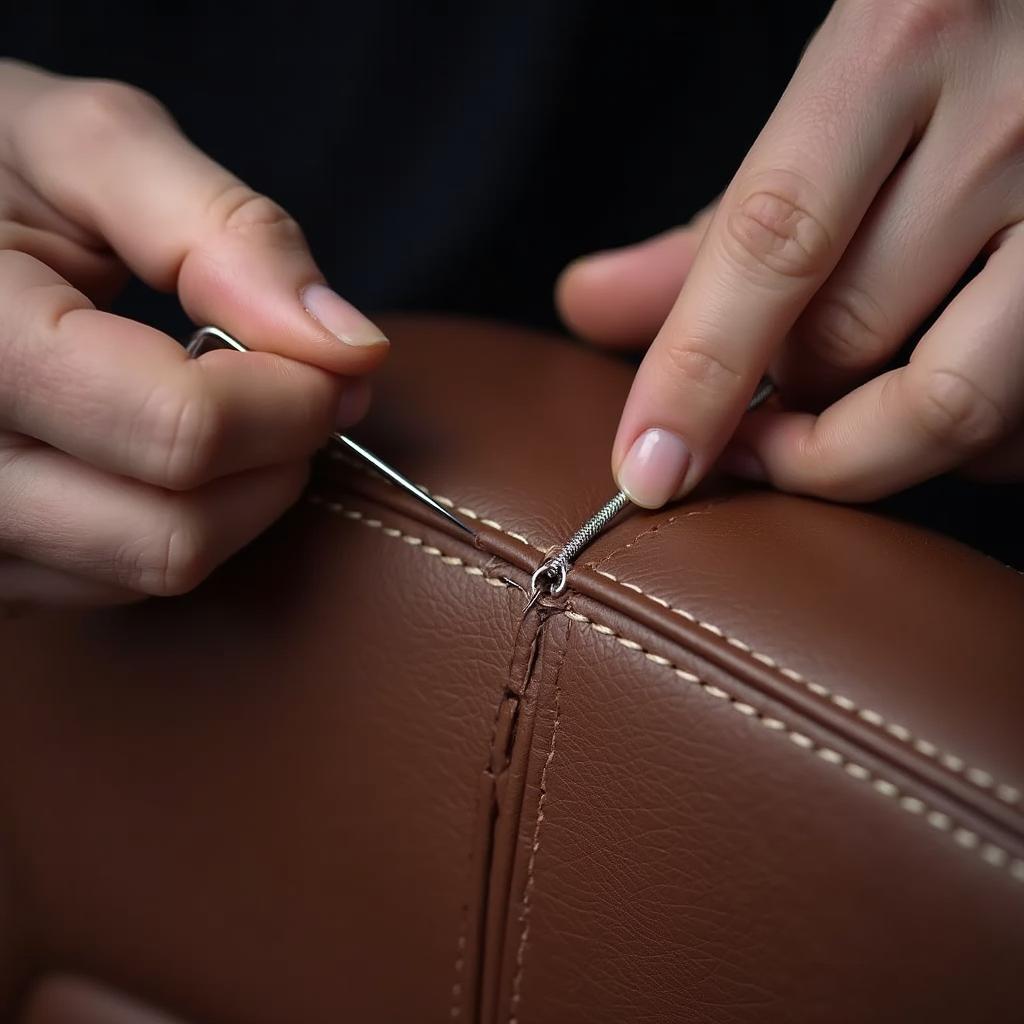
Leather car seats exude a sense of luxury and comfort. However, over time, the constant wear and tear can take a toll on even the most meticulously maintained leather upholstery. One common issue that arises is seam damage. Whether it’s a small tear or a complete separation, knowing how to repair leather car seat seams can save you a significant amount of money and keep your interior looking its best.
This comprehensive guide will walk you through the process of repairing leather car seat seams, providing you with the knowledge and confidence to tackle this task head-on.
Understanding the Importance of Timely Repairs
Before we delve into the repair process, it’s crucial to understand why addressing seam damage promptly is essential. Ignoring a small tear or separation can lead to more extensive damage over time. The constant pressure and friction exerted on the seams during regular use can cause the tear to worsen, potentially compromising the structural integrity of the entire seat cover.
“Addressing seam damage early on is crucial,” says renowned automotive upholstery expert, Johnathan Miller. “What may seem like a minor issue initially can quickly escalate into a major repair if neglected. Timely intervention not only saves you money in the long run but also preserves the overall value and aesthetics of your vehicle’s interior.”
Gathering the Necessary Tools and Materials
To embark on your leather car seat seam repair journey, you’ll need a few essential tools and materials. Having everything prepared beforehand will streamline the process and ensure optimal results. Here’s what you’ll need:
- Leather Repair Kit: Opt for a high-quality kit specifically designed for leather car upholstery. These kits typically include specialized needles, heavy-duty thread, a seam ripper, and sometimes even leather adhesive.
- Sharp Scissors: A good pair of sharp scissors will come in handy for trimming excess thread and preparing patches if needed.
- Leather Cleaner and Conditioner: Thoroughly cleaning and conditioning the leather before and after the repair will help to remove dirt and grime, and keep the leather supple.
- Masking Tape: This will help to hold the edges of the torn seam together while you work.
- Optional: Leather Filler: If the tear is significant and involves a loss of material, you may need a leather filler to create a smooth surface before stitching.
Step-by-Step Guide to Repairing Leather Car Seat Seams
Now that you’re equipped with the right tools and knowledge, let’s dive into the step-by-step process of repairing leather car seat seams:
1. Clean the Area
Before commencing the repair, ensure the area around the damaged seam is clean and free from any dirt, dust, or debris. Use a gentle leather cleaner and a soft microfiber cloth to wipe down the surface. Allow the area to dry completely before proceeding.
2. Assess the Damage
Carefully examine the damaged seam to determine the extent of the repair required. Is it a small tear that can be stitched together, or is it a more significant separation that requires patching? Understanding the scope of the damage will help you choose the appropriate repair technique.
3. Prepare the Seam
If the tear is small and the edges are relatively clean, you can proceed directly to stitching. However, if the tear is larger or the edges are frayed, you’ll need to prepare the seam further. Use a seam ripper to carefully remove any loose threads or frayed edges. If there’s any existing stitching that’s damaged or weak, remove it as well. This will ensure a clean and even surface for the new stitching.
For larger tears or those with missing material, you can use a leather patch to reinforce the repair. Cut a patch of leather slightly larger than the damaged area, ensuring it matches the color and texture of your car seat leather as closely as possible. Use leather adhesive to secure the patch behind the tear, following the manufacturer’s instructions for drying time.
4. Begin Stitching
Thread your leather needle with a length of heavy-duty thread, ensuring it matches the color of your car seat’s stitching. Double the thread for added strength and knot the end securely.
Starting from the inside of the seat cover, insert the needle through the leather about a quarter of an inch from the start of the tear. Pull the thread through, leaving a small tail on the inside. Then, insert the needle into the opposite side of the tear, directly across from the first stitch. Pull the thread taut, creating a secure stitch.
Continue stitching along the length of the tear, ensuring your stitches are evenly spaced and consistent in tension. For added durability, consider using a backstitch every few stitches. This involves inserting the needle back through the previous stitch hole before pulling it through the next hole, creating a stronger bond.
5. Finishing Touches
Once you’ve stitched the entire length of the tear, tie off the thread securely on the inside of the seat cover. Trim any excess thread ends. If you used leather filler, allow it to dry completely according to the manufacturer’s instructions. You can then use a fine-grit sandpaper to gently smooth out any rough edges or excess filler.
6. Condition the Leather
After completing the repair, it’s essential to condition the leather to replenish its moisture and protect it from future damage. Apply a high-quality leather conditioner to the entire seat surface, using a soft microfiber cloth. Allow the conditioner to absorb into the leather before using the seat.
Maintaining Your Repaired Leather Car Seats
To keep your newly repaired leather car seats looking their best and prevent future damage, follow these maintenance tips:
- Regular Cleaning: Dust and dirt can act as abrasives, damaging the leather surface over time. Clean your leather car seats regularly using a gentle leather cleaner and a soft microfiber cloth.
- UV Protection: Prolonged exposure to sunlight can cause leather to fade and dry out. Park your car in a shaded area whenever possible, or use a sunshade to protect the interior.
- Conditioning: Just like your skin, leather needs regular moisturizing to stay supple and prevent cracking. Condition your leather car seats every few months, or more frequently if they’re exposed to extreme temperatures or sunlight.
By following these simple care tips, you can extend the lifespan of your leather car seats and keep them looking their best for years to come.
FAQs
Q: Can I use super glue to repair a leather car seat seam?
A: While super glue may seem like a quick fix, it’s not recommended for repairing leather car seat seams. Super glue can create a rigid bond that can crack or break easily under pressure. It’s best to use a dedicated leather adhesive or a leather repair kit that includes suitable bonding agents.
Q: What type of needle is best for sewing leather car seats?
A: For sewing leather car seats, you’ll need a specialized leather needle. Look for needles labeled as “leather” or “heavy duty.” These needles have a triangular tip that pierces through leather more easily than standard sewing needles.
Q: How much does it cost to have a leather car seat seam professionally repaired?
A: The cost of professional leather car seat seam repair can vary depending on the extent of the damage, the type of leather, and the location of the repair shop. On average, you can expect to pay anywhere from $100 to $300 for a professional repair.
Q: Can I repair a ripped leather car seat myself?
A: Yes, you can repair a ripped leather car seat yourself using a leather repair kit and following the steps outlined in this guide. However, if the rip is extensive or you’re not comfortable attempting the repair yourself, it’s best to consult a professional automotive upholstery specialist.
Q: How can I prevent my leather car seats from cracking?
A: To prevent your leather car seats from cracking, clean them regularly with a gentle leather cleaner, condition them every few months, and protect them from prolonged exposure to sunlight and extreme temperatures.
Need More Help?
For more detailed guides on specific car seat repairs, check out these resources:
- Car Mechanic Simulator 2018: How to Repair Seat
- Repair Ripped Leather Car Seat
- How to Repair Small Cut in Leather Car Seat
- Ballam and Thurlow Car Seat Repairs Doncaster
- How to Repair Car Seat Stitch After Airbag Deployment
If you have any further questions or require assistance with your car repair needs, don’t hesitate to reach out to our expert team. We’re available 24/7 to assist you via WhatsApp at +1(641)206-8880 or email us at [email protected].


