Discovering a hole in your car body can be disheartening, whether it’s from rust, an accident, or general wear and tear. Fortunately, repairing a small hole yourself is a manageable DIY project that can save you money and maintain your vehicle’s appearance. This guide provides a step-by-step approach on how to repair a hole in your car body effectively.
Step-by-Step Guide to Repairing Car Body Holes
Step 1: Thoroughly Clean the Damaged Area
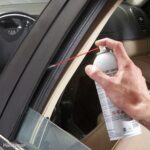
Before you begin any repair work, meticulous cleaning is crucial. Start by washing the area around the hole with soap and water to remove loose dirt and grime. Then, use a wax and grease remover to eliminate any lingering wax or polish, which can interfere with the adhesion of repair materials. Finally, carefully inspect the area for rust. If rust is present, use a wire brush or sandpaper to remove as much surface rust as possible. A clean surface is essential for ensuring the body filler properly adheres and prevents future issues.
Step 2: Sand the Area to Prepare for Filler
Sanding is a critical step in preparing the surface for body filler. Use #180 or #220 grit aluminum oxide sandpaper, or the specific type recommended for your car’s body material (aluminum, steel, or plastic). Automotive supply stores can offer guidance on selecting the correct sandpaper. The purpose of sanding is to create a “key” for the filler to bond to, as body fillers do not adhere well to painted surfaces.
When sanding, employ a feather-edging technique. This involves sanding beyond the immediate area of the hole, gradually blending the edges of the existing paint into the sanded area. Feather-edging prevents the old paint from lifting or chipping later and ensures a smooth transition between the old paint and the repaired section. Work gently inwards from the edges of the damage to avoid accidentally enlarging the hole.
Step 3: Mix Body Filler and Hardener Correctly
Body filler is typically a two-part system consisting of the filler itself and a hardener. It’s important to mix these components in the correct ratio as specified by the manufacturer. Usually, this is a small amount of hardener to a larger quantity of filler. Mix only a small batch at a time, as body filler hardens relatively quickly and you want to avoid waste. Use a clean mixing board or surface and a plastic spreader to thoroughly combine the filler and hardener until you achieve a uniform color and consistency.
Step 4: Back the Hole for Filler Application
For holes that go all the way through the car body, you need to create a backing to prevent the filler from falling through. The method for backing depends on the body material:
-
For metal car body holes: Fiberglass screening or fine aluminum chicken wire are excellent choices. Cut a piece of screening or wire slightly larger than the hole. Clean the underside edges of the hole to remove any dirt or paint. Mix a very small amount of body filler and hardener and apply it to the edges of the screen/wire and the underside edges of the hole. This will adhere the backing material in place. Allow this initial patch to dry for several hours to ensure it’s firmly set before proceeding.
-
For fiberglass or plastic car body holes: Use a specialized patch kit designed for plastics or fiberglass, available at auto supply stores. These kits usually include a mesh patch and resin. Follow the instructions provided with the kit for application.
Step 5: Apply the Body Filler Layer by Layer
Once the backing is secure (if needed), you can start applying the body filler. Use a plastic spreader or putty knife to apply the mixed filler to the prepared area. Work deliberately, pressing the filler into the hole and slightly beyond the edges onto the sanded area. Apply the filler in thin layers, building up gradually. Avoid applying too much filler at once, as thicker layers are more prone to cracking and can be harder to shape and sand. The filled area should be slightly higher than the surrounding car body surface to allow for sanding down to a smooth, even finish.
Step 6: Shape the Filler While It’s Semi-Hard
As the body filler begins to cure, it will reach a consistency similar to hard cheese. At this stage, it’s ideal for initial shaping. Use a perforated body file or a shaping tool to remove excess filler and roughly contour the repair area to match the surrounding body lines. This step significantly reduces the amount of sanding needed later and helps achieve a more accurate shape.
Step 7: Sand the Hardened Filler for a Smooth Finish
Allow the body filler to fully harden completely, which usually takes at least 20-30 minutes, depending on the product and ambient temperature. Once fully hardened, begin sanding to refine the shape and smoothness. Start with medium-grit sandpaper (like #180 or #220) to remove the bulk of the excess filler and refine the shape. Gradually move to finer grits (like #320 or #400) to smooth out the surface and eliminate sanding scratches. Use a sanding block to ensure even pressure and prevent creating uneven areas. Continue sanding until the repaired area is perfectly flush and smooth with the surrounding car body surface. To check for smoothness, you can lightly wet the area and observe the reflection of light; any imperfections will be more visible when wet.
Step 8: Prime and Paint the Repaired Area
With the sanding complete and the repair area smooth, the next step is to prime and paint. Apply several thin coats of automotive primer to the repaired area, allowing each coat to dry according to the primer manufacturer’s instructions. Primer fills any minor imperfections and provides a uniform surface for paint adhesion. Between primer coats, lightly sand with fine-grit sandpaper (like #400 or #600) using a sanding block to achieve an ultra-smooth surface. Finally, apply your car’s matching touch-up paint or have the area professionally painted for a seamless finish. Clear coat can be applied after the color coat for added protection and shine.
Conclusion
Repairing a hole in your car body is a rewarding DIY task that enhances your vehicle’s appearance and prevents further damage. By following these steps carefully and taking your time, you can achieve professional-looking results at home. Remember to always work in a well-ventilated area and wear appropriate safety gear, such as gloves and a respirator, when sanding and working with body fillers and paints. With patience and attention to detail, you can successfully restore your car body and be proud of your DIY repair work.