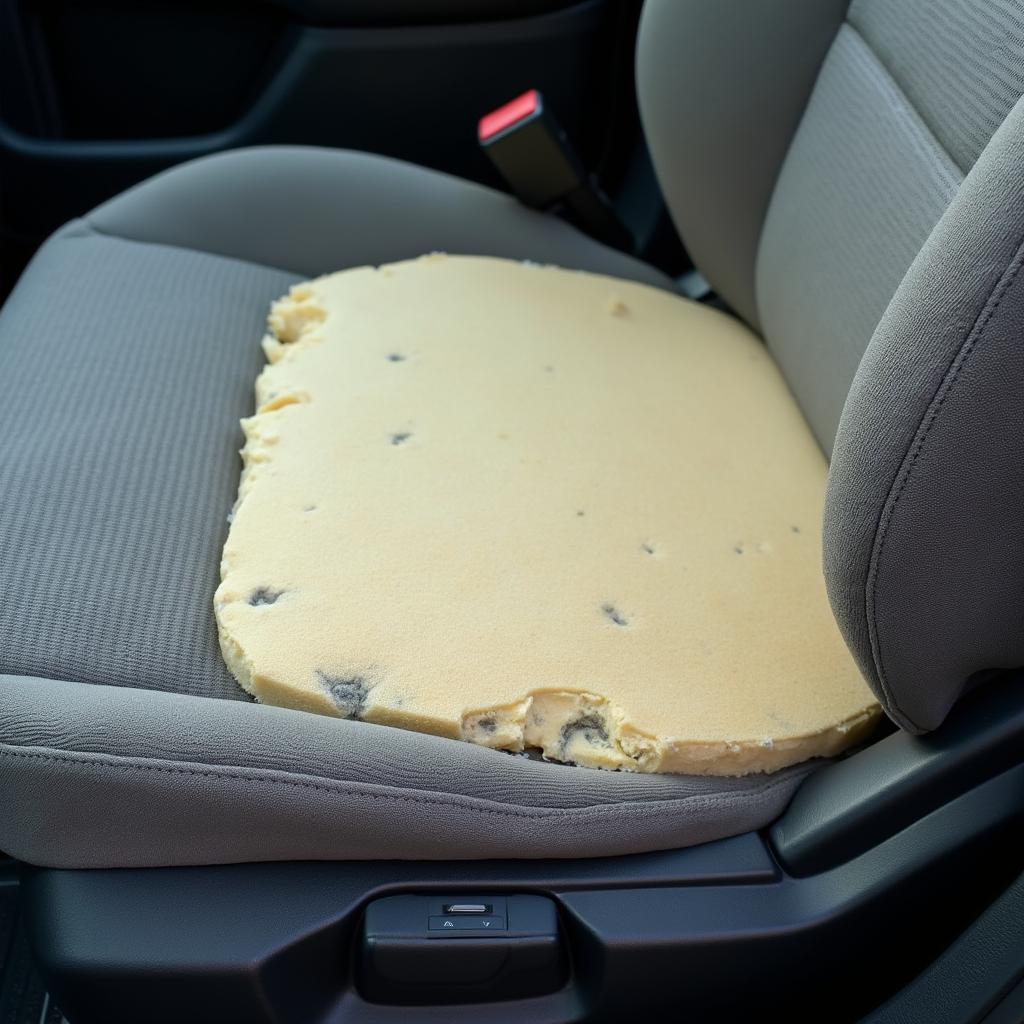
Restoring the comfort and support of your car seat can seem like a daunting task, especially when the foam padding starts to deteriorate. You might be wondering, “How to repair foam in a car seat?” Don’t worry! This comprehensive guide will walk you through the process, offering practical tips and techniques to breathe new life into your worn-out seats.
Identifying the Problem: When Does Car Seat Foam Need Repair?
Before diving into the repair process, it’s essential to determine if your car seat foam truly needs attention. Here are a few telltale signs:
- Visible sagging or compression: If your car seat looks visibly sunken or lacks its original shape, the foam has likely lost its resilience.
- Discomfort while driving: Experiencing back pain, stiffness, or an overall uncomfortable feeling after driving can indicate worn-out foam padding.
- Lumps or uneven surfaces: Feeling lumps, bumps, or noticeable unevenness in the seat cushion signals potential foam damage.
Essential Tools and Materials for Car Seat Foam Repair
Gathering the right tools and materials is crucial for a successful repair. Here’s a list of what you’ll need:
- Replacement foam: Choose foam specifically designed for upholstery, preferably high-density foam for optimal support and durability.
- Sharp utility knife: A sharp blade is essential for precise cutting and shaping of the replacement foam.
- Spray adhesive: Opt for a high-strength adhesive specifically formulated for foam and fabric bonding.
- Scissors: These will come in handy for trimming fabric and making precise cuts.
- Measuring tape: Accurate measurements are key to ensuring a perfect fit for your replacement foam.
- Marker: Use a permanent marker to mark your measurements and cutting lines on the foam.
Step-by-Step Guide to Repairing Car Seat Foam
Follow these detailed steps to effectively repair your car seat foam:
- Remove the Seat Cover: Carefully detach the seat cover from the car seat frame. This usually involves unzipping, unclipping, or removing hog rings holding the cover in place.
- Assess the Foam Damage: Examine the existing foam padding for the extent of the damage. Identify areas requiring repair or replacement.
- Measure and Cut the Replacement Foam: Using the old foam as a template or taking precise measurements of the seat, mark and cut the new foam to the correct dimensions.
- Apply Adhesive: Evenly apply spray adhesive to both the car seat base and the underside of the new foam.
- Bond the Foam: Carefully align and firmly press the replacement foam onto the car seat base, ensuring a secure bond.
- Trim Excess Foam: Using your utility knife, trim any excess foam that extends beyond the seat base edges.
- Reinstall the Seat Cover: Once the adhesive has dried completely, carefully reinstall the seat cover onto the repaired foam, ensuring a snug and wrinkle-free fit.
Tips for a Professional Finish
- Take your time: Rushing through the process can lead to mistakes. Approach each step patiently and meticulously.
- Use a fresh blade: A sharp utility knife blade ensures clean cuts and prevents tearing the foam.
- Work in a well-ventilated area: Spray adhesive emits fumes, so ensure proper ventilation during application.
- Consider adding a layer of batting: For added comfort and a smoother appearance, consider adding a layer of upholstery batting over the repaired foam before reinstalling the seat cover.
When to Seek Professional Help
While repairing car seat foam can be a DIY project, there are instances where seeking professional help is advisable:
- Extensive damage: If the foam is severely damaged, crumbled, or requires complex repairs, it’s best to consult a professional upholsterer.
- Airbag concerns: If your car seat has side airbags, tampering with the foam can affect their deployment. In such cases, always consult a professional.
- Lack of confidence: If you’re unsure about any aspect of the repair process, it’s always better to seek professional assistance.
Conclusion
Repairing the foam in your car seat can significantly improve your driving comfort and the overall appearance of your vehicle’s interior. By following this comprehensive guide and employing the right techniques, you can tackle this repair project with confidence. Remember, patience, precision, and the right materials are key to achieving a professional-looking and long-lasting result. For more in-depth guides on specific car seat repairs, check out our articles on how to repair car seat foam rubber and how to shape foam to repair car seat bolster.


