Seeing cracks in your fake leather car seats can be disheartening. It’s a common problem, especially as vehicles age and are exposed to heat, sunlight, and wear and tear. But don’t worry – repairing these cracks yourself is easier than you might think! This comprehensive guide will walk you through the steps to restore your car seats and leave them looking their best.
Understanding Fake Leather: Why Cracks Happen
Before diving into the repair process, it’s helpful to understand what causes cracks in the first place. Unlike genuine leather, fake leather (also known as leatherette, vinyl, or faux leather) is a synthetic material made by coating a fabric backing with a layer of polyvinyl chloride (PVC) or polyurethane (PU). While durable, this material can break down over time due to:
- UV exposure: Prolonged sunlight can dry out the material, making it brittle and prone to cracking.
- Heat: High temperatures inside a parked car can accelerate the degradation process.
- Cold: Extreme cold can also weaken the material, making it susceptible to cracking when flexed.
- Lack of maintenance: Regular cleaning and conditioning help keep fake leather supple. Neglecting this can lead to dryness and cracking.
Gather Your Supplies: What You’ll Need
Having the right tools and materials on hand is crucial for a successful repair. Here’s a list of what you’ll need:
- Cleaning Supplies: A gentle cleaner specifically designed for leather or vinyl (avoid harsh chemicals), microfiber cloths, a soft-bristled brush, and a bucket of warm water.
- Repair Compound: Choose a high-quality leather or vinyl repair kit that matches your seat color. These kits usually include a filler compound, colorant, and various applicators.
- Preparation Tools: Fine-grit sandpaper (400-grit or higher), rubbing alcohol, and cotton swabs.
- Finishing Touches: Leather or vinyl conditioner, a heat gun or hairdryer (optional), and a clean cloth.
Step-by-Step Guide to Repairing Cracks:
Follow these steps to effectively repair cracks in your fake leather car seats:
- Clean the Affected Area: Use your chosen cleaner and a soft-bristled brush to thoroughly clean the cracked area, removing dirt, grime, and any loose material. Rinse with a damp cloth and let it dry completely.
- Prepare the Surface: Lightly sand the cracked area with fine-grit sandpaper to create a smooth surface for the repair compound to adhere to. Wipe away any dust with a damp cloth.
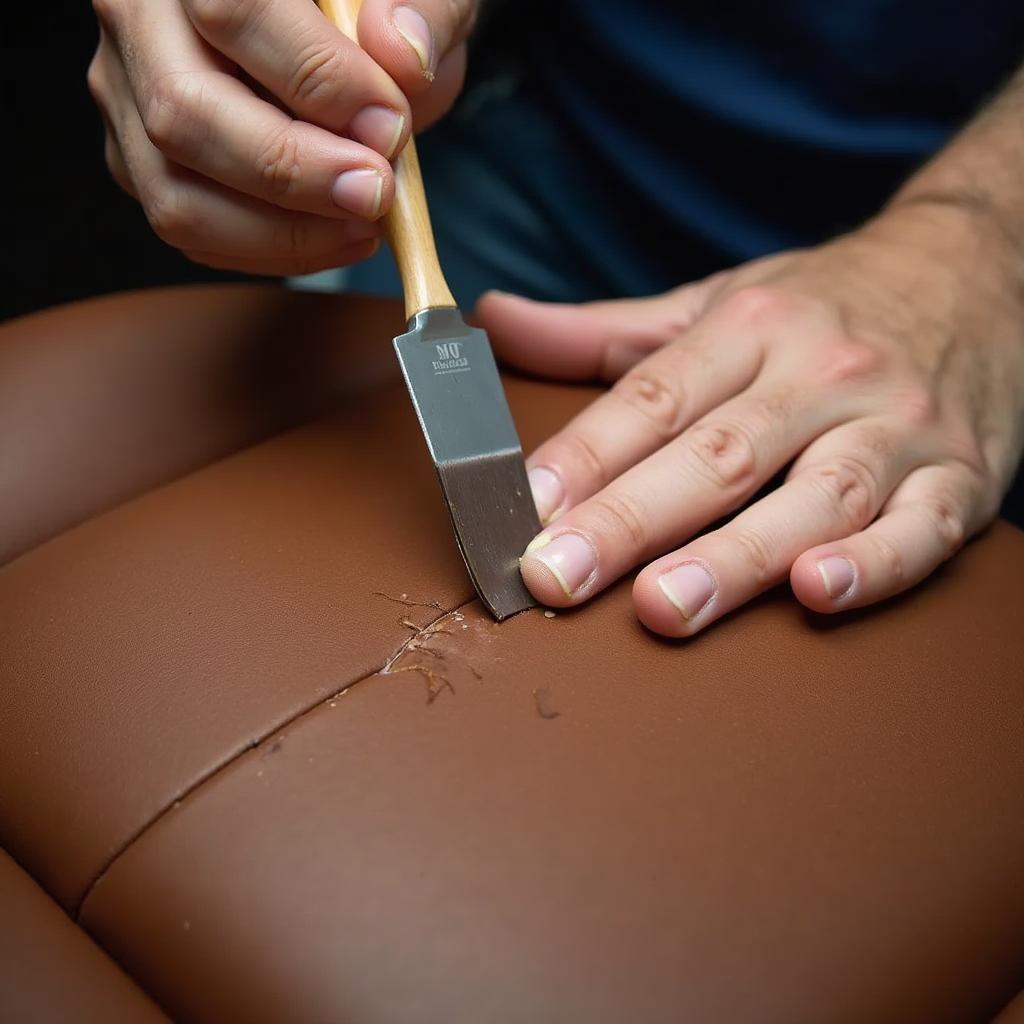
- Apply the Repair Compound: Following the instructions provided with your chosen repair kit, carefully apply the filler compound to the cracks. Use a palette knife or a similar tool to push the compound into the cracks and create a smooth, even surface.
- Allow to Dry: Let the repair compound dry completely according to the manufacturer’s instructions. This usually takes a few hours.
- Sand and Smooth: Once dry, use fine-grit sandpaper to gently sand down any excess repair compound and create a seamless blend with the surrounding surface.
- Apply Colorant (if needed): If your repair kit includes a colorant, apply it to the repaired area following the instructions provided. This helps to create a consistent color match.
- Heat Set (optional): If using a heat gun or hairdryer, carefully apply heat to the repaired area for a few seconds to help the repair compound and colorant cure and bond properly. Follow the manufacturer’s instructions carefully to avoid damaging the material.
- Condition the Leather: Once the repair is complete, apply a high-quality leather or vinyl conditioner to the entire seat surface to help protect the material and keep it supple.
 Applying Leather Repair Compound
Tips for Long-Lasting Results:
- Choose the Right Repair Kit: Select a kit specifically designed for leather or vinyl repair and ensure the color matches your car seats closely.
- Test in a Hidden Area: Before applying any product to a visible area, test it on a hidden part of the seat to check for color matching and any adverse reactions.
- Work in Thin Layers: When applying the repair compound and colorant, work in thin layers, allowing each layer to dry completely before applying the next. This will ensure a smoother finish and better adhesion.
- Be Patient: Take your time with each step and don’t rush the process. Allow adequate drying time between steps for optimal results.
FAQs About Repairing Fake Leather Car Seats
Q: Can I use super glue to repair cracks in my car seats?
A: While tempting, super glue isn’t ideal for fake leather car seat repair. It dries rigidly and can worsen the damage, making future repairs more difficult.
Q: How often should I condition my fake leather car seats?
A: Condition your fake leather seats every 3-6 months to keep the material supple and prevent cracking.
who sells grey viny car seat repair kit
Conclusion: Restore Your Car’s Interior with Confidence
Repairing cracks in your fake leather car seats is a manageable DIY project that can save you money and restore the interior of your vehicle. With the right materials and a little patience, you can achieve professional-looking results. Remember to follow the steps carefully and choose high-quality products for a long-lasting repair.
Need more car care advice or assistance with complex repairs? We’re here to help! Contact us via WhatsApp at +1(641)206-8880 or email us at [email protected] for 24/7 support from our team of experts.


