A deep scratch on your plastic car bumper can be an eyesore, but fixing it yourself is often more affordable than a costly trip to the auto shop. Let’s dive into how you can effectively repair those pesky scratches and restore your bumper’s smooth finish.
Assessing the Damage: Is DIY Repair Possible?
Before you grab your tools, it’s crucial to assess the severity of the scratch.
- Minor Scratches: These are surface-level and often buff out easily with polishing compound.
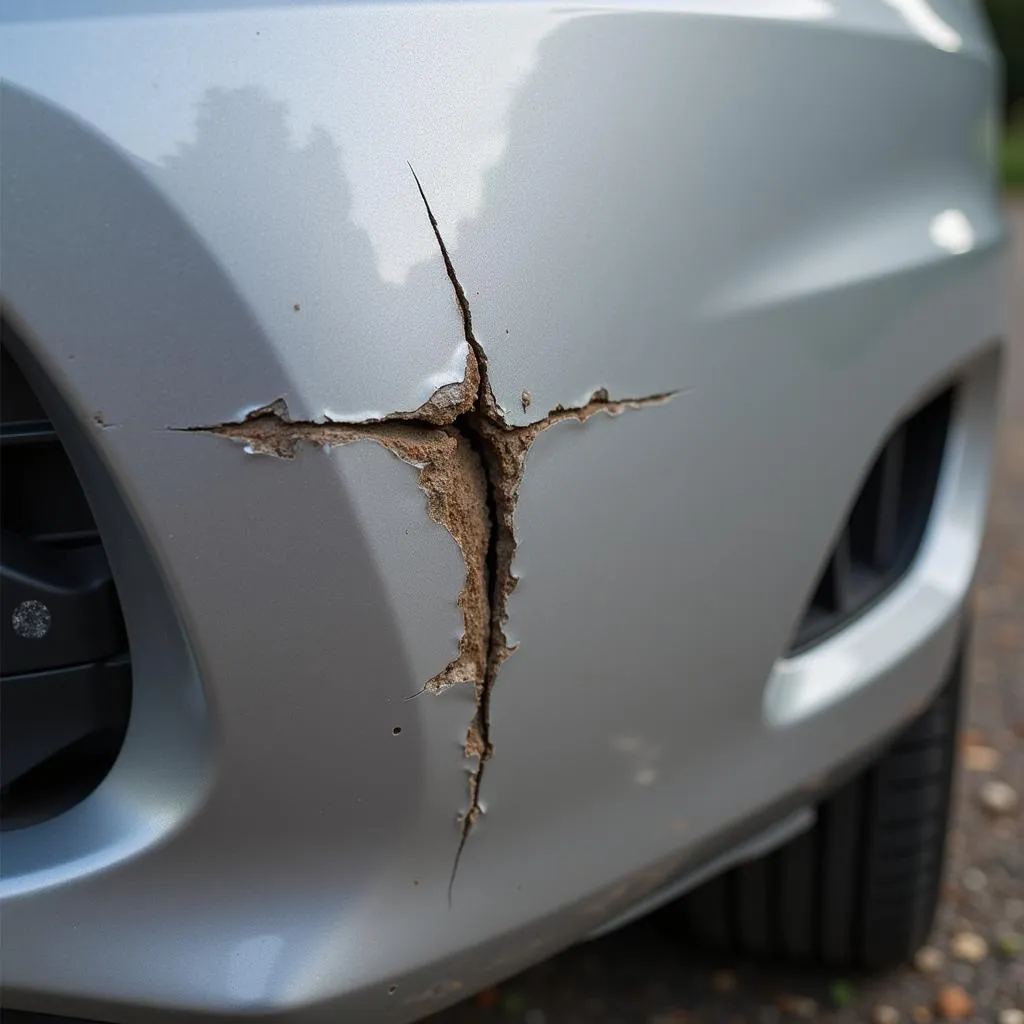
- Deep Scratches: These penetrate the paint and expose the plastic underneath. DIY repair is possible but requires more steps.
- Severe Damage: Deep gouges, cracks, or large areas of missing plastic usually call for professional help.
Gathering Your Repair Arsenal: Essential Tools and Materials
For a successful DIY repair, gather the following:
- Cleaning Supplies: Car wash soap, microfiber cloths, rubbing alcohol
- Sandpaper: 200-grit, 400-grit, 600-grit
- Plastic Primer (if needed)
- Automotive Paint: Matching your car’s color code (check your owner’s manual or driver’s side doorjamb)
- Clear Coat: For protection and shine
- Masking Tape and Paper
- Plastic Putty (if needed)
- Applicators: Sponges, brushes, or spray cans (depending on your chosen products)
Step-by-Step Guide: Repairing That Deep Scratch
1. Prepare the Surface
Thoroughly wash and dry your bumper to remove dirt and grime. Use masking tape and paper to protect the surrounding areas of your car from overspray or accidental sanding.
2. Sanding: Smoothing Out the Scratch
- Deep Scratches: Start with 200-grit sandpaper, sanding only the scratched area using back and forth motions.
- Gradually Increase Grit: As the scratch becomes less noticeable, switch to 400-grit and finally 600-grit sandpaper for a smooth finish.
3. Addressing Deep Gouges: Plastic Putty to the Rescue
- If the scratch is deep enough to feel with your fingernail, you’ll need plastic putty.
- Apply a small amount of putty onto the scratch, slightly overfilling it.
- Let it dry completely, following the manufacturer’s instructions.
- Sand the putty smooth, blending it into the surrounding area.
4. Prime Time: Preparing for Paint
- If you’ve used plastic putty or sanded down to the bare plastic, apply a thin coat of plastic primer.
- Primer promotes paint adhesion and ensures a uniform finish.
- Let the primer dry completely before moving on.
5. Applying the Paint: Matching the Color
- Shake your automotive paint thoroughly.
- Apply thin, even coats, following the product instructions.
- Allow each coat to dry completely before applying the next.
- Two to three coats are usually sufficient.
6. Sealing the Deal: The Protective Clear Coat
- Once the paint is completely dry, apply two to three thin layers of clear coat.
- Clear coat provides a glossy finish and protects the paint from UV rays and other environmental damage.
7. Final Touches: Buffing for a Flawless Look
- After the clear coat has cured (usually 24-48 hours), use a polishing compound and a soft cloth to buff the area gently.
- This removes any overspray or imperfections, leaving a smooth, shiny finish.
Repairing Deep Scratches on Plastic Car Bumpers: FAQs
Q: Can I use regular spray paint on my car bumper?
A: It’s not recommended. Automotive paint is specifically designed to withstand weather elements and bond to plastic surfaces.
Q: What if I can’t find my exact paint color code?
A: Most auto parts stores can help you find a close match based on your car’s make, model, and year.
Q: How long will the repair last?
A: A properly executed DIY repair can last for several years.
Need Expert Assistance?
If you’re unsure about any step of the process or the damage seems too severe, don’t hesitate to seek professional help. Contact our team of car repair specialists at CarRepairOnline via WhatsApp: +1(641)206-8880 or email: [email protected]. We’re here to assist you 24/7!


