Car window rubber, also known as window weatherstripping, plays a crucial role in keeping your car’s interior dry and quiet. Over time, this rubber seal can become brittle, cracked, or damaged, leading to wind noise, water leaks, and even potential damage to your car’s interior. Fortunately, repairing this damage is often a manageable DIY project. This comprehensive guide will walk you through the steps of how to repair damaged rubber around your car window, helping you restore your car’s seal and prevent further issues.
Identifying the Problem: What’s Wrong with Your Car Window Rubber?
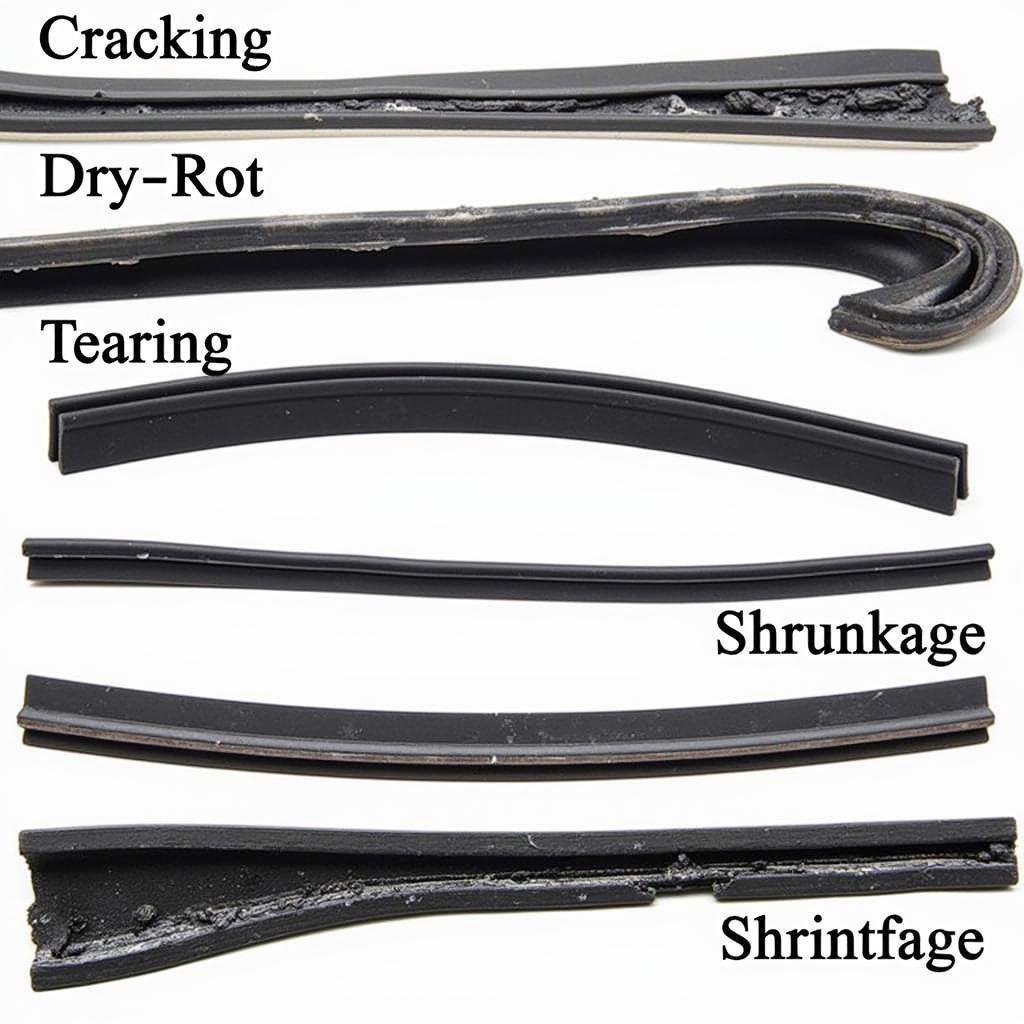
Before you start repairing your car window rubber, it’s essential to identify the specific issue. Here are some common problems:
- Cracking and Dry Rot: This is a common issue caused by exposure to UV rays, heat, and ozone.
- Tearing or Ripping: Sharp objects or accidental snags can cause tears in the rubber.
- Shrinking or Compression: Over time, the rubber can shrink or compress, leading to gaps in the seal.
- Missing Pieces: In some cases, sections of the rubber seal might be completely missing.
 Damaged Car Window Rubber
Gathering Your Tools and Materials
Once you’ve identified the problem, gather the necessary tools and materials:
- Cleaning Supplies: A bucket of warm soapy water, a cleaning rag or sponge, and rubbing alcohol.
- Replacement Rubber Weatherstripping: If the damage is extensive, you’ll need to replace the entire weatherstripping.
- Rubber Conditioner/Protectant: This helps restore the rubber’s flexibility and prevents future damage.
- Weatherstripping Adhesive (Optional): For securing loose or torn sections.
- Utility Knife or Scissors: For trimming and cutting the replacement weatherstripping.
- Plastic Pry Tools (Optional): Helpful for gently removing old weatherstripping or loosening trim pieces.
Step-by-Step Guide to Repairing Damaged Car Window Rubber
Follow these steps to repair the damaged rubber around your car window:
1. Clean the Area Thoroughly:
Use warm soapy water and a clean rag to remove dirt, grime, and debris from the rubber seal and the surrounding area. Allow it to dry completely.
2. Assess the Damage:
Carefully examine the rubber seal to determine the extent of the damage. If the damage is minimal (small cracks or dryness), you can likely repair it with a rubber conditioner.
3. Applying Rubber Conditioner (For Minor Damage):
Apply a high-quality rubber conditioner to the affected areas. Work it into the rubber using your fingers or a soft cloth. Allow it to dry and reapply as needed.
4. Replacing Damaged Sections (For Extensive Damage):
- Remove the Old Weatherstripping: If the damage is extensive, you’ll need to replace the entire weatherstripping. Carefully pry off the old weatherstripping using a plastic pry tool. Be gentle to avoid damaging the surrounding paint or trim.
- Measure and Cut the New Weatherstripping: Measure the length of the old weatherstripping and cut the new piece accordingly using a utility knife or sharp scissors.
- Apply Weatherstripping Adhesive (Optional): If using adhesive, apply it to the back of the new weatherstripping according to the manufacturer’s instructions.
- Install the New Weatherstripping: Starting at one end, carefully press the new weatherstripping into place, ensuring it aligns with the window channel. Use a plastic pry tool to help guide it into place if necessary.
5. Test the Seal:
Once the repair or replacement is complete, close the car window and check for any gaps or areas where the seal is not tight. Spray water around the window to check for leaks.
Tips for Maintaining Your Car Window Rubber
- Regular Cleaning: Clean the rubber seals regularly with soap and water to prevent dirt and grime buildup.
- Apply Rubber Conditioner: Apply a rubber conditioner every few months, especially during extreme weather conditions, to keep the rubber pliable and prevent cracking.
- Avoid Parking in Direct Sunlight: Prolonged exposure to UV rays can accelerate the deterioration of rubber. Park in the shade or use a car cover whenever possible.
- Address Damage Promptly: If you notice any damage to the rubber seals, address it as soon as possible to prevent further deterioration and potential water leaks.
When to Consult a Professional
While repairing damaged car window rubber can often be a DIY project, there are instances when it’s best to consult a professional car window repair mechanics. If you’re uncomfortable working on your car or the damage is extensive, it’s best to seek professional help.
Conclusion
Maintaining the integrity of your car window rubber is essential for a quiet, dry, and comfortable ride. By following the steps outlined in this guide, you can repair minor damage and ensure a proper seal. Remember that regular maintenance, including cleaning and conditioning, can significantly extend the lifespan of your car window rubber, preventing future issues and saving you money in the long run.
If you’re looking for reliable car window repair services in your area, check out our resources for car window repair Fairfax, car power window repair Louisville KY, car window repair Plainfield NJ, or car window repair Myrtle Beach SC.

