Is the coating on your car’s navigation screen scratched, peeling, or damaged? It’s a common issue that can detract from your driving experience, making the display look worn and impacting visibility, especially in bright sunlight. Many car owners face this problem, often considering expensive screen replacements. However, there’s a cost-effective and straightforward DIY solution: repairing the coating yourself using a screen protector film. This guide will walk you through the process of restoring your car navigation screen coating, saving you money and frustration.
Identifying the Problem: Damaged Navigation Screen Coating
Before you start, it’s important to confirm that the anti-glare coating on your navigation screen is indeed damaged. Common signs include:
- Scratches and Scuff Marks: Visible lines or marks on the screen surface, often appearing as a grid pattern or rubbed-off areas.
- Peeling or Flaking Coating: The matte finish may start to peel off, especially noticeable at the edges or corners of the screen.
- Uneven Glossiness: Areas of the screen may appear glossier than others, indicating the coating has been unevenly worn away.
- Pink or Rainbow Hues in Certain Lighting: Damage can become more apparent under specific lighting conditions, revealing pink or rainbow reflections.
These issues are often caused by accidental cleaning with harsh chemicals, abrasive cloths, or even just years of dust and regular use. Sometimes, as the original author suspected, damage can even occur during dealer servicing.
Choosing the Right Solution: NuShield DayVue Film
Instead of replacing the entire navigation screen, which can be costly and complex, applying a specially designed screen protector film is an effective repair. For automotive displays, NuShield DayVue film is an excellent choice. This film is specifically engineered to address the challenges of car screens:
- Anti-glare properties: Like the original coating, DayVue film minimizes reflections, ensuring visibility even in direct sunlight.
- Scratch resistance: It provides a protective layer, preventing further scratches and damage.
- Enhanced clarity and contrast: Users report that DayVue film can actually improve screen clarity and contrast compared to the original, often fragile, matte coating.
- Easy application: Similar to smartphone screen protectors, DayVue film is designed for straightforward DIY installation.
While other films might be available, NuShield DayVue is praised for its superior performance and suitability for automotive displays, as highlighted by the original author’s positive experience and comparison to Lexerd film.
Step-by-Step Guide to Repairing Your Navigation Screen Coating
Here’s a detailed guide based on the original author’s successful method for repairing your car navigation screen coating using NuShield DayVue film. Always ensure you have the correct tools and work in a clean, dust-free environment.
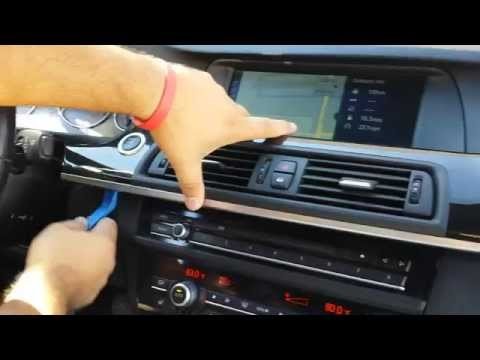
Step 1: Removing the CIC Display
The first step is to safely remove the navigation display unit from your car. The process varies depending on your car model, but generally involves carefully prying away trim pieces and unscrewing the unit.
Refer to online resources and videos specific to your car model for detailed instructions. A helpful video for removing a similar BMW CIC screen can be found on YouTube, demonstrating the general process of accessing and disconnecting the display unit.
Step 2: Disassembling the Display Unit
Once removed, you’ll need to disassemble the display unit to access the screen surface. This typically involves removing a plastic bezel surrounding the screen. Small Torx screwdrivers are usually required for this step.
Again, online videos can be invaluable for visualizing this process. A video demonstrating bezel removal and screen polishing (though on a slightly different screen model) provides a visual guide to the disassembly.
Step 3: Polishing off the Original Coating
With the screen accessible, the next step is to remove the damaged original coating. The author recommends using Novus #2 Polish and a clean microfiber cloth to gently polish away the old coating. Follow this with Novus #1 Polish for enhanced clarity. Work in circular motions with light pressure until the damaged coating is removed and the screen is clear.
Step 4: Applying the NuShield DayVue Film
Clean the screen thoroughly using a product like CarPro Eraser or isopropyl alcohol on a clean microfiber towel to remove any polish residue and ensure a dust-free surface. Carefully apply the NuShield DayVue film according to the manufacturer’s instructions, similar to applying a smartphone screen protector. Take your time to avoid air bubbles and ensure proper alignment.
Step 5: Reassembling and Re-installing
Once the film is applied, re-attach the plastic bezel to the display unit and then carefully re-install the complete unit back into your car, reversing the removal process from Step 1. Ensure all connections are secure.
Benefits of Using NuShield DayVue Film
Choosing NuShield DayVue film offers several advantages for repairing your car navigation screen coating:
- Restored Screen Appearance: Eliminates scratches and damage, making your screen look new again.
- Improved Visibility: Reduces glare and enhances clarity, improving screen readability in various lighting conditions.
- Cost-Effective Solution: Significantly cheaper than replacing the entire navigation screen.
- DIY Friendly: A straightforward process that can be completed by most car owners with basic tools and patience.
- Protection: Adds a layer of protection against future damage.
Conclusion
Repairing the damaged coating on your car navigation screen is a worthwhile DIY project. By following these steps and using NuShield DayVue film, you can restore the look and functionality of your screen, enjoying a clearer and more pleasant driving experience without the hefty cost of a screen replacement. Embrace the DIY approach and bring your navigation screen back to life.

