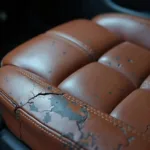
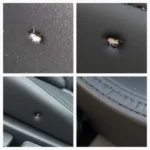
Torn, stained, or faded cloth car seats can make your interior look worn out. But don’t worry! You don’t need to be a professional mechanic to bring your seats back to life. This comprehensive guide will walk you through the steps on how to repair cloth car seats and restore their former glory.
Assessing the Damage: What Kind of Repair Do You Need?
Before diving into the repair process, it’s crucial to identify the type of damage your cloth car seats have sustained. This will determine the appropriate repair method and tools required.
Common types of cloth car seat damage include:
- Tears and Rips: These can occur from sharp objects, rough use, or even just wear and tear over time.
- Burns and Cigarette Holes: Accidental burns from cigarettes or hot objects leave unsightly marks on the fabric.
- Stains and Spills: Food, drinks, and dirt can lead to stubborn stains that detract from the seat’s appearance.
- Fading and Discoloration: Prolonged exposure to sunlight can cause the fabric to fade and lose its vibrancy.
Gathering Your Tools and Materials
Having the right tools and materials on hand is essential for a successful cloth car seat repair. Depending on the type of damage, you might need:
- Cleaning Supplies: Upholstery cleaner, microfiber cloths, a soft-bristled brush, and a vacuum cleaner with upholstery attachments.
- Repair Kit: A dedicated cloth car seat repair kit typically includes patches, adhesive, a color matching guide, and application tools. You can find these online or at auto parts stores.
- Scissors: For cutting patches to the desired size and shape.
- Iron: An iron with adjustable heat settings is necessary for heat-activated adhesives.
- Hair Dryer: A hairdryer can be used as an alternative to an iron for some adhesives.
Step-by-Step Guide: How to Repair a Tear in a Cloth Car Seat
Tears are one of the most common issues with cloth car seats, but thankfully, they’re relatively straightforward to fix. Here’s a step-by-step guide on how to repair a tear in a cloth car seat:
-
Clean the Area: Thoroughly clean the damaged area with upholstery cleaner and a microfiber cloth to remove dirt, dust, and debris. Allow it to dry completely before proceeding.
-
Prepare the Patch: If the tear is large, use a patch from your repair kit. Cut the patch to a size slightly larger than the tear, ensuring it covers the edges comfortably.
-
Apply Adhesive: Apply a thin layer of adhesive to the back of the patch, following the instructions provided with your repair kit.
-
Position the Patch: Carefully align the patch over the tear, ensuring it sits flush with the surrounding fabric. Gently press down on the patch to secure it in place.
-
Heat Activation (If Required): If your repair kit uses heat-activated adhesive, place a clean cloth over the patch and apply heat using an iron or hairdryer, following the manufacturer’s instructions. The heat will activate the adhesive and bond the patch to the seat fabric.
-
Drying and Curing: Allow the adhesive to dry and cure completely before using the seat. This may take several hours or as directed in the repair kit instructions.
 Repairing a Tear in Cloth Upholstery
Addressing Other Common Damages
While tears are a frequent issue, other forms of damage can also mar your cloth car seats. Let’s explore some solutions:
How to Repair a Burn in a Cloth Car Seat
Minor burns and cigarette holes can often be repaired using a similar patching technique as described for tears. However, for more severe burns that have significantly damaged the fabric, replacing the affected panel or seeking professional upholstery repair might be necessary.
How to Repair a Torn Cloth Car Seat Seam
Torn seams can often be fixed with a needle and thread. Choose a thread that closely matches the color of your car seat upholstery. Use a simple straight stitch to sew the torn edges of the fabric back together.
“For durable seam repairs, consider using a curved upholstery needle and a strong thread like nylon upholstery thread,” advises experienced automotive upholsterer, John Miller. “This combination helps create a stitch that can withstand the stresses of regular use.”
How to Remove Stains From Cloth Car Seats
Stains are an inevitable part of car ownership, but prompt action can prevent them from becoming permanent fixtures. Here are some tips:
- Act Fast: The sooner you address a stain, the easier it will be to remove.
- Blot, Don’t Rub: Blot the stain gently with a clean cloth or paper towel to absorb as much of the spill as possible. Rubbing can spread the stain and damage the fabric fibers.
- Use the Right Cleaner: Choose an upholstery cleaner appropriate for the type of stain. Test the cleaner on an inconspicuous area of the seat first to ensure it doesn’t cause discoloration.
Preventing Future Damage: Tips for Keeping Your Seats Looking Their Best
Prevention is always better than cure! Protect your cloth car seats from future damage with these proactive measures:
- Regular Cleaning: Vacuum your car seats regularly to remove dirt and debris that can cause wear and tear over time.
- Use Seat Covers: Consider using seat covers to protect your seats from spills, stains, and UV damage, especially if your car sees heavy use.
- Treat Spills Immediately: Address spills as soon as they occur to prevent them from setting into the fabric.
- Avoid Sharp Objects: Be mindful of sharp objects that could potentially tear your seats.
Conclusion
Repairing cloth car seats doesn’t have to be a daunting task. With the right tools, techniques, and a little patience, you can restore your car’s interior to its former glory. By following the steps outlined in this guide, you’ll be well-equipped to tackle tears, burns, stains, and other common car seat woes. Remember, regular cleaning and proactive care will go a long way in extending the life and maintaining the appearance of your cloth car seats.
Need further assistance with your car seat repair or have specific questions? Don’t hesitate to reach out to our expert team via WhatsApp at +1(641)206-8880 or email us at [email protected]. We offer 24/7 customer support to help you get back on the road with confidence!


