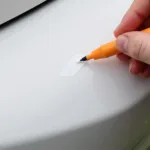
Clearcoat damage on your car bumper can make your vehicle look older than it is. Whether it’s from rocks, bugs, or the sun’s harsh rays, knowing how to repair clearcoat on car bumper can save you a costly trip to a body shop. This guide provides a step-by-step approach to restoring your bumper’s shine.
Knowing how to repair clearcoat on car bumper yourself can be a rewarding experience. The first step is identifying the extent of the damage. Is it a light scratch, a deeper gouge, or widespread peeling? The solution depends on the severity. For minor scratches, a simple polishing compound might suffice. Deeper damage may require sanding, priming, and repainting the affected area. This guide will cover a range of repair techniques to help you achieve professional-looking results. You’ll learn how to identify the type of damage, choose the right materials, and execute the repair process effectively. Let’s get started! Check out our guide on how to repair scratches on bumper of car for more detailed information on scratch repair.
Assessing the Damage to Your Car Bumper Clearcoat
Before starting any repair, carefully examine the damaged area. Wash the bumper thoroughly with car wash soap and water, then dry it completely. This removes dirt and debris, allowing for a clear view of the damage. Determine if the scratch penetrates the color coat or if it’s just on the clearcoat surface. A simple way to check is to run your fingernail across the scratch. If it catches, the damage is likely deeper than the clearcoat.
Gathering Your Materials for Clearcoat Repair
Having the right tools and materials is crucial for a successful clearcoat repair. For minor scratches, you’ll need a polishing compound, applicator pads, and microfiber towels. Deeper scratches require sandpaper (various grits), masking tape, primer, clearcoat spray paint, and a clearcoat applicator. Invest in quality materials for a smoother finish and lasting results. Remember, preparation is key to a professional-looking repair.
Step-by-Step Guide to Repairing Clearcoat on Your Car Bumper
Repairing Minor Clearcoat Scratches
- Clean the area: Wash and dry the bumper thoroughly.
- Apply polishing compound: Using an applicator pad, apply a small amount of polishing compound to the scratched area.
- Buff the area: Rub the compound in circular motions, applying gentle pressure. Continue until the scratch disappears.
- Wipe clean: Use a microfiber towel to remove excess compound and reveal a shiny, restored surface. Check our guide on car bumper paint scratch repair for more tips.
Repairing Deeper Clearcoat Scratches
- Prepare the area: Clean the bumper and mask off the surrounding area with masking tape.
- Sand the scratch: Starting with a coarser grit sandpaper (e.g., 1500 grit), sand the scratched area until it’s smooth and level with the surrounding surface. Gradually move to finer grits (e.g., 2000, 2500 grit) for a flawless finish.
- Apply primer (if necessary): If the scratch penetrates the color coat, apply a thin coat of primer to the sanded area and allow it to dry completely.
- Apply clearcoat: Apply several thin coats of clearcoat spray paint, allowing each coat to dry before applying the next. For best results, apply the clear coat in thin layers and use proper painting techniques. Our guide on bumper car scratch repair provides a helpful overview of this process.
- Wet sand and polish: Once the clearcoat is dry, wet sand the area with very fine grit sandpaper (e.g., 3000 grit) to remove any imperfections. Follow up with a polishing compound and microfiber towel for a final, gleaming finish. For those interested in repairing scratches, our guide on repair scratches on car bumper is an excellent resource.
Conclusion
Repairing clearcoat on a car bumper can seem daunting, but with the right approach, it’s achievable. By following this guide and using quality materials, you can restore your bumper’s shine and protect it from further damage. Remember to assess the damage correctly and choose the appropriate repair method. With a little patience and attention to detail, you can achieve professional-looking results and save yourself money in the process. For a comprehensive guide on DIY car bumper scratch repair, check out car bumper scratch repair how to.
FAQ
- Can I use any type of clearcoat spray paint? It’s best to use a clearcoat specifically designed for automotive use.
- How long does it take for the clearcoat to dry? Drying times vary depending on the product and environmental conditions, but typically allow at least 24 hours for complete drying.
- What if the scratch is very deep? For very deep scratches that expose the underlying material, it’s best to consult a professional body shop.
- Can I repair clearcoat damage in direct sunlight? No, avoid working in direct sunlight as it can cause the clearcoat to dry too quickly and unevenly.
- How can I prevent future clearcoat damage? Regularly washing and waxing your car can help protect the clearcoat from environmental damage.
Common Clearcoat Repair Scenarios
- Light scratches from car washes: These can usually be addressed with a polishing compound.
- Scratches from minor impacts: Depending on the depth, these might require sanding and clearcoat application.
- Peeling clearcoat: This usually indicates more significant damage and might require professional attention.
Related Resources
- Learn more about scratch repair in our guide on how to repair scratches on bumper of car.
- For information on repairing car bumper scratches, visit bumper car scratch repair.
- Explore further tips on car bumper scratch repair with our guide on repair scratches on car bumper.
- Our article on car bumper scratch repair how to provides further guidance on DIY repairs.
- Find tips on repairing car bumper paint scratches in our resource on car bumper paint scratch repair.
Need further assistance? Contact us via WhatsApp: +1(641)206-8880, or Email: [email protected]. Our customer service team is available 24/7.

