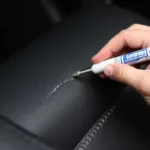
A comfortable car seat is essential for enjoyable driving, especially on long journeys. Over time, the foam rubber in your car seats can deteriorate, leading to discomfort, sagging, and an unsightly appearance. While it might seem easier to replace the entire seat, repairing the foam rubber yourself is a cost-effective solution that can breathe new life into your car’s interior. This comprehensive guide will walk you through the steps on how to repair car seat foam rubber, restoring comfort and improving the overall look of your vehicle.
Assessing the Damage and Gathering Your Supplies
Before diving into the repair process, it’s crucial to assess the extent of the damage to your car seat foam.
- Inspect the foam: Carefully examine the foam for areas that are compressed, torn, or crumbling.
- Determine the repair method: Minor indentations might only require adding extra padding, while larger tears or severe compression might necessitate foam replacement.
Once you’ve evaluated the damage, gather the necessary supplies:
- Replacement foam: Choose foam with a similar density and thickness to the original. Upholstery foam, available online or at fabric stores, is a suitable option.
- Spray adhesive: Opt for a high-quality adhesive specifically designed for foam and fabric.
- Utility knife or electric carving knife: Use a sharp blade for precise cutting of the foam.
- Marker or pen: For marking the foam for cutting.
- Scissors: For trimming fabric.
- Upholstery needle and thread: If you need to repair the seat cover.
Repairing Minor Indentations and Tears
For minor damage, such as small indentations or tears:
- Clean the area: Use a vacuum cleaner and a damp cloth to remove dirt and debris from the affected area.
- Cut the replacement foam: Measure and cut a piece of replacement foam slightly larger than the damaged area.
- Apply adhesive: Spray adhesive on both the replacement foam and the area surrounding the damaged section of the car seat foam.
- Insert the foam: Carefully insert the replacement foam into the indentation or tear, ensuring a snug fit.
- Press firmly: Apply firm and even pressure to the area for a few minutes to ensure proper adhesion.
Replacing Severely Damaged Foam
If the foam is severely compressed or has large tears, complete replacement is often the best solution.
- Remove the seat cover: Consult your car’s manual for instructions on removing the seat cover. You may need to unclip or unscrew certain parts.
- Trace the old foam: Place the old foam on top of the replacement foam and trace its outline using a marker.
- Cut the new foam: Carefully cut the new foam along the traced lines using a utility knife or an electric carving knife.
- Adhere the new foam: Apply spray adhesive to the bottom of the new foam and carefully position it onto the seat frame.
- Reinstall the seat cover: Carefully reattach the seat cover, ensuring it fits snugly over the new foam.
Tips for a Professional Finish
To achieve professional-looking results when repairing car seat foam rubber:
- Use high-quality materials: Invest in durable replacement foam and a strong adhesive to ensure long-lasting repairs.
- Take your time: Rushing the process can lead to mistakes. Be patient and work carefully for the best outcome.
- Consider professional help: If you are uncomfortable with DIY repairs, consider taking your car to a professional upholsterer for assistance.
Conclusion
Repairing car seat foam rubber is an achievable DIY project that can save you money and enhance the comfort of your vehicle. By following these steps and using the right materials, you can restore your car seats to their former glory, ensuring a more enjoyable driving experience. Remember, taking the time to address minor issues promptly can prevent more extensive damage down the road, keeping your car’s interior looking and feeling its best for years to come.
FAQs about Repairing Car Seat Foam
Can I use regular household foam for car seat repair?
While it might seem tempting, using regular household foam is not recommended for car seat repair. Household foam is typically not dense or durable enough to withstand the constant pressure and friction car seats endure. It’s essential to use upholstery foam specifically designed for this purpose to ensure long-lasting results.
How can I prevent future damage to my car seat foam?
Preventing future damage involves simple yet effective practices:
- Regular cleaning: Vacuum your car seats regularly to remove dirt and debris that can contribute to wear and tear.
- Use seat covers: Consider using durable seat covers to protect your seats from spills, stains, and UV damage.
- Avoid eating or drinking in your car: Spills can seep into the foam and cause staining and deterioration.
What should I do if the damage to my car seat foam is beyond repair?
If the damage is extensive or you are not comfortable attempting a DIY repair, it’s best to consult a professional upholsterer. They have the expertise and tools to assess the damage and recommend the best course of action, whether it’s repairing or replacing the affected seat.
For more in-depth guides on car seat repair and other automotive maintenance tips, check out these resources:
If you need assistance, please don’t hesitate to reach out to our team of experts via WhatsApp: +1(641)206-8880, or Email: [email protected]. We offer 24/7 customer support to address all your car repair needs.


