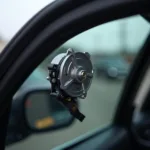
A malfunctioning car seat belt retractor can be a serious safety hazard. If your seat belt isn’t retracting properly, or if it’s locked in place, it’s important to get it fixed as soon as possible. While in some cases, a complete replacement might be necessary, often you can repair a car seat belt retractor yourself with a few basic tools.
Common Causes of Seat Belt Retractor Problems
Before diving into the repair process, let’s understand the common culprits behind a faulty retractor:
- Twisted Seat Belt Webbing: The most frequent cause is simply a twisted seat belt. Over time, the webbing can get twisted, preventing the retractor from working correctly.
- Dirt and Debris: Just like any other car part, seat belt retractors can accumulate dirt, dust, and debris, affecting their performance.
- Wear and Tear: After years of use, the retractor spring can weaken, or internal components can wear out, leading to malfunctions.
How to Diagnose the Problem
Before attempting any repairs, you’ll need to pinpoint the exact issue:
- Inspect the Seat Belt Webbing: Carefully check the entire length of the webbing for any twists, tangles, or obstructions.
- Listen for Unusual Sounds: When pulling and releasing the seat belt, listen for any grinding, clicking, or snapping noises coming from the retractor mechanism.
- Test the Retraction Force: The seat belt should retract smoothly and firmly. If it retracts slowly, sticks, or doesn’t retract at all, the retractor likely needs attention.
Tools You’ll Need
Gather these tools before starting the repair:
- Screwdriver (usually Phillips or flathead)
- Cleaning cloth
- Vacuum cleaner with crevice attachment
- WD-40 or similar lubricant
- Replacement seat belt retractor (if necessary)
Step-by-Step Guide to Repairing a Car Seat Belt Retractor
1. Disconnect the Battery: Before working on any electrical components in your car, disconnect the negative terminal of your car battery as a safety precaution.
2. Access the Retractor: Locate the seat belt retractor, typically mounted on the B-pillar (the metal pillar between the front and rear doors) or behind the rear seats.
3. Remove the Retractor Cover: Depending on your car model, you may need to remove a plastic cover to access the retractor mounting bolts.
4. Untangle the Webbing: If you identified twists or tangles in the webbing, carefully untwist it. In some cases, you might need to fully extend the belt to remove the twists effectively.
5. Clean the Retractor: Use a vacuum cleaner with a crevice attachment to remove loose dirt and debris from the retractor mechanism.
6. Lubricate the Mechanism: Apply a small amount of WD-40 or a similar lubricant to the moving parts of the retractor. Avoid using excessive lubricant, as it can attract more dirt.
7. Reassemble and Test: Put the retractor cover back on, reconnect the battery, and test the seat belt to ensure it retracts smoothly and locks properly.
When to Replace the Seat Belt Retractor
If the above steps don’t resolve the issue, or if you notice any physical damage to the retractor, it’s best to replace it entirely. Seat belt retractors are crucial safety components, and attempting to repair a severely damaged one could compromise your safety.
Conclusion
Taking care of your car’s safety features is paramount. A properly functioning seat belt retractor can be the difference between minor injuries and serious harm in an accident. By following these steps, you can often repair a car seat belt retractor yourself and ensure your continued safety on the road. However, if you encounter a problem that seems beyond your expertise, don’t hesitate to seek professional help.


