
Even minor imperfections like stains or scratches on your car’s body, especially on the often-overlooked wheel rims, can be frustrating and detract from your vehicle’s overall appearance. Knowing how to address these scratches can save you money and keep your car looking its best.
This guide will walk you through simple steps to fix scratched rims using readily available tools, empowering you to restore your rims to their former glory.
Common Causes of Scratched Rims
Wheel rims are particularly susceptible to scratches due to their exposed position. Often out of direct line of sight in rearview mirrors, rims can easily encounter obstacles. Here are the primary culprits behind rim damage:
Curb Rash
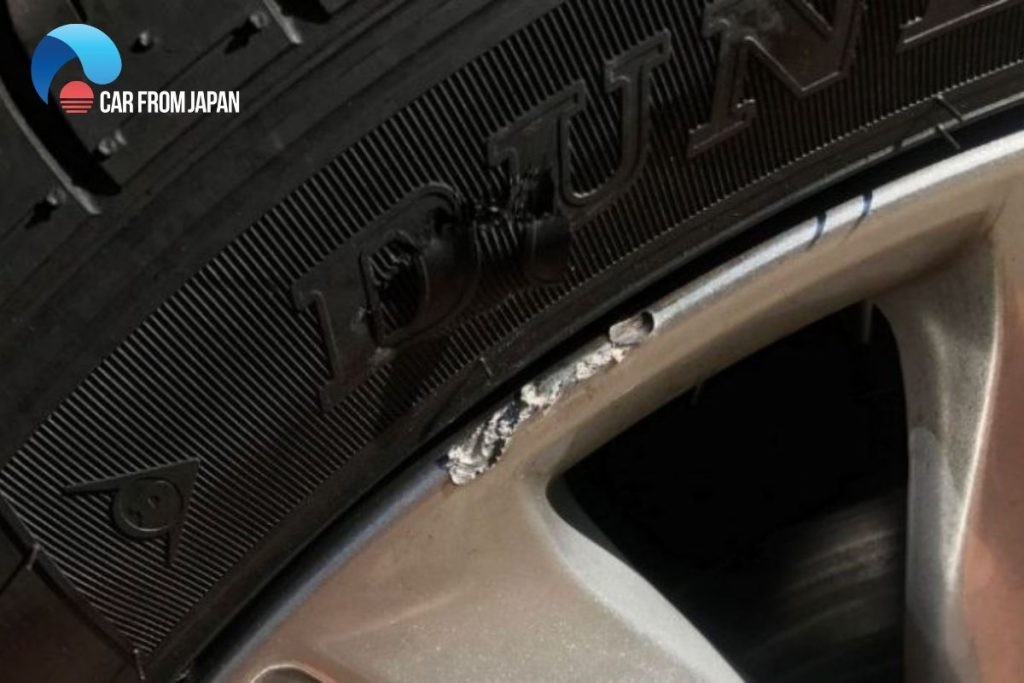
Curb damage is arguably the most frequent cause of rim scratches. Maneuvering in tight parking spaces or making sharp turns can lead to the rim scraping against the curb. Misjudging distance during parking is a common mistake that results in unsightly scratches and abrasions. Everyday driving hazards such as potholes, road debris, and minor collisions also contribute to rim damage, ranging from superficial blemishes to deeper gouges. While minor surface scratches can often be concealed with touch-up paint, severe damage may necessitate rim replacement.
Tire Changing Mishaps
Improper technique or tools during tire changes can easily lead to rim scratches. Using tire irons or jacks without adequate protection can inadvertently scrape or gouge the rim’s surface. Careless handling of tools around the rim area is a common cause of damage during tire maintenance.
Harsh Cleaning Practices
Aggressive cleaning methods can also damage your rims. Using abrasive cleaning agents or stiff brushes not designed for rims can cause scratches. It’s crucial to use cleaning products and tools specifically formulated for wheel rims to preserve their finish and avoid damage.
Understanding these common causes allows car owners to take preventative measures and minimize the risk of rim scratches. Now, let’s delve into how to effectively repair those scratches and restore your rims’ appearance.
DIY Guide: How to Fix a Scratched Rim
Scratched rims are not only an eyesore but can also diminish your car’s resale value. Fortunately, many rim scratches can be repaired at home, saving you the expense of professional services. The repair process largely depends on the severity of the damage. Let’s explore the step-by-step process for DIY rim scratch repair.
Essential Tools for Rim Scratch Repair
Before you begin, gather these essential tools:
- Mild soap or specialized rim cleaning solution: For thoroughly cleaning the rim before and after the repair process.
- Soft brush or sponge: To gently remove dirt, grime, and brake dust from the rim surface.
- Clean cloths or microfiber towels: For drying the rim and applying polishing compounds.
- Fine-grit sandpaper (800 to 1000 grit): For carefully sanding down the scratched area.
- Touch-up paint or rim repair kit (optional): For deeper scratches that remain visible after sanding, to fill and conceal the damage.
- Polishing compound: To buff and polish the repaired area, blending it seamlessly with the rest of the rim.
- Protective gloves and safety glasses: To ensure personal safety throughout the repair process.
With your tools assembled, let’s proceed with the rim scratch repair steps.
Step 1: Thoroughly Clean the Wheel Rim
Begin by meticulously cleaning the entire rim to eliminate any dirt, road grime, and brake dust. Use a mild soap or a dedicated rim cleaner in conjunction with a soft brush or sponge. Rinse the rim thoroughly with clean water and ensure it is completely dry before proceeding. For localized scratches, you can also use cleaning solutions and a soft cloth to focus on the affected area.
During this step, carefully inspect the scratches to assess their depth. If the scratches are superficial and haven’t penetrated the metal, you can confidently proceed with the following repair steps. However, for deep scratches or significant rim damage, professional repair or rim replacement might be necessary.
Step 2: Sanding the Scratched Area
Using fine-grit sandpaper (around 800 to 1000 grit), lightly sand the scratched area. Employ a circular motion and focus specifically on the scratched portion of the rim. Apply gentle pressure to avoid exacerbating the scratches. If the scratch is close to the tire, use masking tape to protect the tire from accidental sanding.
Step 3: Filling Deeper Scratches (Optional)
If scratches remain noticeable after sanding, you can use touch-up paint or a specialized rim repair kit to fill them. Carefully follow the product instructions for optimal results. Apply the touch-up paint or repair material precisely, ensuring even coverage of the scratches. Allow it to dry completely according to the manufacturer’s directions.
Step 4: Buffing and Polishing for a Smooth Finish
Once the filler material is fully dry, apply a polishing compound to a soft cloth. Gently buff the repaired area using circular motions. Continue buffing until the repaired section seamlessly blends with the surrounding rim surface, achieving a uniform finish.
Step 5: Final Cleaning and Inspection
After buffing, clean the rim once more to remove any residual polishing compound or debris from the repair process. Use a clean cloth and mild soap or rim cleaner. Rinse thoroughly and dry the rim completely. Inspect your work to ensure the scratches are effectively repaired and the rim looks its best.
Repairing wheel rim scratches is a straightforward process that can significantly improve your car’s appearance. With patience and the right tools, you can effectively tackle minor rim damage at home, saving time and money.