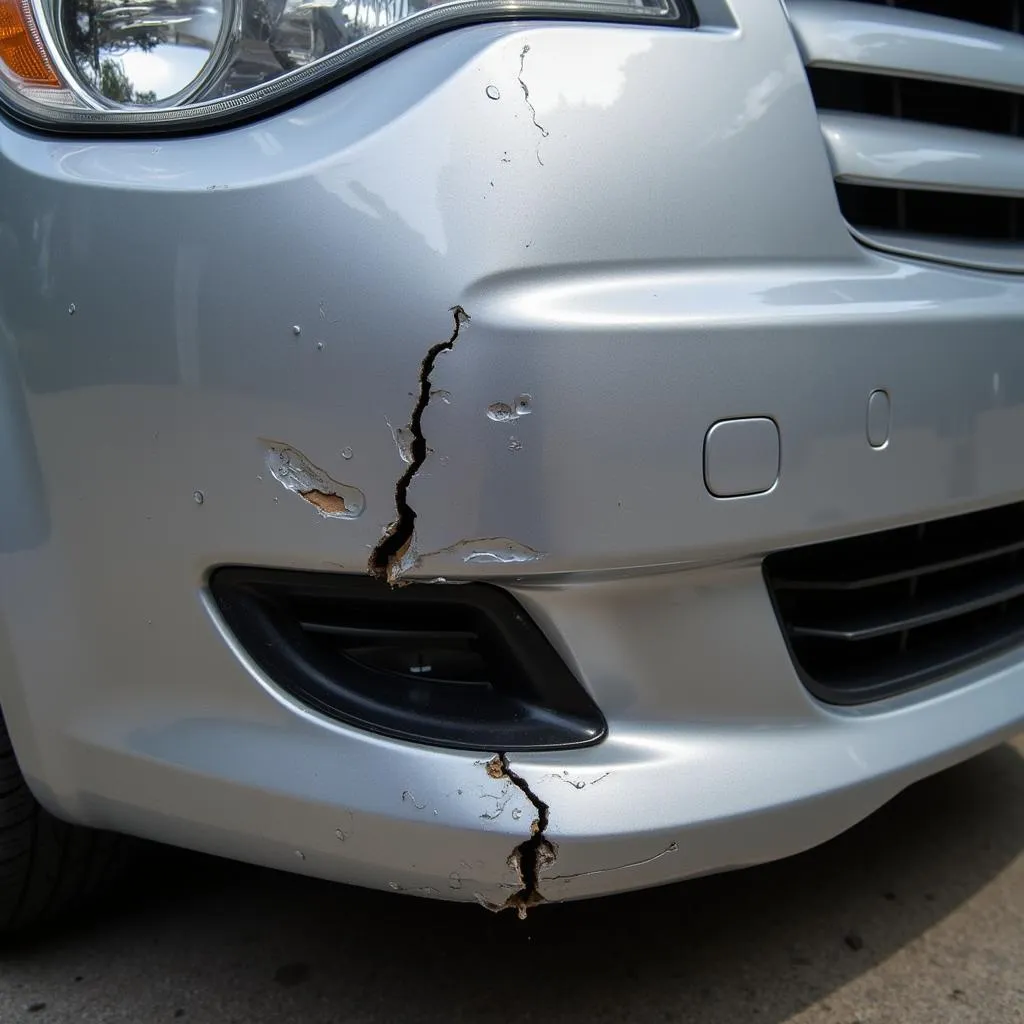
Fixing a cracked or dented plastic car bumper might seem daunting, but it’s often a manageable DIY project. This guide provides a detailed walkthrough of the process, empowering you to restore your bumper’s appearance and potentially save on costly repairs.
Understanding Car Bumper Damage
Before diving into the repair, it’s crucial to assess the extent of the damage. Minor scratches and dents often require simple fixes, while deep cracks or holes might necessitate more complex procedures.
Types of Plastic Bumper Damage:
- Scratches: Superficial damage affecting the paint but not the underlying plastic.
- Scuffs: Deeper scratches penetrating the paint and slightly affecting the plastic.
- Dents: Deformations in the bumper’s shape without breaking the plastic.
- Cracks: Breaks in the plastic, ranging from hairline fractures to large splits.
- Holes: Punctures or missing pieces of the bumper material.
Gathering the Necessary Tools and Materials
Having the right tools and materials on hand is crucial for a successful repair:
Tools:
- Cleaning supplies (soap, water, microfiber cloth)
- Sandpaper (various grits)
- Plastic filler (e.g., Bondo)
- Putty knife
- Primer
- Automotive paint (matching your car’s color)
- Clear coat
- Masking tape and paper
- Heat gun or hairdryer (for dent removal)
- Safety equipment (gloves, mask, eye protection)
Materials:
- Depending on the severity of the damage, you might need additional materials like fiberglass cloth or mesh for reinforcement.
Step-by-Step Guide to Repairing a Plastic Car Bumper
Follow these steps for a successful bumper repair:
1. Clean the Damaged Area:
- Thoroughly wash the bumper with soap and water, ensuring the damaged area is free from dirt, grease, and debris.
2. Sand the Damaged Area:
- Use coarse-grit sandpaper (around 80-grit) to roughen the damaged area and create a better surface for the filler to adhere to. Gradually move to finer grits (180-220) for a smoother finish.
3. Apply Plastic Filler:
- Following the manufacturer’s instructions, mix the plastic filler. Using a putty knife, apply an even layer to the damaged area, slightly overlapping the surrounding undamaged surface.
4. Sand the Filler:
- Once the filler dries (refer to the product’s drying time), sand it down using increasingly finer grits of sandpaper, starting with 180-grit and finishing with 400-grit, to create a smooth, seamless transition.
5. Apply Primer:
- Clean the area to remove sanding dust. Apply several thin coats of primer, allowing each coat to dry before applying the next. This will help the paint adhere better and provide a more even finish.
6. Paint the Repaired Area:
- Shake the automotive paint can thoroughly and apply thin, even coats to the primed area, following the paint manufacturer’s instructions for drying time between coats.
7. Apply Clear Coat:
- Once the paint dries, apply a clear coat to protect the paint and provide a glossy finish. Apply multiple thin coats for the best results.
8. Buffing and Polishing (Optional):
- For a professional-looking finish, you can buff and polish the repaired area once the clear coat is fully cured. This will remove any imperfections and enhance the shine.
Tips for a Seamless Repair
- Practice Makes Perfect: If you’re a first-timer, consider practicing on a spare plastic part before working on your car’s bumper.
- Patience is Key: Rushing the drying and curing times of the filler, primer, paint, and clear coat can compromise the repair’s quality.
- Matching the Paint: Getting an exact color match for your car’s paint is crucial for a seamless repair. Consult your car’s owner’s manual or contact your dealership for the precise paint code.
When to Consult a Professional
While minor bumper repairs can be DIY projects, consider seeking professional help in the following situations:
- Extensive Damage: If the bumper has severe cracks, large holes, or structural damage, professional repair is recommended.
- Airbag Deployment: If the damage is related to an accident that deployed airbags, it’s best to have a professional inspect the entire bumper system.
- Lack of Experience: If you’re uncomfortable with the repair process or lack the necessary tools and experience, it’s advisable to seek professional assistance.
Conclusion
Repairing a plastic car bumper can be a rewarding DIY project for minor to moderate damage. By following these steps and tips, you can restore your bumper’s appearance and potentially save money. Remember, patience and attention to detail are key to achieving a seamless and long-lasting repair.
For more in-depth guides on specific car bumper repair scenarios, check out our articles on plastic car bumper repair, repair plastic car bumper scratches, and how to repair deep scratch on plastic car bumper.
If you have any doubts about tackling the repair yourself, it’s always best to consult a trusted automotive professional. They can assess the damage, provide an accurate quote, and ensure a safe and effective repair.


