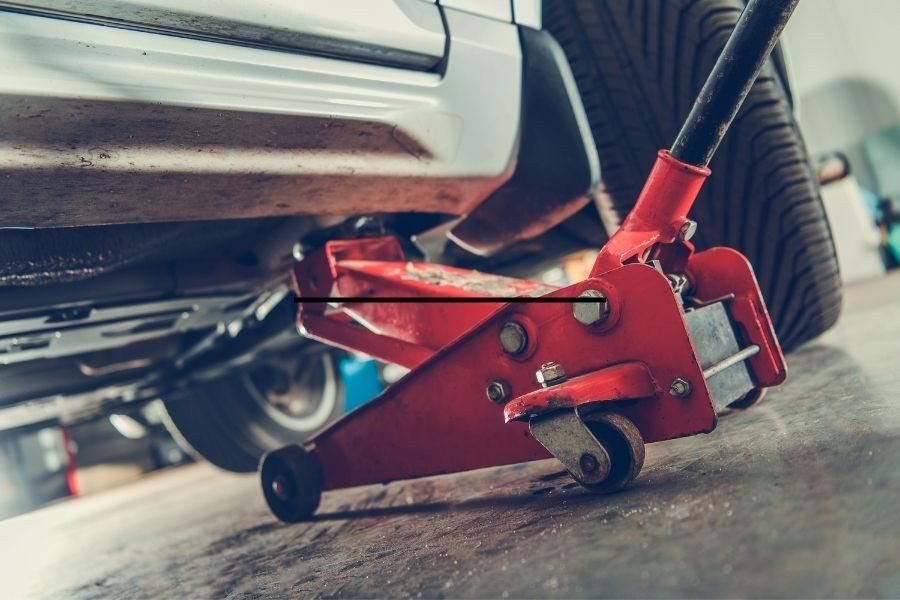
 Hydraulic floor jack that is not lifting and needs repair
Even the most well-equipped garage can be rendered ineffective if you can’t safely and efficiently access the underside of your vehicle. A reliable car jack is indispensable for a range of essential maintenance tasks, from routine oil changes and tire replacements to more complex automotive repairs. Whether you’re performing scheduled upkeep or addressing an unexpected issue, a floor jack is your gateway to accessing critical components of your car or truck.
However, like any mechanical tool, car jacks, regardless of their type or brand, can sometimes malfunction. Encountering a floor jack that refuses to lift when you need it most can be frustrating and halt your repair work in its tracks. Understanding common issues and knowing how to troubleshoot and repair your car jack is a valuable skill for any DIY car enthusiast or professional mechanic.
This guide provides a step-by-step approach to diagnosing and fixing a car jack that won’t lift, ensuring you can get back to your vehicle maintenance tasks quickly and safely.
Troubleshooting a Floor Jack That Won’t Lift
When your floor jack fails to lift, it’s crucial to systematically investigate the potential causes. Here’s a breakdown of the common culprits and how to address them:
Verify the Jack’s Lifting Capacity
Before assuming there’s a mechanical fault with your jack, always double-check if you are attempting to lift a load within its designed capacity. Overloading a jack is not only ineffective but also extremely dangerous.
Locate the Gross Vehicle Weight (GVW) of your vehicle, typically found on a sticker inside the driver’s side door jamb. This sticker provides crucial weight information, often including the front and rear axle weight ratings. Ensure your floor jack’s rated lifting capacity significantly exceeds the heavier of these two weights. For instance, if your vehicle’s front axle weight is around 3100 pounds (approximately 1.5 tons), you should use a jack with a minimum capacity of 2 to 2.5 tons to provide a safe margin.
Exceeding a floor jack’s weight limit can cause undue stress on its components, leading to damage and increasing the risk of failure during operation. Always prioritize safety by using a jack with an appropriate weight rating for your vehicle.
Inspect Hydraulic Fluid Levels
One of the most frequent reasons for a car jack failing to lift is an improper hydraulic fluid level. Hydraulic jacks rely on fluid to transmit pressure and generate lifting force. Insufficient or excessive fluid can disrupt this process.
To check the fluid level, locate and carefully remove the oil filler plug on your jack. Looking into the fill chamber, you should be able to observe the hydraulic oil level. Generally, the ideal fluid level is approximately 3/16 to 1/4 inch above the reservoir. If the level is low, replenish it with high-quality hydraulic jack oil.
Conversely, an overfilled jack can also cause problems. Excessive fluid can lead to pressure build-up, potentially damaging seals and causing internal leaks, ultimately resulting in pressure loss and lifting failure. If you suspect overfilling, carefully drain some fluid to reach the recommended level.
A consistently low fluid level, even if the jack still functions, often indicates a leak within the hydraulic system. Hydraulic systems are closed-loop, meaning fluid loss is not normal. If you find yourself frequently needing to top off the fluid, a leak is likely present and needs to be addressed to maintain the jack’s performance and prevent further issues.
Always use the hydraulic oil specified by the jack manufacturer. Using alternative fluids like brake fluid or transmission oil can damage the seals and internal components, leading to costly repairs.
Bleed Trapped Air from the System
Air can become trapped within the hydraulic system of a car jack, especially during shipping or if the jack has been tilted or stored improperly. Air bubbles in the hydraulic lines can compress, reducing the jack’s lifting power and causing it to feel spongy or unresponsive.
Bleeding the air from your hydraulic jack is a simple maintenance procedure that should be performed when you first unbox a new jack and periodically, such as monthly, or whenever you notice diminished lifting performance. Regular bleeding helps ensure optimal jack performance.
Here’s how to bleed a hydraulic car jack:
- Open the Release Valve: Locate the release valve (usually a screw or knob) and open it completely to allow fluid to flow freely.
- Pump the Handle (Valve Open): With the release valve open, pump the jack handle approximately ten times. This action helps to circulate fluid and push air bubbles towards the reservoir.
- Close the Release Valve: Securely close the release valve.
- Extend the Jack to Full Height: Pump the handle to raise the jack to its maximum extension.
- Continue Pumping (Full Extension): Even at full extension, continue pumping the handle another ten times. This helps to force out any remaining trapped air in the cylinder.
- Lower the Cylinder: Carefully open the release valve to lower the jack cylinder completely.
- Repeat if Necessary: If the jack still feels spongy or doesn’t lift smoothly, repeat steps 2-6 up to two more times to ensure all air is expelled.
In most cases, this bleeding process will effectively remove trapped air. If the issue persists, and you suspect stubborn air pockets, you can gently loosen the oil fill plug after lowering the cylinder completely. This can provide an additional vent for trapped air to escape. Remember to retighten the plug securely afterward.
Evaluate the Release Valve for Leaks
If you’ve addressed fluid levels and bled the system, and the jack still fails to build pressure, the release valve is a prime suspect. The release valve is designed to create an airtight seal when closed, allowing pressure to build within the hydraulic cylinder for lifting. A faulty or leaking release valve will compromise this seal, allowing pressure to escape and preventing the jack from lifting or holding a load.
Carefully inspect the release valve area for any signs of leaks. A telltale sign of a leaking valve is often a greasy film or oil residue around the valve mechanism. This indicates hydraulic fluid seepage, confirming a breach in the airtight seal.
A leaking release valve will not only prevent the jack from lifting effectively but can also introduce air back into the hydraulic system, exacerbating the problem. If you identify a leaking release valve, it may need to be cleaned, tightened, or potentially replaced depending on the severity of the leak and the valve’s condition.
Implement Routine Maintenance and Cleaning
Even if you’ve successfully resolved the immediate issue of a non-lifting jack, a thorough inspection and routine maintenance are crucial for preventing future problems and ensuring the longevity of your tool. Regular maintenance can identify potential issues before they escalate into major malfunctions.
Conduct a comprehensive check of all jack components:
- Welds: Inspect for any cracks or breaks in the welded joints of the jack frame and lifting arms.
- Parts: Look for any damaged, bent, or worn components, particularly in the lifting mechanism and handle linkages.
- Oil Leaks: Re-examine the entire jack for any signs of hydraulic fluid leaks beyond the release valve area, checking around seals, hoses, and cylinder connections.
- Ram Inspection: Carefully inspect the jack’s ram (the extending piston). Extend and retract the ram fully, checking for rust, scoring, or damage along its surface. Rust or damage to the ram can compromise the seals and lead to leaks and reduced lifting performance.
Regularly inspect your jack, even when it’s functioning correctly. Check the storage area for any signs of fluid leaks. Examine the jack housing for rust, cracks, or damage, and inspect the piston rod for scoring or other wear. Look for signs of excessive wear in any moving parts that could indicate future problems. Finally, remove any foreign debris like metal shavings, dirt, or rocks that could potentially damage the jack’s internal mechanisms.
Cleaning your hydraulic jack after each use is also an essential maintenance step. Use a mild soap and water solution to clean the exterior surfaces of the jack. Crucially, avoid cleaning the hydraulic components or ram directly with soap and water, as this can introduce contaminants and damage seals.
Regularly lubricate the jack’s moving parts to minimize wear and ensure smooth operation. Apply a general-purpose lubricant to caster wheels, the front axle, the elevator arm pivots, handle base pivot bolts, and the release mechanism. After each use, check for any signs of oil leakage from seals and replace any damaged seals promptly to prevent fluid loss and maintain jack performance.
SVI International: Your Partner for Quality Car Repair Parts
We hope this guide has provided you with the knowledge to effectively troubleshoot and repair your car jack when it fails to lift. Remember, consistent maintenance is the best preventative measure against malfunctions and ensures your jack remains a reliable tool in your garage. Keeping your jack clean, dry, and well-lubricated will extend its lifespan and performance.
Should you require replacement parts for your car jack or are considering upgrading to a new, high-quality jack, SVI International is your trusted source. We offer a comprehensive range of parts and equipment to meet your car repair needs, ensuring safety and reliability. Contact us today at (800) 321-8173 for expert assistance and same-day shipping on in-stock parts!