A sagging car headliner can be a real eyesore and detract from your vehicle’s interior appeal. Beyond aesthetics, a drooping headliner can be distracting and even a bit annoying while driving. If you’re noticing your car’s headliner starting to sag, you might be wondering how to fix it without the hassle and expense of a full replacement. Luckily, there are several effective DIY methods you can use to restore your headliner without removing it. Let’s explore these simple solutions and get your car’s interior looking its best again.
Understanding Your Car Headliner
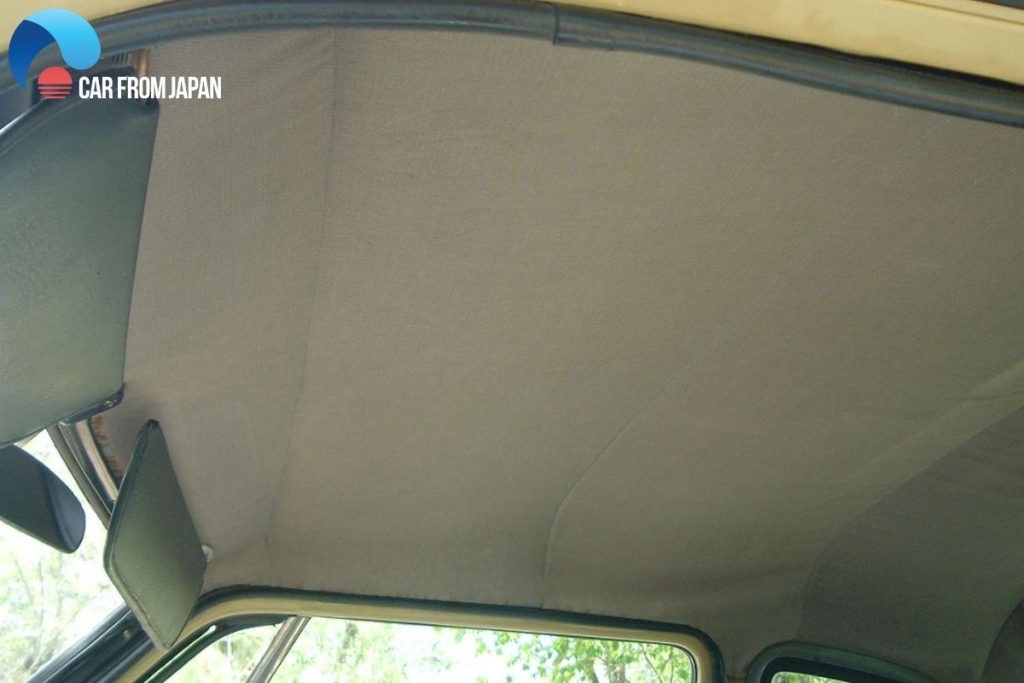
The headliner, or interior roof lining, is more than just a decorative fabric inside your car. It’s a crucial component that provides several benefits. Typically made of fabric bonded to a foam backing and a rigid board, the headliner is attached to the car’s roof frame.
Here’s what a headliner does:
- Enhances Interior Aesthetics: It provides a smooth, finished look to the car’s interior roof, contributing to the overall comfort and style of your vehicle.
- Provides Thermal Insulation: The headliner helps insulate the cabin, keeping it cooler in hot weather and warmer in cold weather. This insulation is especially important for maintaining a comfortable temperature inside your car, reducing the strain on your air conditioning and heating systems.
- Reduces Noise Levels: The materials in the headliner, particularly the foam backing, are designed to absorb sound. This helps to minimize road noise, wind noise, and other external sounds, making for a quieter and more pleasant driving experience.
- Improves Acoustics: By reducing echoes and absorbing sound waves, the headliner also enhances the sound quality within the car, which is beneficial for your car audio system.
Why Car Headliners Sag: Identifying the Causes
Over time, you might notice your car’s headliner starting to sag or droop. This is a common problem, especially in older vehicles or cars exposed to harsh conditions. Sagging occurs when the adhesive bonding the fabric to the headliner board deteriorates, causing the fabric to separate and hang down. Several factors contribute to this deterioration:
- Heat and Sunlight: Extreme heat, especially when a car is parked in direct sunlight, is a primary culprit. The heat weakens and breaks down the adhesive over time, causing the fabric to detach from the backing board.
- Humidity and Moisture: Moisture, whether from humidity or leaks, can seep into the headliner and damage the foam backing. This moisture absorption can cause the foam to lose its structural integrity and the adhesive to fail. Leaks from sunroofs or windshield seals can exacerbate this problem.
- Age and Adhesive Degradation: Like any adhesive, the glue used in headliners has a lifespan. Over years, it naturally degrades and loses its bonding strength, particularly when exposed to temperature fluctuations and UV radiation.
- Poor Initial Installation: In some cases, a headliner might sag prematurely due to inadequate adhesive application or improper installation techniques at the factory.
- Physical Stress: While less common, physical stress can contribute to sagging. Children or pets playing in the car might pull or scratch at the headliner, putting strain on the fabric and adhesive, accelerating the sagging process.
DIY Repair Methods: Fixing a Sagging Headliner Without Removal
Replacing the entire headliner can be a costly and time-consuming job, often requiring professional installation. Fortunately, if the sagging is not too severe, you can often repair it yourself without removing the headliner. Here are some effective DIY methods for fixing a sagging car headliner:
1. Regluing the Headliner: The Adhesive Solution
For minor sagging, especially around the edges or corners, reglueing can be a straightforward and effective solution. This method involves reapplying adhesive to re-bond the fabric to the backing board.
Materials You’ll Need:
- Headliner Adhesive Spray: This is a specialized high-temperature adhesive designed for automotive headliners. Regular glue is not suitable as it won’t withstand the heat inside a car. Look for a spray adhesive specifically labeled for headliner repair.
- Masking Tape and Paper or Plastic Sheeting: To protect surrounding areas from overspray.
- Clean Cloth or Sponge: For cleaning the area and smoothing the fabric.
- Optional: Cardboard or Stiff Card: To protect areas you don’t want to spray.
Steps to Reglue Your Headliner:
- Prepare the Area: Clean the sagging area of the headliner with a soft brush or vacuum cleaner to remove any loose debris or dust.
- Protect Surrounding Areas: Use masking tape and paper or plastic sheeting to carefully mask off the trim, windows, and any other areas surrounding the sagging headliner to prevent overspray of the adhesive.
- Apply Adhesive: Shake the can of headliner adhesive spray well. Hold the can about 6-8 inches away from the headliner and apply a light, even coat of adhesive to both the back of the sagging fabric and the corresponding area on the headliner board. Avoid applying too much adhesive in one spot, as this can soak through the fabric.
- Wait for Tackiness: Allow the adhesive to become tacky. This usually takes a few minutes, depending on the adhesive and temperature. Check the adhesive can instructions for specific drying times.
- Reattach the Fabric: Carefully press the sagging fabric back into place, aligning it properly. Use a clean cloth or sponge to gently smooth the fabric and ensure good contact with the adhesive. Work from the center outwards to avoid trapping air bubbles.
- Allow to Dry and Cure: Let the adhesive dry and cure completely according to the manufacturer’s instructions. This may take several hours. Avoid touching or disturbing the repaired area during this time.
- Remove Masking: Once the adhesive is fully cured, carefully remove the masking tape and protective sheeting.
Pros of Regluing:
- Relatively inexpensive and easy to do.
- Effective for minor sagging and edge repairs.
- Can restore a clean, smooth look to the headliner.
Cons of Regluing:
- May not be effective for large areas of severe sagging.
- Requires careful application to avoid overspray and adhesive showing through the fabric.
- The repair may not last as long as a full headliner replacement, especially if the underlying cause of the sagging (heat, moisture) is not addressed.
2. Twist Pins or Headliner Repair Pins: A Quick and Simple Fix
For a faster and often more economical solution, especially for more widespread sagging, twist pins or headliner repair pins are a popular choice. These pins are designed to hold the sagging fabric up against the headliner board.
Materials You’ll Need:
- Headliner Twist Pins or Repair Pins: These are typically clear plastic pins with a spiral or barbed design to grip the fabric and backing board securely. They are readily available at auto parts stores and online.
- Optional: Pattern Template (Cardboard or Paper): To create a uniform pattern for pin placement if desired.
Steps to Use Twist Pins:
- Position the Fabric: Gently push the sagging headliner fabric back up towards the headliner board to its original position as much as possible.
- Insert Twist Pins: Take a twist pin and push it through the fabric and into the foam backing board. Twist the pin as you push to ensure a secure grip.
- Space Pins Evenly: Continue inserting pins across the sagging area, spacing them evenly for the best support and appearance. You can follow a pattern (rows, diagonal lines, etc.) for a more organized look.
- Check for Secureness: Ensure each pin is firmly in place and holding the fabric securely against the board.
Pros of Twist Pins:
- Very easy and quick to install.
- Inexpensive solution.
- Effective for supporting larger areas of sagging.
- Pins are typically clear or low-profile and blend in relatively well with most headliner fabrics.
Cons of Twist Pins:
- Pins are visible on the headliner surface, which may not be aesthetically ideal for everyone.
- Pins create small holes in the headliner fabric (though these are usually minimal).
- This is a more of a temporary or cosmetic fix and doesn’t address the underlying adhesive failure.
3. Steam Cleaning and Stretching: Re-activating the Adhesive
In some cases, particularly when the sagging is relatively recent or mild, you might be able to re-activate the original adhesive using steam. This method involves applying steam to the headliner fabric to soften the old adhesive, allowing you to stretch and re-adhere the fabric.
Materials You’ll Need:
- Fabric Steamer (Garment Steamer or Upholstery Steamer): A handheld fabric steamer is ideal for this task. Avoid using a general-purpose steam cleaner that might produce too much pressure or moisture.
- Paint Roller (Soft Foam or Fabric Roller): To gently press and smooth the fabric back into place.
- Clean Cloths: To wipe away any excess moisture.
- Optional: Headliner Adhesive Spray (for reinforcement): If the steam method alone isn’t sufficient, you might need to use a small amount of adhesive in combination.
Steps for Steam Cleaning and Stretching:
- Prepare the Area: Clean the sagging headliner area as with the reglueing method.
- Apply Steam: Using the fabric steamer, gently apply steam to the sagging fabric area. Move the steamer head slowly and evenly over the fabric. Avoid saturating the fabric with water. The goal is to warm and moisten the adhesive underneath, not soak the fabric.
- Stretch and Smooth: As you steam, gently stretch and smooth the fabric back into its original position using your hand or a soft paint roller. Work in small sections and avoid pulling too hard, which could damage the fabric.
- Press and Adhere: Use the paint roller to firmly but gently press the fabric against the headliner board to encourage the softened adhesive to re-bond.
- Dry and Repeat if Necessary: Allow the area to dry completely. If the sagging persists in some areas, repeat the steaming and stretching process as needed.
- Reinforce with Adhesive (Optional): If the steam method alone isn’t enough to fully re-adhere the fabric, you can carefully apply a small amount of headliner adhesive spray to stubborn areas and repeat the stretching and smoothing process.
Pros of Steam Cleaning and Stretching:
- Can potentially re-activate the original adhesive, providing a more seamless repair.
- No visible pins or added adhesives in some cases.
- Can be effective for mild to moderate sagging.
Cons of Steam Cleaning and Stretching:
- Effectiveness depends on the type and condition of the original adhesive.
- Requires a fabric steamer.
- There’s a risk of over-wetting or damaging the headliner fabric if not done carefully.
- May not be sufficient for severe sagging or when the adhesive is significantly degraded.
Preventing Future Headliner Sagging
While repairing a sagging headliner is manageable, preventing it in the first place is even better. Here are some tips to help prolong the life of your car’s headliner:
- Park in Shade: Whenever possible, park your car in shaded areas or garages, especially during hot and sunny weather. This reduces the car’s interior temperature and minimizes heat damage to the headliner adhesive.
- Use a Sunshade: When parking in direct sunlight is unavoidable, use a windshield sunshade to reflect sunlight and reduce heat buildup inside the car.
- Ventilate Your Car: On hot days, crack your windows slightly (if secure) to allow hot air to escape and reduce interior temperature.
- Regularly Inspect and Maintain Seals: Check your car’s weather seals around windows and sunroofs regularly to ensure they are in good condition and prevent water leaks that can damage the headliner.
- Avoid Harsh Cleaning Products: When cleaning your car’s interior, use gentle cleaners specifically designed for automotive interiors. Avoid harsh chemicals or excessive moisture when cleaning the headliner.
- Limit Physical Stress: Discourage children and pets from pulling or scratching at the headliner.
When to Consider Professional Headliner Replacement
While DIY methods can effectively repair many cases of sagging headliners, there are situations where professional replacement might be the best option:
- Severe Sagging or Damage: If the headliner is extensively sagging, torn, or heavily damaged, DIY repairs may not be sufficient to restore its appearance and functionality.
- Extensive Adhesive Failure: If the adhesive is completely degraded over a large area, reglueing or steam methods may not provide a long-lasting solution.
- Desire for a Like-New Finish: For a truly flawless and long-lasting repair, especially if you are concerned about the aesthetics of your car’s interior, professional replacement ensures a factory-quality finish.
- Lack of Time or DIY Skills: If you don’t have the time, tools, or confidence to tackle a DIY headliner repair, professional installation is a convenient option.
- Vehicle Value: For higher-value vehicles or those you plan to sell, professional headliner replacement can help maintain or improve the car’s resale value.
Headliner Replacement Costs: What to Expect
If you opt for professional headliner replacement, the cost can vary depending on several factors:
- Vehicle Make and Model: The complexity of the headliner design and accessibility can affect labor costs. Luxury vehicles or those with sunroofs or complex roof features may be more expensive to replace.
- Type of Headliner Material: The choice of replacement headliner fabric can influence the price. Standard fabrics are generally less expensive than premium or custom materials.
- Labor Costs: Labor rates vary by location and shop. Headliner replacement can take several hours of labor.
- Additional Repairs: If there is underlying damage, such as water leaks or roof damage, these repairs will add to the overall cost.
Generally, you can expect to pay anywhere from $300 to $1000 or more for professional headliner replacement. Simpler vehicles without sunroofs may be on the lower end of the range, while luxury vehicles or those with complex features can be on the higher end. It’s always best to get quotes from several reputable auto upholstery shops or mechanics in your area to compare prices.
Conclusion
A sagging car headliner can be an annoying problem, but it doesn’t always require a costly professional replacement. By understanding the causes of sagging and utilizing these DIY repair methods – reglueing, twist pins, or steam cleaning – you can often restore your headliner’s appearance and save money. Choose the method that best suits the severity of the sagging and your comfort level with DIY repairs. And remember, preventative measures like parking in the shade can go a long way in keeping your headliner looking good for years to come.
FAQs About Car Headliner Sagging
How do I know if my car ceiling is sagging?
Signs of a sagging car headliner include:
- Visible Drooping: The fabric is noticeably hanging down from the roof of the car, rather than being taut and attached to the roof frame.
- Loose Fabric: You can easily push up on the fabric, and it feels detached from the backing board.
- Wrinkles or Creases: Sagging fabric often develops wrinkles, creases, or folds.
- Increased Noise: In some cases, a sagging headliner might rattle or flap in the wind, leading to increased noise inside the cabin.
Is it okay to fix the headliner sagging myself?
Yes, in many cases, it is perfectly okay to fix a sagging headliner yourself, especially if the sagging is minor to moderate. DIY methods like reglueing, using twist pins, or steam cleaning are effective and can save you a significant amount of money compared to professional replacement. However, if you are not comfortable with DIY car repairs or if the sagging is severe, professional replacement might be a better option.
Can I paint a car headliner?
While technically you could paint a car headliner, it is generally not recommended. Painting a headliner can lead to several issues:
- Stiffness: Paint can make the fabric stiff and less flexible, potentially leading to cracking or further detachment.
- Uneven Texture: Achieving an even and aesthetically pleasing paint finish on fabric can be difficult.
- Weight: Paint can add weight to the headliner, potentially exacerbating sagging.
- Odor: Some paints can have strong odors that may linger in the car interior.
It’s usually better to repair the sagging using adhesive or pins, or to replace the headliner fabric entirely if you want to change its color or appearance.
Will car insurance cover headliner replacement?
Generally, no, standard car insurance policies typically do not cover headliner replacement due to sagging. Car insurance is primarily designed to cover damages from accidents, collisions, theft, or natural disasters. Wear and tear, aging, and cosmetic issues like sagging headliners are usually considered maintenance items and are not covered by insurance. Some extended warranties or specific interior protection plans might offer some coverage, but it’s important to review your policy details to be sure.