Car glass, especially your windshield, is crucial for your vehicle’s structural integrity and your safety on the road. Damage, even seemingly minor chips or cracks, can quickly escalate due to everyday driving stresses and temperature fluctuations. Addressing these issues promptly is essential. Learning how to repair car glass yourself can save you money and prevent more significant problems down the line. This guide will walk you through the process of repairing minor car glass damage effectively, ensuring you maintain both the clarity and safety of your vehicle.
Understanding Car Glass Damage: Types and Severity
Before you dive into repairs, it’s important to understand the different types of damage car glass can sustain and their severity. This knowledge helps you determine if a DIY repair is suitable or if professional intervention is necessary. Common types of car glass damage include:
- Chips: Small, often circular damage caused by pebbles or road debris.
- Cracks: Linear fractures in the glass that can spread over time. These can be hairline, short cracks, long cracks, or even branched cracks.
- Bullseyes: A type of chip with a visible cone-shaped impact point and concentric circles around it.
- Stars: Star-shaped cracks radiating outwards from the impact point.
- Combination Breaks: Damage that combines features of different types, such as a star crack with a bullseye.
- Scratches: Surface-level damage, often cosmetic but can sometimes affect visibility.
The severity of the damage is crucial in deciding whether a DIY repair is appropriate. Minor damage, generally considered to be chips smaller than a quarter or cracks shorter than 3 inches, are typically good candidates for DIY repair kits. However, larger or more complex damage, damage in the driver’s critical viewing area, or damage that penetrates multiple layers of glass should be assessed and repaired by a professional.
Repairing minor car glass damage early is crucial for several reasons:
- Structural Integrity: The windshield is a structural component of your car. Even small cracks can weaken it, reducing its effectiveness in an accident, especially in rollover situations.
- Visibility: Cracks and chips can distort your vision, creating glare and increasing the risk of accidents, particularly in challenging driving conditions like rain or at night.
- Legal Issues: In many regions, driving with a cracked windshield is illegal and can result in fines.
- Cost Savings: Addressing minor damage early prevents it from spreading and becoming a more expensive repair or requiring a full windshield replacement.
DIY Car Glass Repair: Is It Right for You?
Deciding whether to tackle car glass repair yourself depends on your comfort level, the extent of the damage, and your resources.
Pros of DIY Car Glass Repair:
- Cost-Effective: DIY repair kits are significantly cheaper than professional repairs or windshield replacements.
- Convenience: You can perform the repair at your own pace and location, without needing to schedule an appointment or leave your car at a shop.
- Preventative Maintenance: Addressing minor damage quickly can prevent it from worsening, saving you from bigger problems later.
Cons of DIY Car Glass Repair:
- Skill and Precision Required: While kits are designed for ease of use, a steady hand and attention to detail are necessary for a successful repair.
- Limited to Minor Damage: DIY kits are not suitable for large or complex cracks, or damage in critical viewing areas.
- Potential for Imperfect Results: DIY repairs may not always be as cosmetically perfect as professional repairs, although they are effective in restoring structural integrity and preventing further damage.
- Time Commitment: Although not lengthy, the repair process requires time and patience to follow each step correctly, including curing time.
When to Choose Professional Repair:
- Large or Complex Cracks: Cracks longer than 6 inches or branched cracks are best handled professionally.
- Damage in Driver’s Critical Viewing Area: Damage directly in front of the driver can be distracting and requires expert repair to ensure optimal visibility.
- Multiple Layers of Glass Damaged: If the damage penetrates beyond the outer layer of laminated glass, professional replacement might be necessary.
- If You’re Uncomfortable with DIY: If you are hesitant or unsure about performing the repair yourself, it’s always best to seek professional help to ensure the job is done correctly and safely.
Essential Tools and Materials
Before starting your DIY car glass repair, gather all the necessary tools and materials to ensure a smooth and efficient process. A standard windshield repair kit typically includes most of these items, but it’s good to verify and have them ready:
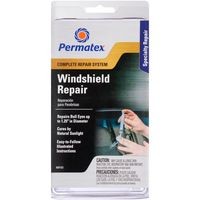
- Windshield Repair Kit: Choose a reputable brand kit designed for the type and size of damage you need to repair. Kits vary slightly, so read reviews and instructions beforehand. Some kits are better suited for chips, while others are for cracks.
- Razor Blade or Utility Knife: For removing excess resin and the curing strip after the repair. Ensure the blade is new and sharp for a clean finish.
- Glass Cleaner: A specialized glass cleaner or rubbing alcohol to thoroughly clean the damaged area and surrounding glass. Avoid household cleaners that may leave residue.
- Microfiber Cloths: Soft, lint-free cloths for cleaning and wiping the glass surface.
- Pin or Needle: For removing any loose glass fragments from within the crack or chip before applying the resin.
- Curing Light or UV Lamp (Optional): Some kits include a UV lamp to speed up the resin curing process. If not included, sunlight can be used as a natural UV source.
- Masking Tape: To secure the repair applicator or pedestal to the windshield and to protect surrounding areas if needed.
- Gloves: To protect your hands from sharp glass edges and the epoxy resin.
- Safety Glasses: To protect your eyes from glass fragments and resin splashes.
Having all these items prepared will streamline the repair process and help you achieve the best possible results.
Step-by-Step Guide: How to Repair Car Glass
Now, let’s walk through the process of repairing car glass using a typical windshield repair kit. Always refer to the specific instructions included with your kit, as there might be slight variations.
1. Assess the Damage
First, carefully examine the damage. Determine the type and size of the crack or chip. Measure the length of any cracks and the diameter of chips. Ensure the damage falls within the repairable range specified by your chosen kit (usually chips smaller than a quarter and cracks shorter than 3 inches). If the damage is larger or more complex, consider professional repair.
2. Gather Your Supplies
Lay out all the tools and materials listed earlier within easy reach. Read through the instructions in your repair kit to familiarize yourself with the specific steps and components.
3. Prepare the Area
Thoroughly clean the damaged area and the surrounding windshield glass. Use glass cleaner or rubbing alcohol and a microfiber cloth to remove all dirt, debris, and loose glass fragments. Use the pin or needle to gently extract any small glass pieces within the crack or chip. Ensure the glass is completely dry before proceeding. Moisture can interfere with the resin’s adhesion.
4. Apply the Patch and Pedestal
Most kits use an adhesive patch and pedestal system to create a sealed area for resin application. Peel off the backing from the adhesive patch and carefully align the cutout in the patch directly over the center of the damage. Apply the patch to the exterior of the windshield, pressing firmly to ensure it adheres well and creates a seal around the damaged area.
Next, attach the pedestal to the patch. Align the tabs or connectors on the pedestal with the patch and press it firmly against the adhesive. The pedestal typically has an opening or tube for injecting the resin.
5. Inject the Epoxy Resin
Open the epoxy resin provided in your kit. Some kits have pre-mixed resin, while others might require mixing two components. Follow the kit’s instructions for resin preparation.
Insert the resin syringe into the pedestal opening. Slowly inject the resin into the pedestal, filling it to the recommended level or until you see resin starting to fill the crack or chip.
Once the pedestal is filled, use the syringe to apply pressure by pushing down on the plunger. This helps force the resin into the damaged area and displace any air. After applying pressure, carefully pull back on the syringe plunger to create a vacuum within the pedestal. This vacuum helps draw out air bubbles trapped in the crack or chip and further encourage resin penetration. Repeat the push-and-pull action with the syringe a few times as instructed in your kit.
6. Wait for Air Bubbles to Escape and Resin to Penetrate
Observe the damaged area through the pedestal. You should see air bubbles being drawn out and rising to the surface of the resin in the pedestal. Allow sufficient time for the air bubbles to escape and for the resin to fully penetrate the crack or chip. This process can take anywhere from 5 to 15 minutes, depending on the kit and the extent of the damage. Be patient and wait until you no longer see air bubbles forming.
7. Remove Syringe and Pedestal and Apply Curing Strip
After the air bubbles have subsided and the resin has been allowed to penetrate, carefully remove the syringe and pedestal from the windshield. Some kits recommend adding another drop or two of resin directly onto the repair site after removing the pedestal to ensure it’s completely filled.
Apply the curing strip (a clear plastic film) over the repair area. Gently press it down, starting from the center and moving outwards to squeeze out any remaining air bubbles between the strip and the resin. This strip helps to create a smooth, even surface and protects the resin during curing.
8. Curing Process
Now, you need to cure the resin. The curing process hardens the resin and completes the repair. Most resins are UV-activated, meaning they cure when exposed to ultraviolet light.
- Sunlight Curing: If using sunlight, park your car in direct sunlight for the time recommended in your kit instructions (usually 15-30 minutes, but may be longer on overcast days).
- UV Lamp Curing: If your kit includes a UV lamp, use it according to the instructions to cure the resin. This is a faster and more controlled curing method, especially useful indoors or on cloudy days.
Ensure the resin is fully cured before proceeding to the next step. The resin should be hard and no longer sticky to the touch.
9. Remove Excess Epoxy and Finishing
Once the resin is fully cured, carefully peel off the curing strip. Use a new, sharp razor blade held at a shallow angle to gently scrape away any excess cured resin around the repair area. Work carefully to avoid scratching the surrounding glass. Clean the area with glass cleaner and a microfiber cloth to remove any residue and reveal your repaired car glass. Inspect the repair. It should be significantly less visible, and the structural integrity of the glass should be restored.
Advanced Tips for Successful Car Glass Repair
- Optimal Temperature: Perform the repair in moderate temperatures, ideally between 50°F and 75°F (10°C and 24°C). Extreme temperatures can affect resin curing. Avoid direct sunlight during application to prevent premature curing, but use sunlight for curing afterward.
- Work in Shade: When working outdoors, choose a shaded area to prevent the resin from curing too quickly during application and to maintain a workable temperature.
- Handle Different Crack Types: For longer cracks, you might need to apply resin along the length of the crack, working in sections if necessary, to ensure complete filling.
- Troubleshooting Air Bubbles: If you have persistent air bubbles, try gently tapping the windshield around the repair area to help them rise to the surface. Re-applying vacuum with the syringe can also help.
- Storage of Repair Kits: Store unused repair kits in a cool, dark place to prolong the shelf life of the resin. Check the expiration date before use to ensure optimal performance.
Maintaining Your Repaired Car Glass
After successfully repairing your car glass, proper maintenance will help ensure the longevity of the repair and prevent future damage.
- Avoid Extreme Temperature Changes Immediately After Repair: Give the resin time to fully settle. Avoid drastic temperature changes (like using very hot or cold water to wash the windshield) for the first 24-48 hours after repair.
- Gentle Cleaning: Clean the repaired area gently with a soft cloth and glass cleaner. Avoid abrasive cleaners or brushes that could potentially damage the repaired spot.
- Regular Inspections: Periodically inspect your windshield for new chips or cracks, especially after driving on roads with gravel or debris. Addressing new damage quickly will prevent it from spreading.
- Consider Windshield Protection Film: For added protection against future chips and cracks, consider applying a windshield protection film, especially if you frequently drive in areas prone to road debris.
By following these steps and tips, you can effectively repair car glass damage yourself, saving money and maintaining the safety and appearance of your vehicle. Remember, for significant damage, professional repair or replacement is always the best course of action. For minor chips and cracks, DIY repair kits offer a convenient and effective solution when used correctly.
[