Car electrical harnesses are the unsung heroes of your vehicle, silently routing power and signals to every component, from headlights to taillights, and everything in between. Like any hardworking part, they can succumb to wear and tear, especially in areas that experience constant movement, such as doors, trunks, and hatchbacks. If you’re experiencing electrical gremlins in your car, a damaged wiring harness might be the culprit. Diagnosing and repairing it yourself can save you money and be incredibly satisfying. This guide will walk you through the process of how to repair a car electrical harness, drawing on expert techniques and practical advice to get your car back in top electrical condition.
Understanding Car Electrical Harness Issues
Before diving into the repair, it’s crucial to understand why car electrical harnesses fail. The most common reason, as highlighted in our experience, is flexing. Wiring harnesses in areas like car trunks, doors, and tailgates are constantly bending and moving as these parts open and close. Over time, this repeated flexing can cause the wires within the harness to fatigue, crack, and eventually break.
Common Symptoms of a Damaged Car Electrical Harness:
- Malfunctioning lights: Intermittent or non-working headlights, taillights, brake lights, or interior lights.
- Power window and lock problems: Doors not locking or windows failing to operate.
- Trunk or hatch issues: Trunk not opening with the button or key fob, trunk light not working, or false “trunk open” warnings.
- Sensor failures: Erratic readings from sensors, such as parking sensors or trunk latch sensors.
- Audio system glitches: Speakers cutting out or radio malfunctions.
These symptoms can often be traced back to breaks or shorts within the wiring harness. Ignoring these issues can lead to further electrical problems and even safety hazards.
Tools and Materials for Car Electrical Harness Repair
To properly repair your car’s electrical harness, you’ll need to gather the right tools and materials. Having everything on hand before you start will make the repair process smoother and more efficient.
Essential Tools:
- Wire Strippers/Crimpers: For stripping insulation from wires and crimping connectors.
- Soldering Iron and Solder: For creating strong and reliable soldered connections.
- Heat Gun: To shrink heat shrink tubing for insulation and weatherproofing.
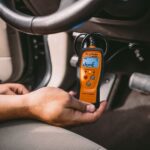
- Multimeter: For testing continuity and voltage to diagnose electrical issues.
- Scissors or Utility Knife: To carefully open the wiring harness sheath.
- Pliers: For manipulating wires and connectors.
- Torx and Screwdriver Set: To access the wiring harness and components.
- Inspection Mirror and Flashlight: To help see in tight spaces.
Materials You’ll Need:
- Automotive Wire (of appropriate gauge): To replace damaged sections of wire. Ensure it’s the same gauge or thicker than the original wire.
- Butt Splice Connectors: For quick and easy crimped wire connections.
- Heat Shrink Solder Splice Connectors: For solder connections with integrated weatherproofing.
- Heat Shrink Tubing: To insulate soldered or crimped connections.
- Electrical Tape (Cloth Tape Recommended): To re-wrap the wiring harness and protect the repaired area.
- Flux (for soldering): To help solder flow smoothly, especially on older wires.
- Cable Ties: To neatly secure the repaired harness.
- Pen and Paper or Camera: To document wire colors and connections before disassembly.
Step-by-Step Guide to Repairing a Car Electrical Harness
Now, let’s get into the actual repair process. Remember to always disconnect the car battery before working on any electrical components to prevent shorts and ensure your safety.
1. Diagnosis: Locating the Break in the Harness
- Identify the Symptoms: Pinpoint the specific electrical malfunctions to narrow down the area of the harness to inspect.
- Visual Inspection: Carefully examine the wiring harness, especially in flex points like trunk and door hinges. Look for:
- Cracked or Brittle Insulation: Indicates wire fatigue.
- Visible Breaks or Cuts: Obvious signs of damage.
- Bulging or Melted Sheathing: Possible short circuit or overheating.
- Continuity Testing with a Multimeter:
- Set your multimeter to the continuity setting (usually indicated by a sound wave symbol).
- Identify the wires in the harness related to the malfunctioning component (refer to your car’s wiring diagram if needed).
- Test for continuity along each wire segment within the flex area. No continuity means a break in the wire.
2. Preparation: Accessing and Exposing the Damaged Wires
- Access the Harness: Remove any interior panels or trim pieces necessary to access the wiring harness.
- Carefully Open the Sheath: Using scissors or a utility knife, carefully slit open the rubber or plastic sheath protecting the wiring harness in the damaged area. Be cautious not to cut the wires inside.
- Expose the Broken Wires: Gently separate the wires to get a clear view of the damage.
3. Choosing a Splicing Method
There are several methods for splicing broken wires in a car electrical harness. The best choice depends on the location, space constraints, and your preference.
-
Butt Splice Connectors (Crimp Connectors):
- Pros: Quick, easy, no soldering required, maintains wire length.
- Cons: Can be bulky, less weather-resistant if not properly sealed, can be less reliable in high-vibration areas.
- When to use: For quick repairs in less critical areas, or when soldering is not feasible.
-
Heat Shrink Solder Splice Connectors:
- Pros: Combines soldering and weatherproofing in one step, more compact than butt splices, reliable connection.
- Cons: Shortens wire length slightly, requires a heat gun, slightly more complex than butt splices.
- When to use: Excellent for most car wiring repairs, providing a good balance of reliability and ease of use.
-
Manual Soldering with Heat Shrink Tubing:
- Pros: Creates the most durable and weather-resistant connection, allows for adding extra wire length if needed, preferred by professionals for critical repairs.
- Cons: Requires soldering skills, more time-consuming, requires separate heat shrink tubing.
- When to use: For critical repairs, high-flex areas, or when you want the most robust connection.
4. Soldering and Heat Shrinking (Manual Method)
This method, while slightly more involved, provides a very reliable and long-lasting repair, especially suitable for high-flex areas.
-
Prepare the Wires:
- Cut the broken wires cleanly.
- Strip about ½ inch of insulation from each broken wire end and from both ends of a new wire splice (if adding length). Match the gauge of the new wire to the original.
- Slide a piece of heat shrink tubing onto one end of each wire to be joined, ensuring it’s far enough away from the splicing area to avoid shrinking prematurely.
-
Mechanical Connection:
- Create a strong mechanical joint by hooking the wire ends together. A good method is to create small hooks at the ends of the wires, interlock them, and then crimp them closed with pliers to ensure good physical contact before soldering.
- Soldering the Connection:
- Heat the wire joint with your soldering iron.
- Apply solder to the heated joint. The heat from the wire should melt the solder, allowing it to flow into the wire strands. Use flux if needed to ensure good solder flow, especially on older wires that may have oxidation.
- Ensure the solder flows smoothly and creates a solid, shiny joint, not a “cold solder” joint which looks dull and weak.
- Insulate with Heat Shrink Tubing:
- Once the solder joint has cooled, slide the heat shrink tubing over the soldered connection, centering it over the splice.
- Use a heat gun to shrink the tubing. Apply heat evenly until the tubing conforms tightly around the wire, creating a weatherproof and insulated seal.
- Repeat for All Broken Wires: Repair each broken wire individually using the same soldering and heat shrinking process. If multiple wires are broken, work methodically to ensure each is properly repaired.
5. Testing and Reassembly
- Test the Repair: Before fully reassembling everything, reconnect the car battery and test the repaired circuit to ensure it’s working correctly. Check the lights, trunk release, or whatever component was malfunctioning.
- Secure the Harness: Carefully re-wrap the repaired section of the wiring harness with cloth electrical tape or new harness tape to protect the wires from abrasion and moisture.
- Reassemble Components: Route the harness back into its original position, secure it with cable ties if necessary, and re-install any trim panels or components you removed for access.
Conclusion: The Satisfaction of DIY Car Electrical Repair
Repairing your car’s electrical harness might seem daunting, but with patience, the right tools, and a step-by-step approach, it’s a very achievable DIY task. Not only will you save money on potentially expensive mechanic fees, but you’ll also gain the satisfaction of fixing a problem yourself and ensuring your car’s electrical system is functioning correctly. By understanding how to repair a car electrical harness, you’re equipped to tackle common automotive electrical issues and keep your vehicle running smoothly for years to come. Remember to always prioritize safety, take your time, and enjoy the process of automotive DIY!