Dealing with sagging car door fabric can be an unsightly and frustrating issue for any car owner. Over time, the adhesive holding the fabric in place can weaken due to heat, humidity, and general wear and tear, leading to that droopy, detached look. While a professional upholstery service is always an option, you might be surprised to learn that repairing your car door fabric is a straightforward task you can easily tackle yourself at home.
For everyday car owners, especially those with vehicles that have seen a few years and miles, a quick, effective, and budget-friendly fix is often the best approach. This guide provides a simple method to repair sagging car door fabric, perfect for DIY enthusiasts looking to restore the interior aesthetics of their vehicles without breaking the bank. Forget about expensive repairs; let’s get that fabric looking taut and new again in just a few easy steps.
Materials You’ll Need
Before you begin, gather these readily available materials to ensure a smooth and efficient repair process:
- 3M Super 77 Multipurpose Adhesive: This spray adhesive is specifically recommended for its strong hold, ease of use, and clean-up. It’s designed to bond fabric and is less likely to bleed through or damage surrounding materials compared to other adhesives.
- Mild Body Solvent or Goo Gone: For cleaning the existing surface and removing any residue from the old adhesive. Goo Gone is a readily available household option, while a mild body solvent, often used in auto detailing, can also be effective.
- Clean Rags or Microfiber Cloths: For applying the cleaning solution and wiping surfaces clean.
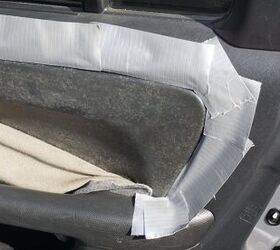
- Painter’s Tape or Duct Tape: To mask off the area around the fabric you’re repairing, protecting adjacent surfaces from overspray. Painter’s tape is gentler on surfaces, but duct tape can work if applied carefully.
- Plastic Razor Blade or Credit Card: To smooth the fabric back into place and eliminate air bubbles without damaging the material.
- Small Flathead Screwdriver (Optional): For carefully tucking the fabric edges back into the trim for a neat finish.
Step-by-Step Guide to Repairing Car Door Fabric
Follow these simple steps to effectively repair your sagging car door fabric and refresh your car’s interior.
Step 1: Cleaning the Surface
Start by preparing the area for the new adhesive. Use a mild body solvent or Goo Gone sprayed onto a clean rag to gently wipe away any loose debris, dirt, and old adhesive from both the back of the sagging fabric and the door panel surface. The goal isn’t to remove every trace of the old glue, but to create a clean and reasonably smooth surface for the new adhesive to bond effectively. Ensure the area is dry before proceeding to the next step.
Step 2: Masking the Area
Protect the surrounding areas of your car door from accidental adhesive overspray by carefully masking off the repair area. Use painter’s tape or duct tape to outline the fabric section that needs repair. Ensure the tape is securely in place but avoid pressing down too firmly, especially with duct tape, to prevent any damage to the door panel’s finish when removing it later. Accurate masking will ensure a clean and professional-looking repair.
Step 3: Applying the Adhesive
Now it’s time to apply the 3M Super 77 adhesive. Shake the can well and apply an even coat of the spray adhesive to both the back of the fabric and the corresponding area on the door panel. Hold the can about 6-8 inches away from the surface for even distribution. Avoid applying too much adhesive, as a light, even coat is sufficient.
Allow the adhesive to become tacky before pressing the fabric back into place. The drying time will vary depending on weather conditions, but typically, it takes about 15-30 seconds. Test the tackiness by lightly touching the adhesive with your knuckle – it should feel sticky but not wet.
Step 4: Reattaching the Fabric
Carefully align the fabric and begin pressing it back onto the door panel. Start from the center of the sagging area and work your way outwards to avoid trapping air bubbles. Use a plastic razor blade or a credit card to gently smooth the fabric and ensure even contact with the adhesive. This tool helps to apply consistent pressure and achieve a smooth, wrinkle-free finish.
Step 5: Finishing Touches
Once the fabric is securely in place, inspect the edges and trim. If necessary, use a small flathead screwdriver to gently tuck the edges of the fabric back into the door panel trim for a clean, factory-like finish. Carefully remove the masking tape, pulling it away from the repaired area.
In case of any accidental overspray of the adhesive onto unwanted areas, don’t worry. As demonstrated in the original guide, 3M Super 77 is easy to clean up. Use car shampoo or a degreaser on a rag to gently wipe away any overspray from plastic or vinyl surfaces. Follow up with your favorite plastic protectant to restore the shine and protect the surface.
Conclusion
Repairing your car door fabric is a satisfying DIY project that can significantly improve your car’s interior appearance. With just a few materials and these straightforward steps, you can effectively tackle sagging fabric and restore a more polished look to your vehicle. While this method provides a quick and reliable fix, remember that it’s a surface repair. For heavily damaged or extensively sagging fabric, professional upholstery services might offer a more comprehensive and longer-lasting solution. However, for typical cases of sagging door fabric, this DIY approach using 3M Super 77 is an excellent, cost-effective way to achieve great results yourself. So, take on this simple project and enjoy a fresher, more well-maintained car interior!