
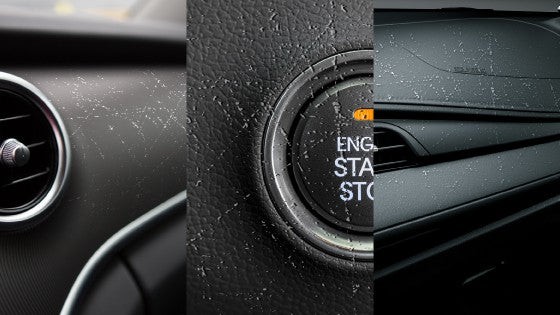
Dogs and cars, a classic combination filled with joy and… potential interior damage. While we adore our canine companions, their enthusiasm for car rides can sometimes leave our dashboards bearing the brunt of their excitement. Whether it’s a playful paw or simply everyday wear and tear, scratches on your car dashboard are an unfortunate reality for many vehicle owners. These blemishes, regardless of whether your dashboard is crafted from vinyl, wood, plastic, metal, leather, or synthetic materials like Ultrasuede, can detract from your car’s interior appeal and even impact its resale value. So, the question arises: how can you effectively remove or conceal those unsightly car dashboard scratches? The answer depends on the dashboard material, the severity of the scratch, and your commitment to restoring your car’s interior to its former glory.
Why Removing Dashboard Scratches Matters
Ignoring scratches on your car dashboard isn’t just an aesthetic oversight; it can have long-term consequences for your vehicle. Think of your dashboard like a high-quality wooden cutting board. Neglecting to oil or resurface the board won’t immediately compromise its functionality, but it will certainly diminish its appearance over time. Similarly, dashboard scratches, if left unattended, can lead to discoloration and the formation of hairline cracks. What starts as a minor cosmetic issue can escalate into a more significant and costly problem.
Beyond aesthetics and potential material degradation, dashboard scratches can also negatively impact your car’s resale value. Whether the scratches are on plastic, wood, metal, vinyl, or leather, automotive experts agree that dashboard imperfections contribute to vehicle depreciation. Prospective buyers notice these details, and scratches on a prominent interior surface like the dashboard can raise concerns about overall vehicle care and condition.
Whether caused by a misplaced handbag, a sliding electronic device, or even your beloved pet, dashboard scratches are a blemish on a highly visible part of your car’s interior. Unlike exterior scratches that can often be buffed out relatively easily, repairing dashboard scratches demands a more meticulous approach. Prevention is always better than cure, and there are preventative measures you can take, such as applying interior protectants or investing in custom dashboard covers. However, when scratches do occur, knowing how to address them is crucial for maintaining your car’s appearance and value.
Essential Tools and Materials for Plastic or Vinyl Dashboard Scratch Repair
Tackling dashboard scratches, like any DIY car care project, requires having the right tools and materials at hand. While exterior paint protection projects have their specific lists, dashboard repair has its own set of essentials. Forget household remedies like magic erasers or baking soda. For minor surface scratches on black plastic or vinyl dashboards, a product like Meguiar’s Ultimate Black Plastic Restorer, paired with a microfiber cloth, might suffice. However, for deeper scratches, a more comprehensive approach is needed, requiring the following materials:
Materials for Vinyl or Plastic Dashboard Scratch Repair:
- Interior Car Cleaner: While rubbing alcohol can work in a pinch, a dedicated, well-reviewed interior cleaner is more effective. Spray bottles are particularly useful for dislodging dirt and debris embedded in the scratch.
- Heat Gun or Hair Dryer: Heat is essential for making plastic or vinyl pliable for reshaping and scratch minimization.
- Fine Grit Sandpaper: Used for gently smoothing imperfections and blending the repaired area seamlessly with the surrounding dashboard.
- Textured Automotive Finishing/Grain Pads: Crucial for restoring the original “leather-like” texture to vinyl dashboards, ensuring the repaired area matches the rest of the dashboard. Choose a pad that closely mimics your dashboard’s texture.
- Lint-Free Gloves: Protect your hands from heat and prevent skin oils from contaminating the dashboard surface. Nitrile gloves are recommended.
- Color-Matched Paint (Optional): For dashboards with discoloration, color-matched paint can restore a uniform appearance.
- Cleaning Cloths: Microfiber cloths are ideal for cleaning and wiping down surfaces without scratching.
Materials to Avoid When Repairing Dashboard Scratches:
- Household Cleaners: These are often too harsh for automotive interiors and can cause discoloration or damage to dashboard materials.
- Blow Torch: Excessive heat can easily melt or warp your dashboard. Controlled heat from a heat gun or hairdryer is necessary.
- Coarse Sandpaper: Aggressive sandpaper will worsen scratches and damage the dashboard’s surface. Fine grit sandpaper is essential for delicate work.
- Low-Temperature Finishing Media: Finishing pads not designed for heat can melt onto the dashboard surface, creating further damage.
- Spray Paint: Spray paint is difficult to control in confined car interiors and can lead to overspray and uneven application. Brush-on paint is more precise for touch-ups.
Step-by-Step Guide: Removing Scratches from a Vinyl Dashboard
Step 1: Thorough Cleaning
Begin any dashboard scratch repair by thoroughly cleaning the affected area. Regardless of the dashboard material or any existing protective coatings like ceramic coatings, cleaning is paramount. Use an interior cleaner spray and a microfiber cloth to remove all dirt, dust, and debris. This ensures a smooth finish and prevents discoloration during the repair process. Allow the cleaned area to dry completely before proceeding.
Step 2: Smoothing and Shaving
Scratches often create raised edges or ridges of plastic or vinyl. Gently reduce these ridges using fine-grit sandpaper. For larger ridges, carefully shave them off with a razor blade or an Exacto knife, slicing parallel to the dashboard surface to avoid further damage. Once the larger ridges are removed, use fine-grit sandpaper to further smooth the edges of the scratch, focusing only on the immediate area needing repair.
Step 3: Heat Application
Using a heat gun on a low setting or a hairdryer on high heat, carefully apply heat to the scratched vinyl area. The goal is to soften the vinyl, making it more pliable for reshaping. Exercise caution to avoid overheating, as plastic and vinyl can warp quickly. Heat until the vinyl’s textured surface begins to smooth and become slightly glossy.
Step 4: Texture Restoration
While the vinyl is still warm and pliable, gently press the textured finishing pad onto the damaged area. This process aims to force the edges of the scratch together and imprint a matching texture onto the repaired area, blending it with the surrounding dashboard. Apply even pressure and check the texture match frequently.
Step 5: Cooling and Inspection
Allow the repaired area to cool and harden completely. As it cools, the scratch should become significantly less visible, replaced by a textured area blending with the surrounding dashboard. Inspect the repair closely to determine if additional heat treatment or texturing is needed. Minor imperfections can often be addressed with a second heat and texture application.
Step 6: Final Cleanup, Painting, and Protection
Once the repaired dashboard area is completely cool, use superfine sandpaper to gently remove any remaining imperfections and ensure a smooth, uniform surface. Wipe down the area with rubbing alcohol or interior cleaner to remove sanding debris. If necessary, apply small dabs of color-matched paint to address any discoloration. Finally, apply a clear interior protectant or coating to the entire dashboard to enhance its appearance and protect it from future scratches.
Repairing Scratches on a Leather Dashboard
Repairing scratches on a leather dashboard presents unique challenges compared to plastic or vinyl. Minor surface scuffs may be treatable with a leather restoration wax or spray and a microfiber cloth. However, deeper scratches require a more specialized approach. Traditional methods involving patches and heating tools are often unreliable. Modern leather repair kits offer a more effective solution, often eliminating the need for heat and providing a wider range of color matching options.
While leather repair kits simplify the process, leather dashboard repair remains a meticulous task requiring patience and care. However, these kits are generally affordable, come with straightforward instructions, and receive positive user reviews.
Step 1: Cleaning and Preparation
Begin by cleaning the scratched leather area with rubbing alcohol or a leather-specific cleaner to remove dirt and debris. Carefully trim any rough edges around the scratch using a razor blade or Exacto knife, cutting parallel to the dashboard surface. This creates a cleaner edge for the repair compound to adhere to.
Step 2: Color Matching and Testing
Leather repair kits typically include a color mixing guide and a range of color pigments. Carefully follow the instructions to mix a filler putty that closely matches your dashboard’s leather color. Once you’ve achieved a likely match, test a small amount of the mixture on an inconspicuous area of your car’s interior, such as under the glovebox or on a lower door panel. Allow the test area to dry completely and then inspect it under good lighting to ensure accurate color matching.
Step 3: Applying Filler Compound
Using the putty knife or applicator provided in the repair kit, carefully apply the color-matched filler compound into the scratch. For deep gouges, you may need to insert a backing pad into the scratch to provide support for the filler. If possible, use the provided tools to insert a backing pad into deeper scratches to make filler application easier. Once the scratch is filled, use a paintbrush to spread the excess filler around the edges of the scratch, blending it smoothly with the surrounding leather. Clean up any excess filler with a paper towel.
Step 4: Drying Time
Allow the filler compound to dry completely according to the kit’s instructions. Drying times vary depending on temperature, humidity, and the amount of filler used. Avoid rushing this step to ensure proper curing of the filler. If you need to expedite drying, you can use a hairdryer on a low setting, but avoid overheating the filler.
Step 5: Buffing and Blending
Once the filler is fully dry, use a Q-tip dampened with rubbing alcohol to gently buff and blend the edges of the repaired area. Use circular motions to smooth out any unevenness and create a seamless transition between the repair and the original leather. Before buffing, carefully inspect the filled scratch. If additional filler is needed for a level surface, repeat steps 3 and 4 before proceeding.
Step 6: Polishing and Protection
With the leather scratch repaired and blended, the final step is protection. While leather wax is a traditional leather care product, consider applying a ceramic coating to your entire leather dashboard. Ceramic coatings offer superior protection against future scratches, UV damage, and general wear, keeping your leather dashboard looking its best for years to come. They also enhance the leather’s appearance, providing a richer, more luxurious finish.