A sagging car ceiling headliner is more than just an eyesore; it’s a common problem that can detract from your vehicle’s interior appeal and even indicate underlying issues. Instead of living with droopy fabric above your head, you can take matters into your own hands. This comprehensive guide will walk you through practical and cost-effective methods on how to repair your car ceiling headliner without the hassle of complete removal. Let’s restore your car’s interior to its former glory!
Understanding Your Car’s Headliner
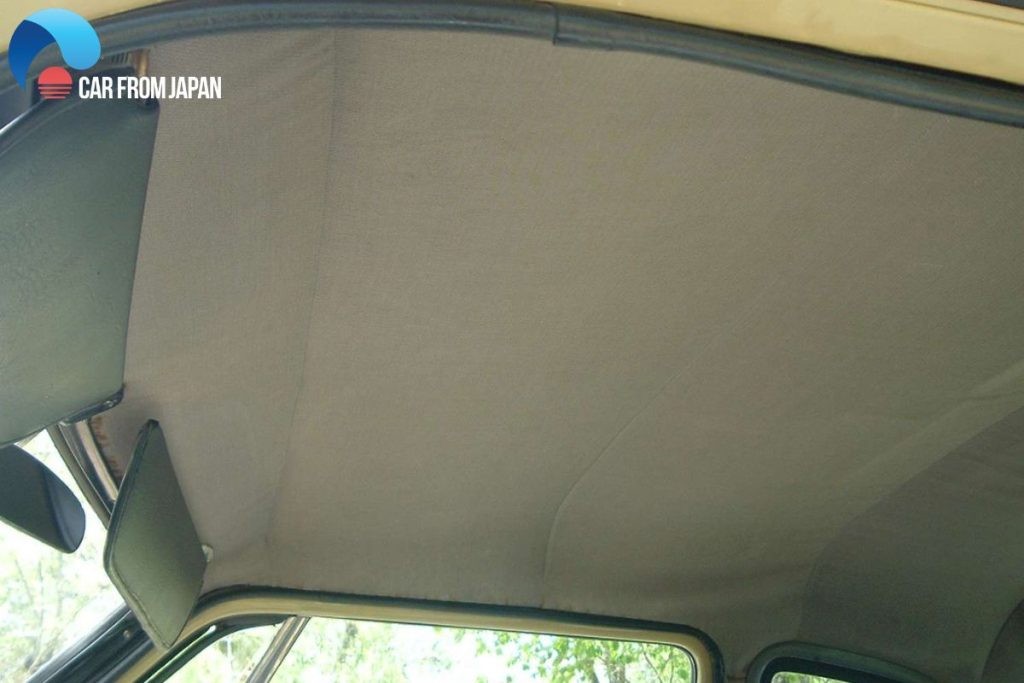
Before diving into repairs, it’s crucial to understand what a headliner is and its function. The headliner, or car ceiling fabric, is the material lining the interior roof of your vehicle. Typically made of fabric with a foam backing, it’s attached to a rigid board that conforms to the roof’s shape.
The headliner serves several important purposes:
- Aesthetics: It provides a finished, clean look to the car’s interior, hiding the bare metal roof structure.
- Insulation: The foam layer helps insulate the cabin, keeping it cooler in summer and warmer in winter.
- Noise Reduction: It absorbs road noise and vibrations, contributing to a quieter and more comfortable ride.
- Acoustics: Headliners can also improve the sound quality within the car, enhancing the performance of your car audio system.
Why Car Headliners Sag: Common Causes
Sagging headliners are a common issue, particularly in older vehicles or those exposed to harsh climates. The primary culprit is the breakdown of the adhesive that bonds the fabric to the headliner board. Several factors accelerate this deterioration:
- Heat: Extreme heat, especially from direct sunlight beating down on your car roof, is the number one enemy of headliner adhesive. Heat weakens and eventually melts the glue, causing the fabric to detach and sag.
- Humidity and Moisture: Moisture, whether from humidity, leaks, or condensation, can seep into the headliner. This moisture degrades the foam backing and weakens the adhesive, leading to sagging and potential mold growth.
- Age: Over time, the adhesive naturally degrades due to age and environmental factors, even without extreme conditions.
- Poor Initial Installation: In some cases, a subpar factory installation with insufficient adhesive can lead to premature sagging.
- Physical Damage: Accidental damage from passengers, especially children or pets pulling or scratching at the headliner, can loosen the fabric and contribute to sagging.
DIY Car Headliner Repair: Methods to Fix Sagging Without Removal
Replacing the entire headliner can be a costly and labor-intensive process, often requiring professional upholstery services. Fortunately, for minor to moderate sagging, you can often achieve excellent results with DIY methods that don’t require removing the headliner. These methods are budget-friendly and can save you a significant amount of money.
1. Re-gluing with Headliner Adhesive Spray
For localized sagging, particularly around edges or corners, re-gluing is a straightforward and effective solution. You’ll need a specialized headliner adhesive spray, readily available at auto parts stores and online.
Steps:
- Preparation: Gently clean the sagging area with a soft brush or vacuum to remove any loose debris or dust.
- Apply Adhesive: Carefully peel back the sagging fabric as much as possible without tearing it. Spray the headliner adhesive onto both the back of the fabric and the exposed headliner board. Follow the adhesive manufacturer’s instructions regarding application distance and drying time.
- Reattach Fabric: Allow the adhesive to become tacky (usually a few minutes). Then, carefully press the fabric back into place, working from the center outwards to avoid wrinkles or air bubbles.
- Secure and Dry: Use painter’s tape or clamps to hold the fabric firmly in place while the adhesive fully cures. Allow ample drying time, typically several hours or overnight, as recommended by the adhesive instructions.
Tips for Gluing:
- Work in a well-ventilated area.
- Use light, even coats of adhesive to prevent soaking through the fabric.
- Avoid over-spraying onto other interior surfaces; use masking tape to protect surrounding areas if needed.
- For larger sagging areas, work in sections to ensure the adhesive doesn’t dry out before you can reattach the fabric.
2. Twist Pins for a Quick and Easy Fix
Twist pins, also known as saggy stopper pins or clear-headed pins, are a remarkably simple and inexpensive solution for temporarily securing sagging headliners. They are particularly useful for larger areas of sagging or when you need a quick, no-mess fix.
Steps:
- Identify Sagging Points: Locate the areas where the headliner is sagging most noticeably.
- Insert Twist Pins: Take a twist pin and gently push it through the fabric and into the headliner board behind it. Twist the pin head to secure it in place.
- Distribute Pins Evenly: Space the pins evenly across the sagging area, typically a few inches apart, to lift and support the fabric. You can arrange them in a pattern for a more aesthetically pleasing look.
Benefits of Twist Pins:
- Easy to Install: No tools or special skills are required.
- Inexpensive: Twist pins are very affordable.
- Minimal Damage: They create very small, barely noticeable holes in the fabric.
- Adjustable: You can easily add or remove pins as needed.
Limitations of Twist Pins:
- Visible: While clear-headed pins are less noticeable, they are still visible on the headliner surface.
- Temporary: Twist pins are generally considered a temporary or short-term fix, although they can last for a considerable time.
3. Steam Cleaner and Paint Roller Combo: Re-activating Adhesive
For more extensive sagging, especially if the adhesive is still somewhat pliable, a steam cleaner combined with a paint roller can be surprisingly effective. The steam’s heat can reactivate the old adhesive, allowing you to re-adhere the fabric.
Steps:
- Steam Application: Using a car steam cleaner, gently apply steam to the sagging headliner area. Move the steam cleaner wand slowly and evenly over the fabric, being careful not to saturate it. The goal is to heat the adhesive, not soak the fabric.
- Rolling and Re-adhering: Immediately after steaming an area, use a clean paint roller to firmly press the fabric back against the headliner board. Roll firmly and evenly to ensure good contact and re-adhesion.
- Repeat as Needed: Work in sections, steaming and rolling, until the entire sagging area is addressed.
- Drying Time: Allow the headliner to dry completely. Ventilation can help speed up the drying process.
Important Considerations for Steam Cleaning:
- Use a Car Steam Cleaner: These are designed for interior use and produce the right amount of steam. Avoid household steam cleaners, which may be too powerful.
- Gentle Steam: Use a low steam setting and keep the steam wand moving to prevent damage to the fabric or excessive moisture buildup.
- Clean Roller: Ensure the paint roller is clean and dry to avoid transferring dirt or stains to the headliner.
- Ventilation: Open car doors and windows to promote ventilation and drying.
Preventing Headliner Sagging: Proactive Measures
While repairs are possible, preventing headliner sagging in the first place is always preferable. Here are some preventative measures you can take:
- Park in Shade: Whenever possible, park your car in shaded areas or garages to minimize exposure to direct sunlight and heat.
- Window Tinting: Consider window tinting, especially for the roof and rear windows, to reduce heat buildup inside the car.
- Regular Interior Cleaning: Keep your car’s interior clean and dry. Address any leaks promptly to prevent moisture damage.
- Avoid Harsh Chemicals: When cleaning your car interior, avoid using harsh chemicals or abrasive cleaners on the headliner, which can damage the fabric and adhesive.
- Gentle Handling: Instruct passengers, especially children and pets, to avoid pulling or scratching at the headliner.
- Regular Inspections: Periodically inspect your headliner for early signs of sagging, particularly in areas prone to heat exposure (e.g., near sunroofs, dome lights). Addressing minor issues early can prevent them from becoming major problems.
Headliner Replacement Cost: When DIY Isn’t Enough
While the DIY methods described above are effective for many sagging headliner issues, there are situations where complete replacement may be necessary. This is often the case with:
- Extensive Sagging: If the headliner is sagging across the entire roof or is severely deteriorated.
- Damaged Headliner Board: If the underlying headliner board is warped, cracked, or damaged beyond repair.
- Desire for a New Look: If you want to change the color or material of your headliner for aesthetic reasons.
Cost of Professional Headliner Replacement:
The cost to replace a car headliner professionally can vary significantly depending on several factors:
- Vehicle Make and Model: Luxury vehicles and those with complex roof designs (e.g., sunroofs, multiple dome lights) typically cost more.
- Headliner Material: The type of fabric and foam used can affect the price.
- Labor Costs: Labor rates vary by location and shop.
General Cost Estimates:
- Sedan/Hatchback/Coupe (e.g., Honda Accord, Toyota Corolla): $300 – $750
- SUV/Crossover (e.g., Toyota RAV4, Nissan X-Trail): $500 – $900
- Luxury Vehicle (e.g., BMW, Mercedes-Benz): $1,000 – $6,000+
Note: These are estimated ranges. It’s always best to get quotes from local auto upholstery shops for your specific vehicle.
Conclusion: Restore Your Car’s Interior with DIY Headliner Repair
A sagging car headliner doesn’t have to be a permanent blight on your vehicle’s interior. With the right approach and a little DIY effort, you can effectively repair sagging headliners without the expense and hassle of full replacement. Whether you choose re-gluing, twist pins, or the steam cleaner method, these techniques offer practical solutions to restore your car’s ceiling to a more presentable and comfortable state. If you’re unsure about tackling the repair yourself, seeking professional help from an auto upholstery specialist is always a reliable option.
FAQs About Car Headliner Sagging and Repair
How do I know if my car ceiling is sagging?
Signs of a sagging headliner include:
- Visible drooping of the fabric away from the roof.
- Fabric that feels loose or detached when touched.
- Creasing or wrinkling of the headliner material.
- In severe cases, the fabric may hang down and obstruct your vision.
Is it okay to fix the headliner sagging myself?
Yes, for many cases of sagging headliners, DIY repair is a viable and cost-effective option. The methods outlined in this guide are designed for car owners to perform themselves with readily available tools and materials.
Can I paint a car headliner instead of repairing it?
While technically possible, painting a headliner is generally not recommended. Paint can stiffen the fabric, alter its texture, and may not adhere well long-term due to temperature fluctuations in the car interior. Repairing or replacing the fabric is usually a better approach.
Will car insurance cover headliner replacement?
Generally, standard car insurance policies do not cover headliner replacement due to wear and tear or cosmetic issues. Headliner damage is typically considered a maintenance issue, not a covered accident or damage event. Extended warranties or specific upholstery coverage might be exceptions, but it’s best to check your policy details.