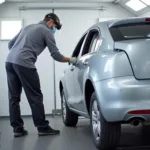
A car bumper scrape is an eyesore, but it doesn’t have to break the bank. Depending on the severity, you might be able to fix a minor scrape yourself. This guide will walk you through how to repair car bumper scrapes, empowering you to restore your car’s appearance and potentially save money.
Assessing the Damage: Is a DIY Bumper Scrape Repair Possible?
Before you grab the sandpaper, it’s crucial to evaluate the damage.
- Light Scrapes and Scratches: These are superficial and often only affect the clear coat or paint. They are excellent candidates for DIY repair.
- Deep Scratches: These expose the plastic bumper underneath and may require professional attention for a seamless finish.
- Dents and Cracks: These compromise the bumper’s structural integrity and are best handled by a professional body shop.
DIY Car Bumper Scrape Repair: Step-by-Step Guide
For this guide, we’ll focus on repairing light car bumper scrapes. Here’s what you’ll need:
- Cleaning Supplies: Car wash soap, microfiber cloths, masking tape, rubbing alcohol
- Sandpaper: 220-grit, 400-grit, 600-grit
- Primer (if necessary): Choose a primer specifically designed for plastic bumpers.
- Touch-Up Paint: Get the exact color match for your car.
- Clear Coat: Protects the paint and provides a glossy finish.
- Polishing Compound
- Wax
Step 1: Preparation is Key
- Thoroughly wash and dry the scraped area.
- Mask off the surrounding area to protect the undamaged paint.
Step 2: Smooth Out the Scrape
- Start with 220-grit sandpaper and lightly sand the scrape, working in circular motions.
- Gradually move up to 400-grit and then 600-grit sandpaper, ensuring the surface is smooth.
Step 3: Prime Time (If Needed)
If the plastic bumper is exposed, apply a thin coat of primer to the sanded area. Allow it to dry completely.
Step 4: Paint it Right
- Shake the touch-up paint thoroughly and apply thin coats to the scrape, allowing each coat to dry completely.
- For small scrapes, a paint pen can offer greater precision.
 Applying Touch-Up Paint on Car Bumper
Step 5: Seal the Deal
- Once the paint is dry, apply 2-3 thin coats of clear coat, allowing each coat to dry before applying the next.
- This step is crucial for protecting the paint and blending the repair.
Step 6: Finishing Touches
- After the clear coat has cured (check the product instructions for drying times), use a polishing compound to buff the area and blend it with the surrounding paint.
- Wax the entire bumper to protect the finish and enhance its shine.
When to Call the Pros
While minor car bumper scrapes can often be tackled at home, some situations warrant professional intervention:
- Deep Damage: If the scrape is deep and exposes a significant amount of plastic, a professional can ensure a seamless repair.
- Color Matching Issues: Matching touch-up paint perfectly can be tricky. Professionals have access to advanced color-matching systems.
- Lack of Confidence: If you’re unsure about any step of the process, it’s always best to err on the side of caution and consult a professional.
Preventing Future Bumper Scrapes
Prevention is always better than cure. Here are some tips:
- Park Strategically: Choose parking spots away from other vehicles to minimize the risk of door dings and scrapes.
- Reverse Parking: It often provides better visibility when maneuvering in and out of parking spaces.
- Be Mindful of Curbs: Avoid pulling too close to curbs when parking.
By following these tips and guidelines, you can confidently tackle those unsightly car bumper scrapes and keep your car looking its best. For more detailed guides on specific car repairs, browse our website. And remember, if you’re ever unsure about a repair, don’t hesitate to seek professional help from our trusted car repair partners in car bumper repair perth, car bumper repair macclesfield, or car bumper repairs glasgow.


