
A car axle, specifically the CV (Constant Velocity) axle, is a critical component of your vehicle’s drivetrain, responsible for transferring power from the transmission to the wheels. Understanding how to repair a car axle is a valuable skill for any car owner, potentially saving you money on costly mechanic bills. This guide will walk you through the symptoms of a failing axle and the steps involved in replacing it yourself.
Recognizing the Symptoms of a Failing Car Axle
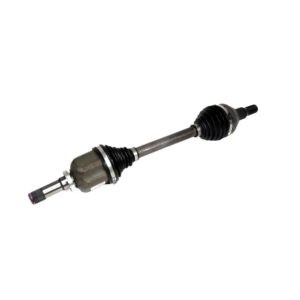
Your CV axle is designed with two joints: an inboard joint near the transmission and an outboard joint at the wheel. These joints are protected by flexible rubber boots, known as CV boots. These boots are filled with grease, which is essential for lubrication and preventing corrosion. A damaged CV boot is often the first sign of axle trouble.
If a CV boot cracks or tears, the lubricating grease can leak out, and contaminants like dirt and debris can enter the joint. This leads to wear and tear on the CV joint, eventually causing noticeable symptoms. Recognizing these early signs can prevent more serious damage and make the repair process smoother.
Identifying a Damaged CV Boot
The easiest way to check for axle problems is to visually inspect the CV boots. With the wheel removed, look for the black, accordion-shaped rubber boots near the wheel hub and transmission.
- Visual Inspection: Check for any visible cracks, splits, or tears in the rubber boot.
- Grease Leakage: Look for grease splattered around the boot or surrounding areas. This is a clear indication of a boot breach.
- Boot Condition: Feel the boot. It should be pliable and firm. A soft, mushy, or excessively hard boot can suggest degradation.
Even without visible boot damage, a CV joint can still fail, although it’s less common. However, boot failure is a strong indicator of potential CV joint issues.
Audible and Vibrational Symptoms of a Worn CV Joint
Beyond visual checks, listen and feel for these symptoms while driving:
- Clicking or Popping Noises When Turning: This is a classic sign of a worn outer CV joint. The noise will be more pronounced when making sharp turns, especially at lower speeds.
- Vibration During Straight-Line Acceleration: A vibration felt through the floorboard or steering wheel during acceleration, particularly in a straight line, often indicates wear in the inner CV joint.
- Clunking Sounds: In some cases, worn CV joints can produce clunking sounds, especially when shifting gears from drive to reverse or vice versa.
If you experience any of these symptoms, it’s crucial to inspect your CV axles promptly. Ignoring these signs can lead to a complete axle failure, leaving you stranded and potentially causing further damage to your transmission. In a worst-case scenario, a broken CV joint can result in a sudden loss of power to the affected wheel and potential damage to transmission components.
Essential Tools for CV Axle Replacement
Before you start the repair, gather the necessary tools. While many are standard in a home mechanic’s toolkit, some specialized tools might be required.
- Floor Jack and Jack Stands: Essential for safely lifting and supporting your vehicle.
- Wheel Chocks: To prevent the vehicle from rolling.
- Lug Wrench: For removing wheel lug nuts.
- Socket Set and Wrenches: Including a socket for the axle nut (size varies by vehicle).
- Breaker Bar: For loosening stubborn axle nuts.
- Pliers: For removing cotter pins and hose clamps.
- Hammer: For gently tapping components into place and dislodging stuck parts.
- Screwdriver Set: Various sizes and types, including flathead and Phillips head.
- Torque Wrench: Crucial for tightening nuts and bolts to the manufacturer’s specified torque.
- CV Axle Puller (Optional but Recommended): Can make removing the axle from the hub easier.
- Penetrating Oil: To loosen rusted or stuck bolts and nuts.
- Grease: For lubricating new parts during installation.
- Gloves and Safety Glasses: For personal protection.
Having these tools readily available will make the CV axle replacement process more efficient and safer.
Step-by-Step Guide to Replacing a CV Axle
Replacing a CV axle is a manageable task for a DIY mechanic with some experience. Follow these steps carefully for a successful replacement:
-
Preparation and Safety First:
- Secure the Vehicle: Park your car on a level surface, engage the parking brake, and place wheel chocks behind the rear wheels.
- Lift the Vehicle: Use a floor jack to raise the side of the vehicle where you’ll be replacing the axle. Position the jack at the designated jacking points for your car model.
- Support with Jack Stands: Immediately and securely place jack stands under the vehicle’s frame rails or designated support points. Never work under a vehicle supported only by a jack.
-
Wheel Removal and Access:
- Remove the Wheel: Use the lug wrench to loosen the lug nuts, then fully remove them and take off the wheel.
-
Accessing the Axle Nut:
- Locate the Spindle: Find the spindle nut (axle nut) in the center of the wheel hub.
- Remove Cotter Pin and Retainer: Use pliers to remove the cotter pin securing the axle nut retainer (if equipped). Remove the retainer.
- Loosen the Axle Nut: This nut is often very tight. Use a breaker bar and the correct size axle nut socket to loosen it. You might need to prevent the wheel hub from rotating. One method is to insert a screwdriver through the brake caliper into a rotor vent to lock the rotor.
-
Disconnecting Suspension Components:
- Inspect for Spring Pressure: Before detaching any suspension parts, visually check if there’s downward pressure from the struts or springs. If there is significant pressure, consult a repair manual or seek professional advice, as releasing suspension components under pressure can be dangerous.
- Detach Tie Rod End: Locate the tie rod end connected to the wheel carrier (steering knuckle). Loosen and remove the nut and use a tie rod separator tool or hammer to carefully detach the tie rod end.
- Detach Ball Joint: Similarly, locate the ball joint connecting the lower control arm to the wheel carrier. Detach it using appropriate tools – this might involve loosening bolts or separating the ball joint from the control arm, depending on your vehicle’s suspension design.
-
Releasing the Axle from the Wheel Hub:
- Protect Axle Threads: Thread the axle nut back onto the axle, flush with the end of the axle, to protect the threads from damage.
- Dislodge the Axle: Use a hammer to gently tap the end of the axle nut. This will help to push the axle out of the wheel hub. Avoid hitting the axle directly without the nut in place, as you could damage the threads.
-
Removing the Axle from the Transmission:
- Locate Transmission Bolts/Nuts: On the transmission side of the CV axle, identify the bolts or nuts securing it to the transmission or transaxle.
- Remove Bolts/Nuts: Use the appropriate wrenches or sockets to remove these fasteners.
- Carefully Remove the Axle: Gently pull the CV axle out of the transmission. Be prepared for a slight amount of transmission fluid to leak out (have a drain pan ready if necessary).
-
Installing the New CV Axle:
- Reverse the Removal Steps: Install the new CV axle by reversing the removal process.
- Engage into Transmission: Carefully align the new axle and gently push it into the transmission until it is fully seated.
- Secure to Transmission: Reinstall and tighten the bolts or nuts securing the axle to the transmission to the manufacturer’s specified torque.
- Slide into Wheel Hub: Guide the outer end of the axle through the wheel hub.
- Reconnect Suspension: Reattach the ball joint and tie rod end, tightening all fasteners to the correct torque specifications.
- Install Axle Nut: Install the axle nut and tighten it to the manufacturer’s specified torque. Use the torque wrench for accuracy.
- Install New Cotter Pin and Retainer: If your vehicle uses a cotter pin, install a new cotter pin and the retainer.
-
Final Steps:
- Reinstall Wheel: Put the wheel back on and tighten the lug nuts hand-tight in a star pattern.
- Lower Vehicle: Carefully lower the vehicle using the floor jack, and remove the jack stands.
- Torque Lug Nuts: Use a torque wrench to tighten the lug nuts to the manufacturer’s specified torque in a star pattern.
- Test Drive: Take the vehicle for a short test drive in a safe area to check for any noises or vibrations.
Important Note: Always replace only one CV axle at a time. Removing both axles simultaneously can cause internal gears in the transmission to shift and misalign, potentially leading to serious transmission damage.
Replacing a car axle is a rewarding DIY task. By understanding the symptoms, using the right tools, and following these steps, you can effectively repair your car axle and keep your vehicle running smoothly. For quality replacement parts and tools, and for expert advice on car repair, visit AutoZone. If you find the job too challenging, AutoZone can also help you locate a Preferred Shop in your area to assist with the repair.