Repairing a damaged bumper underneath your car can seem daunting, but with the right tools and guidance, it’s a manageable task for the DIY enthusiast. This comprehensive guide will walk you through the steps of how to repair bumper underneath car, from assessing the damage to the final touches. We’ll cover different repair methods, provide tips for a professional finish, and help you determine when professional help is necessary.
Assessing the Damage: The First Step in Bumper Repair
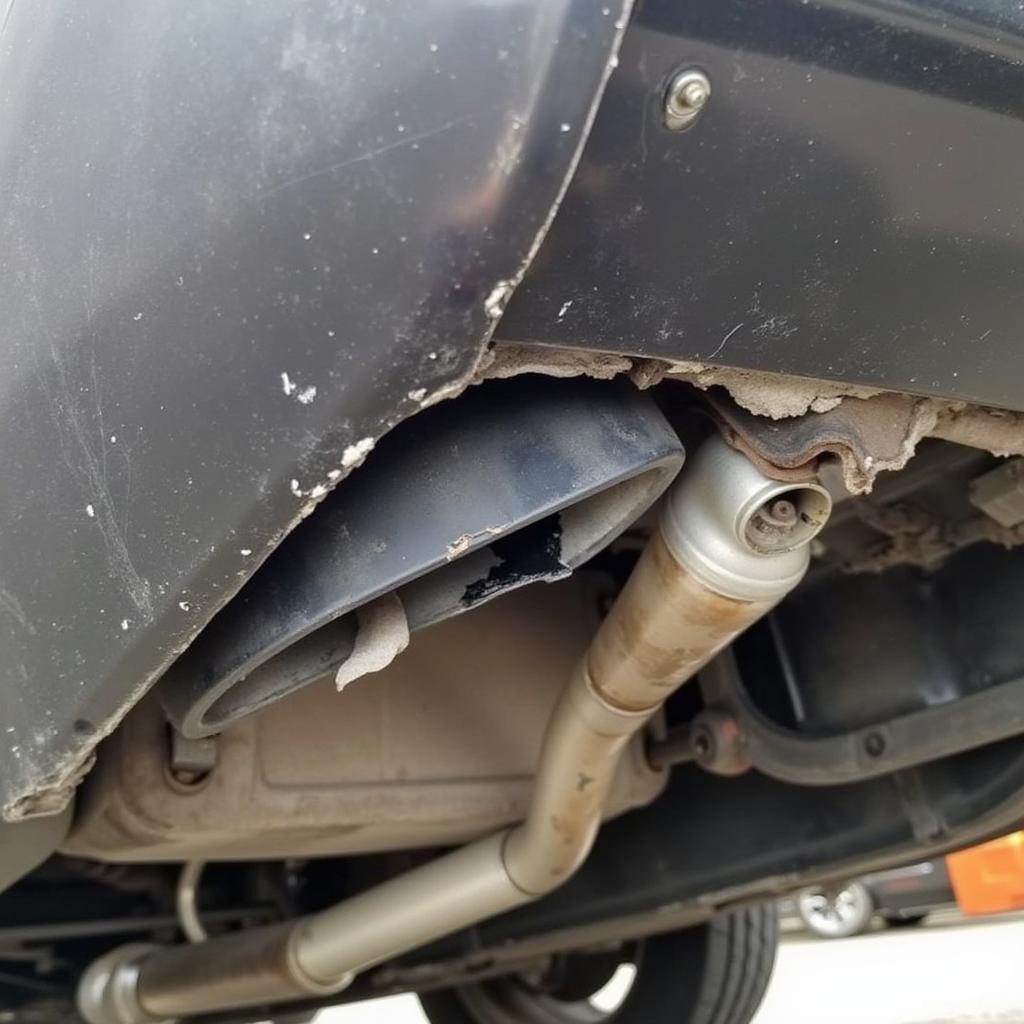
Before diving into repairs, carefully examine the damage to your undercarriage bumper. Is it a minor scrape, a deep crack, or a complete tear? This initial assessment will determine the best course of action. Check for any associated damage to surrounding components like exhaust pipes, fuel lines, or wiring. Identifying the extent of the damage is crucial for selecting the appropriate repair method and ensuring your safety.
DIY Bumper Repair: Methods and Materials
For minor scrapes and scuffs, a thorough cleaning and application of touch-up paint might suffice. However, deeper cracks and tears require more involved repairs. Plastic welding is a common technique for rejoining broken plastic bumper pieces. This involves using a specialized soldering iron to melt and fuse the plastic back together. Alternatively, you can use epoxy resin or fiberglass repair kits for a strong and durable bond. Each method has its pros and cons, and selecting the right one depends on the type and severity of the damage.
Gathering Your Tools: Be Prepared for Success
Having the right tools is essential for a successful bumper repair. You’ll likely need sandpaper, cleaning agents, a plastic welder (if welding), epoxy or fiberglass repair kit, masking tape, and paint. Investing in quality tools will make the repair process smoother and result in a more professional-looking finish. Remember, proper preparation is key to a long-lasting repair.
Step-by-Step Guide to Repairing Your Undercarriage Bumper
- Clean the Area: Thoroughly clean the damaged area with soap and water, removing any dirt, grease, or debris.
- Prepare the Surface: Sand the damaged area with progressively finer grit sandpaper to create a smooth surface for the repair material to adhere to.
- Repair the Damage: Apply the chosen repair method – plastic welding, epoxy, or fiberglass – following the manufacturer’s instructions carefully.
- Sand and Smooth: Once the repair material has cured, sand the area smooth and blend it with the surrounding bumper surface.
- Prime and Paint: Apply primer to the repaired area and allow it to dry completely. Then, apply several thin coats of paint, matching the original bumper color as closely as possible.
When to Call a Professional: Knowing Your Limits
While DIY repairs can save you money, some bumper damage is best left to the professionals. Extensive damage, damage to surrounding components, or lack of experience with automotive repair are all signs that you should seek professional help. A qualified mechanic can ensure the repair is done correctly and safely.
“A properly repaired undercarriage bumper not only enhances the appearance of your vehicle but also protects vital components from road debris and damage,” says automotive expert, Michael Stevenson.
Preventing Future Damage: Protecting Your Investment
After repairing your bumper, consider preventative measures to avoid future damage. Be mindful of parking curbs and avoid driving over rough terrain whenever possible. Regularly inspecting your undercarriage can help you identify and address minor issues before they become major problems.
Conclusion: Keep Your Car Looking Its Best
Repairing your car’s undercarriage bumper is achievable with the right approach. By following these steps and knowing your limits, you can restore your bumper and protect your vehicle. Remember, a well-maintained car is a safer car. How to repair bumper underneath car involves careful assessment, appropriate repair methods, and attention to detail.
FAQs
-
What is the best material for repairing a plastic bumper? Plastic welding, epoxy resin, and fiberglass repair kits are common options. The best choice depends on the type and severity of the damage.
-
Can I repair a bumper myself? Yes, minor repairs can be done DIY, but extensive damage may require professional help.
-
How long does it take for epoxy to dry? Drying times vary depending on the product, but typically allow 24 hours for complete curing.
-
Do I need to prime the bumper before painting? Yes, priming is crucial for proper paint adhesion and a durable finish.
-
How can I prevent future bumper damage? Be mindful of parking curbs and avoid rough terrain. Regularly inspect your undercarriage for any potential issues.
-
What should I do if my bumper is severely damaged? Consult a qualified mechanic for professional repair.
-
Where can I find the right paint color for my bumper? Your car’s owner’s manual should list the paint code, or you can contact a dealership or automotive paint supplier.
Related Questions & Articles:
- How to Repair Scratches on Car Bumper
- DIY Car Maintenance Tips
- Understanding Your Car’s Undercarriage
- Choosing the Right Car Repair Shop
Need help with your car repair? Contact us via WhatsApp: +1(641)206-8880, Email: [email protected]. We have a 24/7 customer service team ready to assist you.


