
Car interiors are complex networks of wiring, powering everything from your radio to your windows. Over time, the connectors linking these circuits can degrade, leading to frustrating electrical issues. Whether it’s a malfunctioning power window, a flickering interior light, or a faulty sensor, bad connections in your car’s interior connectors are often the culprit. This guide will walk you through how to diagnose and repair these bad connections, saving you time and money.
Understanding Car Interior Connectors and Common Problems
Car interior connectors are the unsung heroes of your vehicle’s electrical system. They are designed to create secure and reliable connections between wiring harnesses and various components. These connectors come in various shapes and sizes, from simple single-wire connectors to complex multi-pin units.
However, despite their robust design, car interior connectors are susceptible to wear and tear, leading to bad connections. Several factors contribute to connector problems:
- Corrosion: Moisture and humidity inside the car can lead to corrosion on connector terminals. This corrosion acts as an insulator, hindering the flow of electricity.
- Vibration: Constant vehicle vibration can loosen connectors over time, disrupting the electrical contact.
- Physical Damage: Accidental impacts or stress on wiring harnesses can damage connectors, causing pins to bend or break.
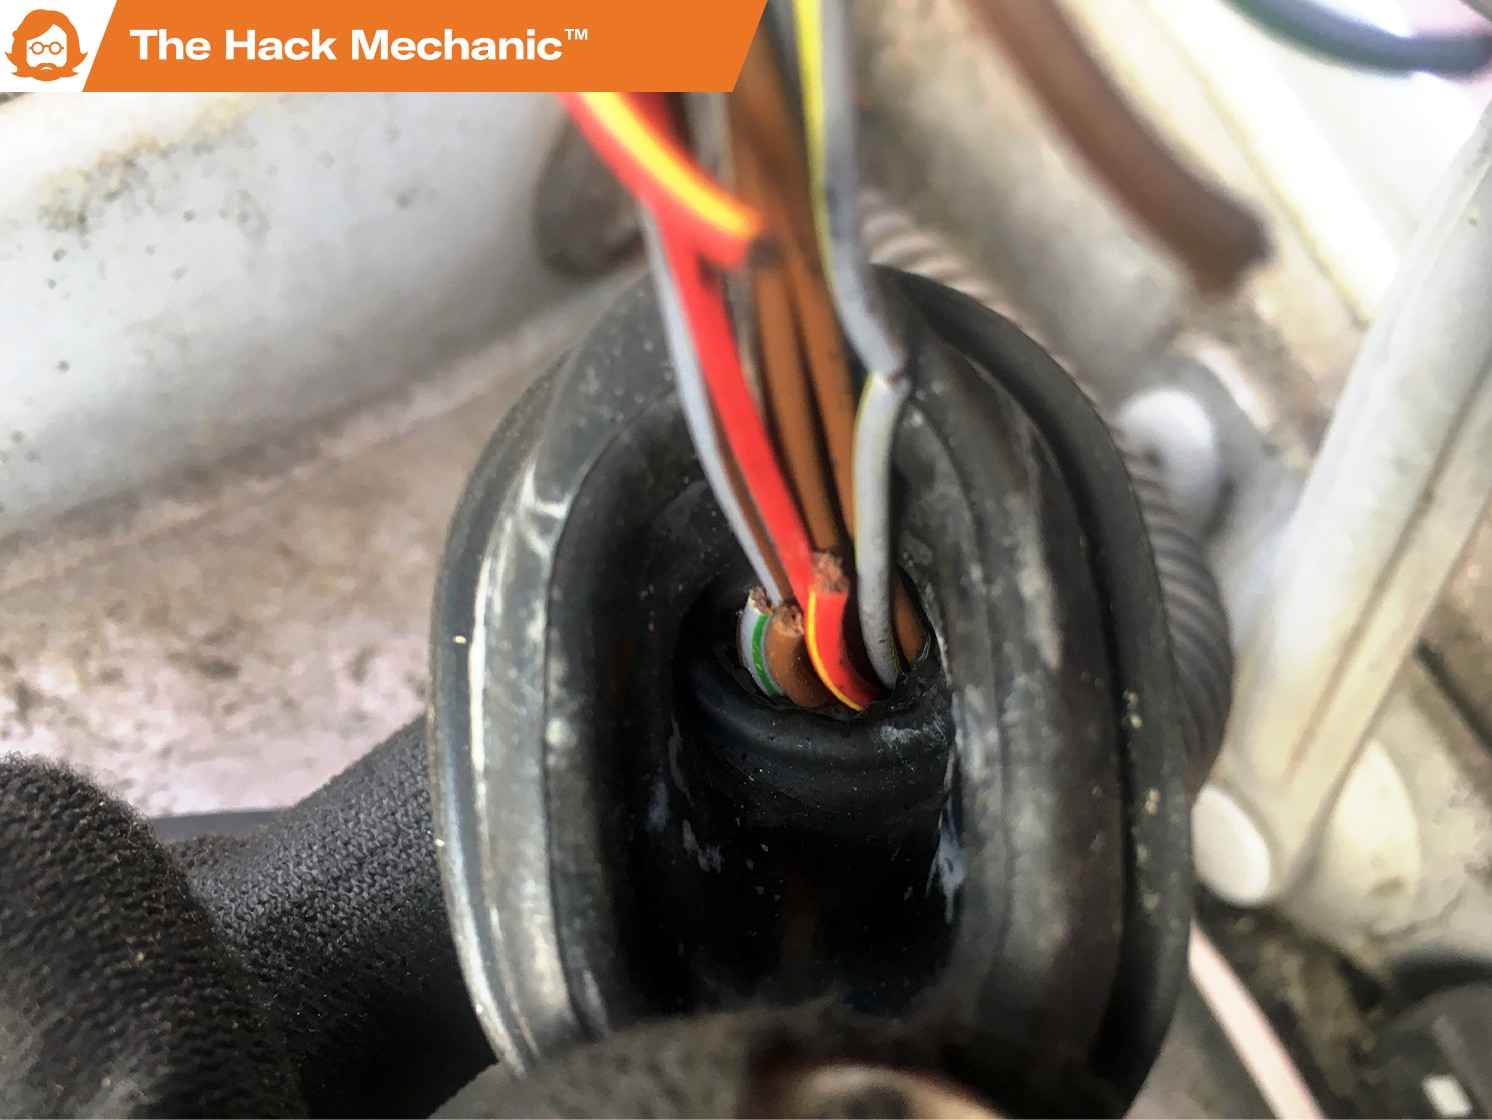
- Flexing and Movement: Wiring harnesses in areas that experience frequent flexing, such as door jambs or trunk lids (as highlighted in stories of trunk wiring issues), are prone to wire fatigue and connector stress. This is especially true for connectors in high-flex areas which can lead to broken wires right at the connector.
These issues can manifest in a variety of electrical problems throughout your car’s interior. For example, a bad connector in your door wiring harness could cause issues with power windows, door locks, or speakers. Similarly, problems with connectors under the dashboard could affect your climate control, infotainment system, or instrument cluster.
Tools and Materials Needed for Repairing Car Connector Connections
Before you begin, gather the necessary tools and materials to ensure a smooth and effective repair. Having everything on hand will save you time and frustration.
-
Basic Hand Tools:
- Screwdrivers: Both Phillips head and flathead screwdrivers of various sizes will be needed to access connectors and remove trim panels.
- Pliers: Needle-nose pliers are particularly useful for manipulating small connectors and wires.
- Wire Strippers/Cutters: Essential for preparing wires for splicing or connector replacement.
- Crimping Tool: For securely crimping new terminals onto wires.
- Soldering Iron and Solder (Optional): For soldering wire splices, offering a more robust and conductive connection.
- Heat Gun or Hair Dryer (Optional): For heat-shrink tubing.
- Multimeter: Crucial for diagnosing electrical problems and testing connector continuity.
- Terminal Removal Tools (Pick Set or Specialized Tools): Depending on the type of connector, specialized tools may be needed to safely remove terminals from the connector housing.
- Inspection Mirror and Flashlight: Helpful for inspecting connectors in tight or hard-to-reach areas.
-
Materials:
- Replacement Connectors or Terminals: Identify the correct type of connector or terminal needed for your repair. You can often find these at auto parts stores or online.
- Electrical Wire: Match the gauge and type of wire to the existing wiring in your car.
- Butt Splice Connectors: For quick wire splicing (as shown in the original article).
- Heat Shrink Solder Sleeves: For a more weather-resistant and compact splice (also mentioned in the original article).
- Heat Shrink Tubing: For insulating and protecting wire splices.
- Electrical Contact Cleaner: To clean corroded connector terminals.
- Dielectric Grease: To protect connectors from moisture and corrosion after repair.
- Electrical Tape: For general wire insulation and bundling.
- Zip Ties: For securing wiring harnesses and keeping them tidy.
Step-by-Step Guide to Repairing Bad Car Connector Connections
Repairing bad connections in car interior connectors involves a systematic approach of diagnosis, preparation, repair, and testing. Follow these steps for a successful fix:
1. Diagnosis: Identifying the Bad Connection
- Identify the Symptoms: Note the specific electrical problem you are experiencing. Is it a complete failure or an intermittent issue? Knowing the symptoms will help you narrow down the potential location of the bad connection.
- Locate the Connector: Use your car’s wiring diagram (if available) or trace the wiring from the affected component to locate the relevant connector. Interior trim panels may need to be removed to access the connector.
- Visual Inspection: Carefully examine the connector for signs of damage, corrosion, or loose wires. Look for:
- Corrosion: Green or white powdery deposits on the terminals.
- Bent or Broken Pins: Terminals that are not straight or are damaged.
- Loose or Backed-Out Wires: Wires that are not securely seated in the connector housing.
- Cracked or Damaged Connector Housing: Physical damage to the plastic connector body.
- Testing with a Multimeter: Use a multimeter to test for continuity and voltage at the connector.
- Continuity Test: With the circuit de-energized (car off), test for continuity across the connector terminals. A lack of continuity indicates a break in the circuit, which could be due to a bad connection within the connector.
- Voltage Test: With the circuit energized (car on, if appropriate and safe), check for voltage at the connector terminals. No voltage when there should be indicates a problem upstream of the connector, but low or fluctuating voltage can suggest a bad connection at the connector itself.
2. Preparation: Getting Ready for the Repair
- Disconnect the Battery: Safety First! Always disconnect the negative terminal of your car battery before working on any electrical system. This prevents accidental shorts and damage to your car’s electronics.
- Access the Connector: Remove any trim panels or components that are blocking access to the connector. Take photos as you disassemble to help with reassembly later.
- Clean the Connector (If Necessary): If you find corrosion, use electrical contact cleaner to carefully clean the terminals. A small wire brush or terminal cleaning tool can help remove stubborn corrosion.
3. Repair Methods: Fixing the Bad Connection
There are several methods for repairing bad connections in car interior connectors, depending on the nature of the problem:
-
Cleaning and Reconnecting: For minor corrosion or loose connections, simply cleaning the terminals and securely reconnecting the connector might solve the issue. After cleaning, apply a small amount of dielectric grease to the terminals to prevent future corrosion.
-
Terminal Repair or Replacement: If a terminal is bent or slightly damaged, you may be able to carefully straighten it with needle-nose pliers. If a terminal is severely damaged or broken, it will need to be replaced.
- Terminal Removal: Use the appropriate terminal removal tool to carefully extract the damaged terminal from the connector housing.
- Terminal Crimping: Crimp a new terminal onto the wire using a crimping tool. Ensure you use the correct type and size of terminal for your connector and wire gauge.
- Terminal Insertion: Insert the new terminal back into the correct position in the connector housing until it clicks into place.
-
Wire Splicing (If Wires are Broken Near the Connector): As Rob Siegel discovered in the original article when dealing with broken wires in a trunk harness, wires can break right at the connector due to flexing. If this is the case, you’ll need to splice in a new section of wire.
- Cut and Strip Wires: Cut the broken wire cleanly back to a point where the wire is undamaged. Strip the insulation from the ends of both the existing wire and the new wire section.
- Choose a Splicing Method:
- Butt Splice Connectors: The quickest method. Insert both wire ends into a butt splice connector and crimp securely. For added protection, you can slide heat shrink tubing over the connector after crimping and shrink it with a heat gun.
- Heat Shrink Solder Sleeves: A more robust and weather-resistant option. Insert both wire ends into the solder sleeve so they overlap within the solder ring. Apply heat with a heat gun until the solder melts and the heat shrink tubing shrinks.
- Soldering and Heat Shrink Tubing: The most time-consuming but often considered the most reliable method. Mechanically join the wires (e.g., by twisting or hooking them as described in the original article), solder the connection, and then insulate it with heat shrink tubing.
- Connector Replacement (If Connector Housing is Damaged): If the connector housing itself is cracked or severely damaged, it’s best to replace the entire connector.
- Identify the Connector Type: Note the type and part number of the connector. You may need to source a replacement from an auto parts store or online dealer.
- Disconnect Wires: Carefully disconnect each wire from the old connector, noting their positions. It’s helpful to take pictures or label the wires before disconnecting them.
- Connect Wires to New Connector: Connect the wires to the new connector in the same positions as they were in the old connector. Ensure terminals are securely crimped and inserted into the new connector housing.
4. Reassembly and Testing
- Reassemble Components: Carefully reassemble any trim panels or components you removed to access the connector.
- Reconnect Battery: Reconnect the negative terminal of your car battery.
- Test the Repair: Test the electrical component that was malfunctioning to ensure the repair was successful. Use your multimeter to re-test for continuity and voltage at the connector to confirm a solid connection.
Preventing Future Connector Problems
Taking preventative measures can help minimize future problems with car interior connectors:
- Use Dielectric Grease: Apply dielectric grease to connector terminals whenever you disconnect and reconnect them. This grease helps to prevent moisture and corrosion.
- Secure Wiring Harnesses: Ensure wiring harnesses are properly secured and supported to prevent excessive movement and vibration, especially in high-flex areas. Use zip ties or wiring harness clips to keep wires in place.
- Regular Inspections: Periodically inspect accessible connectors for signs of corrosion or damage, especially in areas prone to moisture.
- Address Water Leaks: Fix any water leaks in your car’s interior promptly to prevent moisture buildup and corrosion in connectors.
Conclusion
Repairing bad connections on car interior connectors is a manageable DIY task with the right tools and approach. By systematically diagnosing the problem, carefully preparing for the repair, and choosing the appropriate repair method, you can restore your car’s electrical functionality and avoid costly trips to the mechanic. Understanding the common causes of connector issues and taking preventative steps will ensure long-term reliability of your vehicle’s electrical system. Just like addressing the trunk wiring issue highlighted earlier, tackling connector problems head-on can bring back the satisfying feeling of a successful car repair.