
Weather stripping in your car is a silent guardian, often overlooked until problems arise. This humble rubber lining plays a crucial role in keeping your ride comfortable and protected from the elements. Imagine driving without it – you’d be battling wind noise, water leaks, and temperature extremes, turning every journey into an unpleasant experience.
“Weather stripping, much like your spare tire or sway bar links, is something you don’t think about until it fails,” notes Bob Lacivita, a master technician, author, and experienced instructor. “However, it’s vital for your driving comfort, overall health inside the vehicle, and the longevity of your car’s interior.”
Car weather stripping, sometimes called weather seals or gaskets, is susceptible to damage. Freezing temperatures can cause it to stick to door frames or windows, leading to tears when you open them. Prolonged exposure to the sun’s ultraviolet (UV) rays can also degrade the rubber, causing it to dry rot, crack, lose its shape, or become misaligned, resulting in leaks.
Lacivita further explains, “Despite its resilience, everyday wear and tear, such as rubbing against it when entering and exiting your car, or when loading and unloading items from the trunk, can quickly compromise the rubber seal.”
While repairing or replacing weather stripping is often a straightforward DIY task, there are situations where professional help might be beneficial:
- Glued-in Stripping: Removing and cleaning the adhesive channel for glued weather stripping can be a messy and time-consuming process.
- Intricate Interior Trim: If replacing a strip involves removing delicate interior trim panels that you’re concerned about damaging.
- Vehicle-Specific Parts: Locating a precise replacement part for your specific vehicle model can sometimes be challenging.
Understanding Car Weather Stripping and Its Importance
Car weather stripping is the flexible rubber material designed to create a tight seal around openings in your vehicle’s body. This includes doors, windows, the trunk, hood, and even the windshield. Its functions are multifaceted:
- Weather Protection: It effectively blocks rain, snow, wind, and pests from entering your car’s interior.
- Mold and Mildew Prevention: By preventing water ingress, it helps to avoid the growth of mold and mildew inside your vehicle, contributing to better air quality.
- Cabin Insulation: Weather stripping acts as an insulator, keeping the interior warmer in cold weather and cooler in hot weather, enhancing passenger comfort and reducing strain on your car’s HVAC system.
- Vehicle Protection: It protects the car’s structure from water damage and corrosion, preserving its condition and potentially its resale value.
- Noise Reduction: A good seal minimizes wind noise while driving, leading to a more peaceful and enjoyable ride.
To check the effectiveness of your weather stripping, Lacivita suggests a simple test: “Place a dollar bill between the weather strip and the sealed area. If you feel resistance when pulling the bill out, it indicates a good seal.”
If you suspect your weather stripping is compromised, read on to learn how to repair, replace, and maintain it effectively.
Recognizing When Weather Stripping Needs Attention
Visible signs of damage are the most obvious indicators that your weather stripping needs replacement. Look for:
- Dry Rot and Cracking: Cracked, brittle, or crumbling rubber is a clear sign of degradation.
- Missing Chunks: Sections torn away or missing entirely will break the seal.
- Wind Noise and Water Leaks: Unusual whistling sounds while driving or water entering the cabin, especially around door or window frames, often point to weather stripping issues.
Thomas Patterson, Director of New Product Development and Technical Training at Glass Doctor, explains, “Weather stripping deteriorates due to dry rot and constant exposure to temperature fluctuations. The expansion and contraction cycles, from summer heat to winter cold, stress the EPDM rubber, causing it to weaken and lose its sealing ability.”
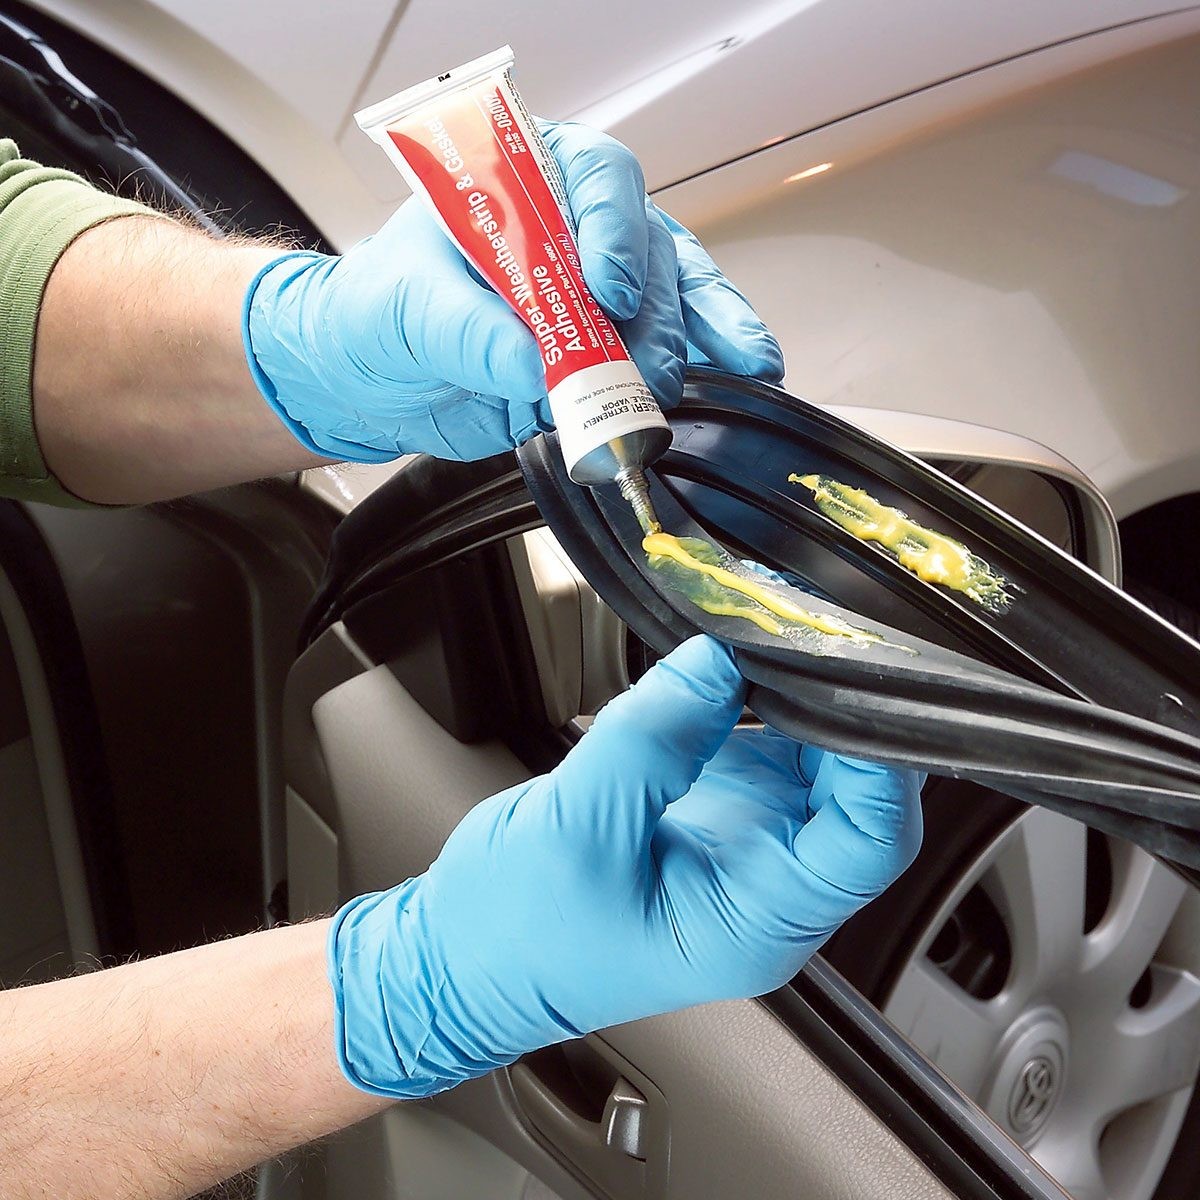 Close-up of a hand applying adhesive to car door weather stripping
Step-by-Step Guide: How to Repair Car Weather Stripping
Repairing minor damage to your car’s weather stripping can often be done at home with a few tools and materials. Here’s a step-by-step guide:
Essential Tools for Weather Stripping Repair
- Flathead Screwdriver: Useful for gently prying away old stripping and cleaning channels.
- 90-degree Picks: Ideal for reaching into channel retainer tracks to remove old adhesive and debris.
- Sandpaper: For lightly prepping surfaces for better adhesive bonding.
- Clean, Dust-Free Rags: For cleaning surfaces and wiping away excess adhesive.
- Microfiber Towels: For a lint-free finish and drying surfaces.
- Utility Knife (Optional): For making precise cuts when patching or inserting foam backer rod.
Materials You’ll Need
- Replacement Weather Stripping: Purchase vehicle-specific or universal weather stripping depending on the damage and your car model.
- Adhesive Remover: To effectively eliminate old adhesive residue.
- Weather Strip Adhesive: A strong, specialized adhesive designed for rubber weather stripping.
- Silicone Spray: To lubricate foam backer rod and protect weather stripping during tape removal.
- Silicone Gel (Optional): For added protection and flexibility, especially in cold climates.
- Low Adhesion Paper Tape or Clamps (Optional): To hold new stripping in place while the adhesive cures.
- Foam Backer Rod (Optional, for Repairs): To restore shape to collapsed or folded weather stripping.
Estimated Time: 20 minutes to several hours, depending on the extent of the repair.
Cost: Varies based on materials and whether you need to purchase replacement stripping.
Skill Level: Beginner
Step 1: Evaluate the Damage
For minor tears or cuts, weather strip adhesive can often provide a quick fix. Apply a small amount of adhesive to patch the tear, being careful to remove any excess immediately with a clean cloth and solvent-based cleaner.
If the weather stripping is simply loose or popping out, a few drops of weather strip adhesive should secure it back in place.
For weather stripping that has lost its shape or folded over, you might be able to restore its form. Carefully make a small incision with a utility knife and insert a piece of foam backer rod, lubricating it with silicone spray first for easier insertion. Use a metal rod or coat hanger to gently push the foam rod into place, reshaping the weather stripping from within.
Step 2: Remove the Old Weather Stripping
If repair isn’t feasible, replacement is necessary.
- Carefully peel off the old weather stripping from the door frame or opening.
- Work slowly and gently to avoid scratching or damaging the paint underneath.
Step 3: Thoroughly Clean the Area
- Apply adhesive remover to the area where the old weather stripping was located.
- Use rags and 90-degree picks to scrub away all traces of old adhesive and any dirt or debris. Lacivita emphasizes, “The channel or mounting surface must be absolutely spotless, free of any glue, residue, or remnants of the old weather stripping” to ensure proper adhesion of the new strip.
- Allow the cleaned area to dry completely before proceeding.
Step 4: Apply New Adhesive Strategically
- Before applying adhesive, perform a test fit (dry fit) of the new weather stripping. Ensure it fits properly into the designated area and matches the size and shape of the original. Trim if necessary for a perfect fit.
- If your new weather stripping doesn’t have pre-applied adhesive, apply a thin, even bead of weather strip adhesive to the vehicle surface where the new strip will be attached.
- Always follow the manufacturer’s instructions for adhesive application and recommended drying times.
Pro-Tip from an Expert: Lacivita recommends, “For adhesive, I always reach for 3M Black Weatherstrip Adhesive. I’m not a fan of 3M Yellow Weather Strip adhesive; once it fully cures, it’s incredibly difficult to remove, almost like contact cement.”
Step 5: Install the New Weather Stripping with Precision
- Carefully position the new weather stripping onto the applied adhesive.
- Press firmly along the entire length of the strip to ensure good contact with the adhesive.
- Use low-adhesion tape or clamps to hold the weather stripping securely in place while the adhesive cures. If using standard tape, apply a bit of silicone spray underneath it to prevent it from sticking too aggressively and potentially damaging the new weather stripping upon removal.
Patterson stresses the importance of curing time: “It’s vital to allow the adhesive to properly cure and bond to the door surface! Avoid closing the door during the curing process as it can cause the strip to shift out of position.”
Step 6: Test and Clean Up for a Professional Finish
- Once the adhesive has set according to the manufacturer’s instructions, test the repair by gently opening and closing the door or trunk.
- Inspect for any gaps in adhesion or areas that might need further attention.
- Use a clean cloth to carefully wipe away any excess adhesive that may have squeezed out during installation.
Maintaining Car Weather Stripping for Longevity
Regular maintenance will keep your car’s weather stripping supple and extend its lifespan. Incorporate these steps into your car care routine:
- Regular Cleaning: Periodically clean your weather stripping, especially when you notice dust or debris buildup. Use car wash soap and a soft brush to gently scrub the stripping, paying particular attention to the back side where dirt and grit tend to accumulate. Clean the adjacent door frames or vehicle parts that contact the weather stripping as well.
- Thorough Drying: After cleaning, dry the weather stripping completely with a microfiber towel.
- Apply Silicone Protectant: Use a silicone-based rubber protectant or silicone paste to keep the rubber conditioned. Apply until the rubber has a slightly wet appearance. Lacivita advises using a spray-pump protectant rather than an aerosol, as some aerosol propellants can degrade rubber. For older, drier weather stripping, a second coat of protectant might be beneficial.
Patterson adds, “Applying a good coating of silicone-based protectant is a great way to extend the life of your weather stripping. When you’re detailing your car’s interior, use the same protectant on the weather seals that you use on leather or vinyl trim.”
Understanding the Costs of Weather Stripping Replacement
The cost to replace weather stripping can vary significantly. A roll of generic self-adhesive or friction-fit weather stripping can be quite affordable, often under $25. “However,” Lacivita points out, “vehicle-specific weather stripping, especially for areas like sunroofs or those requiring trim removal, can cost upwards of $800 for professional replacement.”
Frequently Asked Questions About Car Weather Stripping
Is it Safe to Drive Without Weather Stripping?
While technically you can drive without weather stripping, it’s highly inadvisable. Lacivita succinctly puts it, “Yes, but why would you? Besides exposing yourself to the elements and constant road noise, and potentially causing parts to rattle and slam, your car’s HVAC system will have to work overtime to compensate for temperature fluctuations, making for a very uncomfortable ride.”
How Long Should Car Weather Stripping Last?
With proper care and maintenance, weather stripping should ideally last the lifetime of your vehicle. Patterson states, “I would be surprised if a typical car owner ever needed to replace weather stripping on their car under normal circumstances if it’s properly maintained.”
How Do I Determine the Right Type of Weather Stripping for My Car?
For vehicle-specific or part-specific weather stripping, ordering directly from a dealership or a reputable aftermarket supplier is recommended. To identify the type of weather stripping you need, carefully remove a small section of the damaged strip and examine its attachment method – does it fit into a channel, use clips, or is it glued? This will help you determine whether you need a vehicle-specific part or if a generic roll of weather stripping will suffice, potentially saving you money.
Meet the Experts
Bob Lacivita is a highly respected automotive expert with 27 years of experience as an award-winning General Motors master technician. He has also held ASE master technician certification since 1978 and spent 25 years as an automotive technical educator. Bob is currently a contributing writer for Family Handyman, Reader’s Digest, and other publications, focusing on DIY car repairs and maintenance.
Thomas Patterson serves as the Director of New Product Development and Technical Training at Glass Doctor, bringing 45 years of experience in the glass industry and having worked on countless vehicles. Glass Doctor, a Neighborly Company, operates over 300 retail locations across North America, specializing in glass repair and replacement services.